ASRock 775V88 RAID Utility for Windows Guide - Page 3
Custom, Create, Cancel - specifications
 |
View all ASRock 775V88 manuals
Add to My Manuals
Save this manual to your list of manuals |
Page 3 highlights
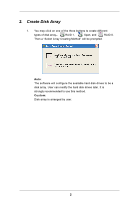
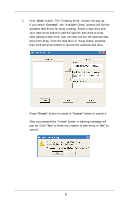
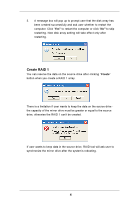
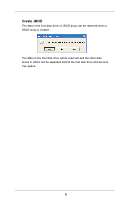
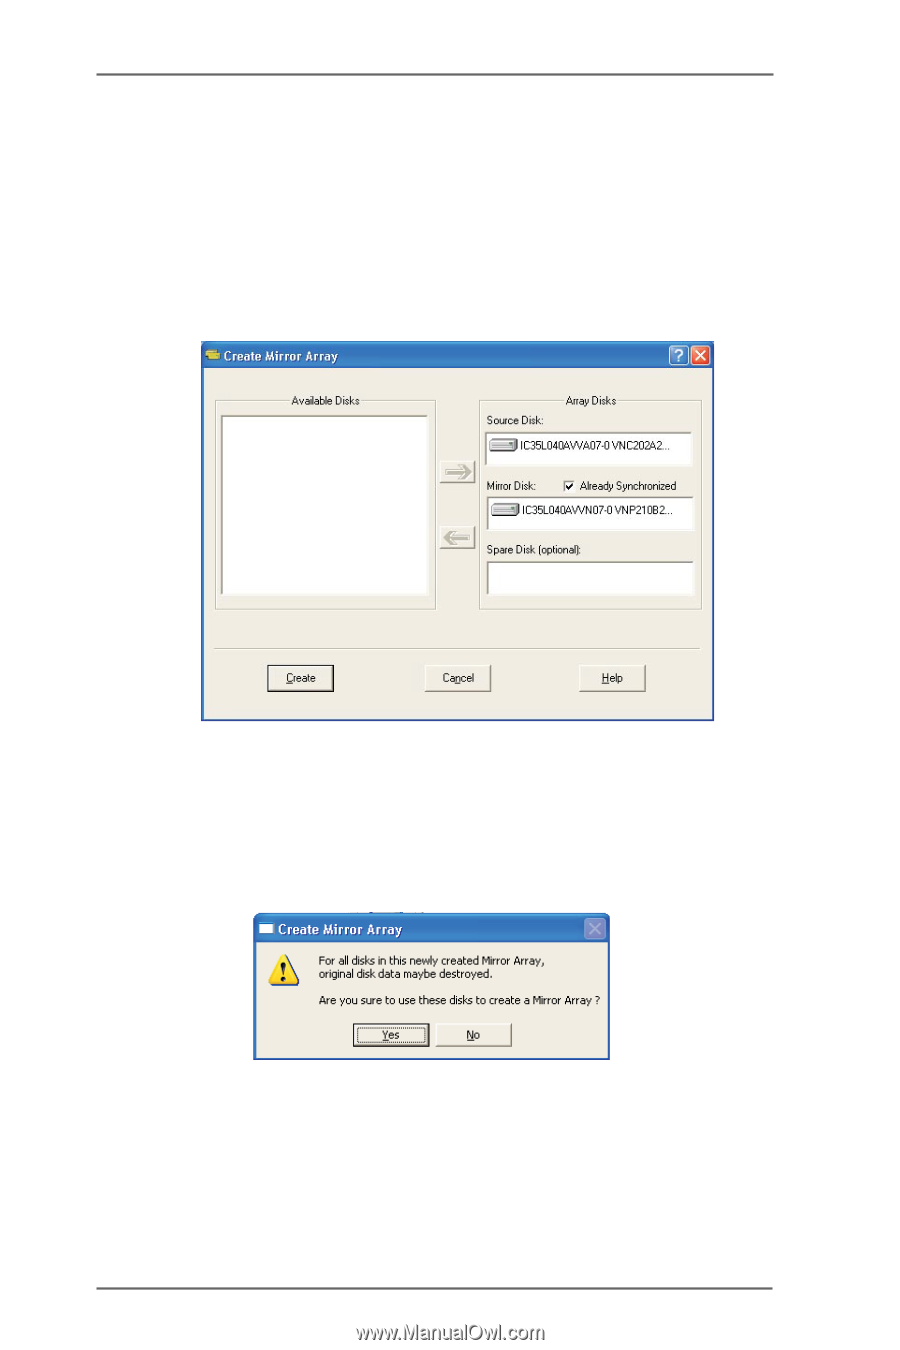
2. Click "Auto" button. The "Creating Array" window will pop up. If you select "Custom", the "Available Disks" window will list the available disk drives for array-creating. Select a disk drive and click right arrow button to add the specific disk drive to array. After adding a disk drive, user can also remove the selected disk drive from array. Click the disk drive in "Array Disks" windows, then click left arrow button to remove the selected disk drive. Press "Create" button to create or "Cancel" button to cancel it. After you pressed the "Create" button, a warning message will pop up. Click "Yes" to finish the creation of disk array, or "No" to cancel. 3
-
 1
1 -
 2
2 -
 3
3 -
 4
4 -
 5
5 -
 6
6 -
 7
7 -
 8
8 -
 9
9 -
10
-
11
-
12
-
13
-
14
-
15
 |
 |
3
2.
Click “
Auto
” button. The “Creating Array” window will pop up.
If you select “
Custom”
, the “Available Disks” window will list the
available disk drives for array-creating. Select a disk drive and
click right arrow button to add the specific disk drive to array.
After adding a disk drive, user can also remove the selected disk
drive from array. Click the disk drive in “Array Disks” windows,
then click left arrow button to remove the selected disk drive.
Press “
Create
” button to create or “
Cancel
” button to cancel it.
After you pressed the “Create” button, a warning message will
pop up. Click “
Yes”
to finish the creation of disk array, or “
No”
to
cancel.