ASRock FM2A85X Extreme6 User Manual - Page 32
ASRock Smart Remote Installation Guide - atx
 |
View all ASRock FM2A85X Extreme6 manuals
Add to My Manuals
Save this manual to your list of manuals |
Page 32 highlights
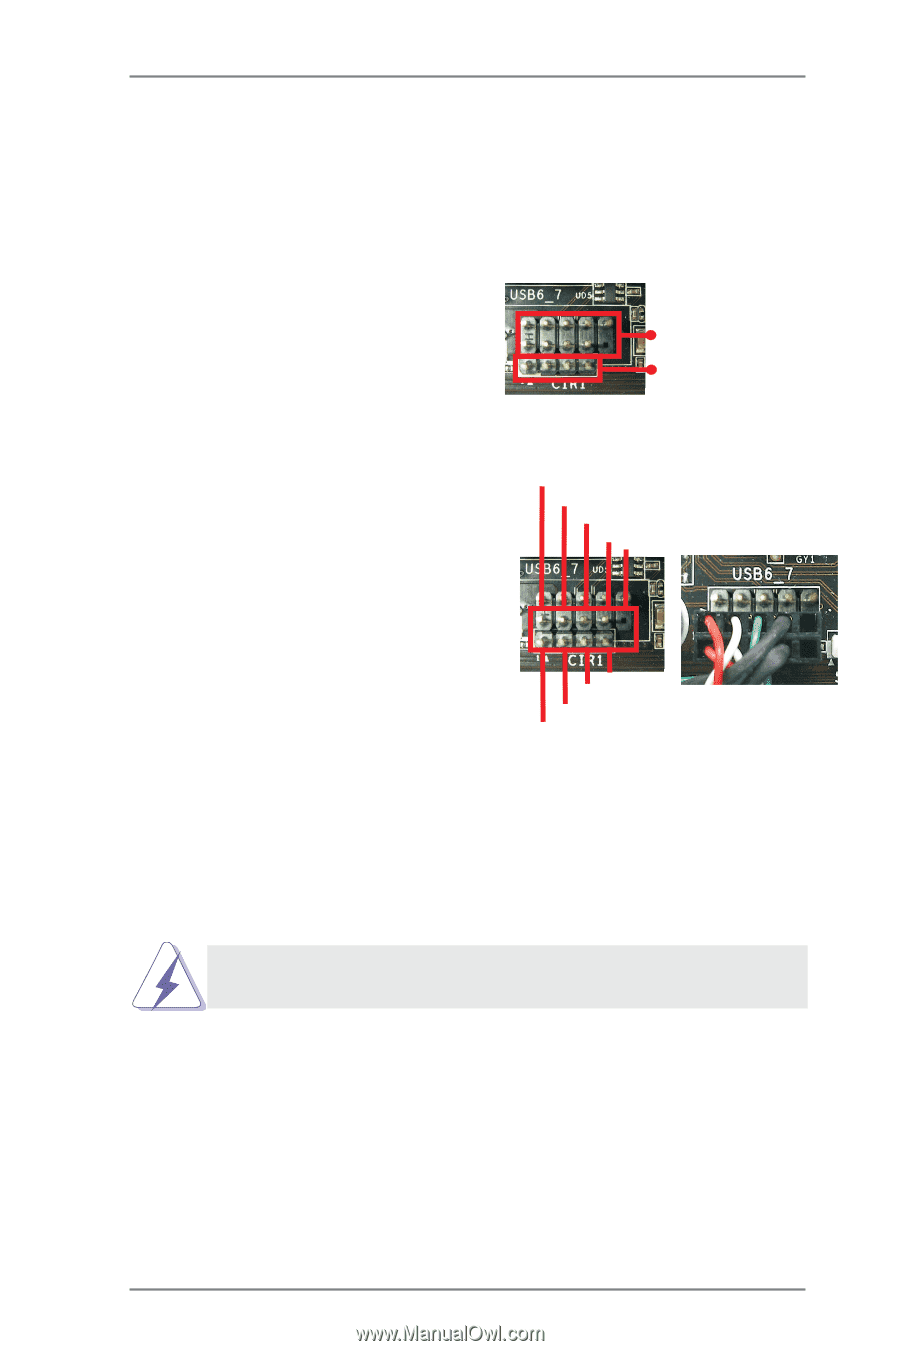
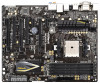
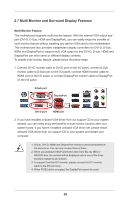
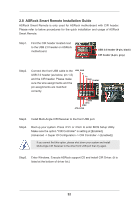
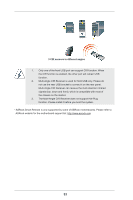
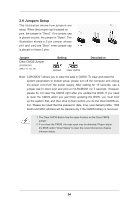
2.8 ASRock Smart Remote Installation Guide ASRock Smart Remote is only used for ASRock motherboard with CIR header. Please refer to below procedures for the quick installation and usage of ASRock Smart Remote. Step1. Find the CIR header located next to the USB 2.0 header on ASRock motherboard. USB 2.0 header (9-pin, black) CIR header (4-pin, gray) Step2. Connect the front USB cable to the USB 2.0 header (as below, pin 1-5) and the CIR header. Please make sure the wire assignments and the USB_PWR PP+ GND DUMMY pin assignments are matched correctly. 1 23 45 GND IRTX IRRX ATX+5VSB Step3. Install Multi-Angle CIR Receiver to the front USB port. Step4. Boot up your system. Press or to enter BIOS Setup Utility. Make sure the option "CIR Controller" is setting at [Enabled]. (Advanced -> Super IO Configuration -> CIR Controller -> [Enabled]) If you cannot find this option, please shut down your system and install Multi-Angle CIR Receiver to the other front USB port then try again. Step5. Enter Windows. Execute ASRock support CD and install CIR Driver. (It is listed at the bottom of driver list.) 32
-
 1
1 -
2
-
3
-
4
-
5
-
6
-
7
-
8
-
9
-
10
-
11
-
12
-
13
-
14
-
15
-
16
-
17
-
18
-
19
-
20
-
21
-
22
-
23
-
24
-
25
-
26
-
 27
27 -
 28
28 -
 29
29 -
 30
30 -
 31
31 -
 32
32 -
 33
33 -
 34
34 -
 35
35 -
 36
36 -
 37
37 -
38
-
39
-
40
-
41
-
42
-
43
-
44
-
45
-
46
-
47
-
48
-
49
-
50
-
51
-
52
-
53
-
54
-
55
-
56
-
57
-
58
-
59
-
60
-
61
-
62
-
63
-
64
-
65
-
66
-
67
-
68
-
69
-
70
-
71
-
72
-
73
-
74
-
75
-
76
-
77
 |
 |