ASRock H510M-HDV/M.2 SE Software/BIOS Setup Guide
ASRock H510M-HDV/M.2 SE Manual
 |
View all ASRock H510M-HDV/M.2 SE manuals
Add to My Manuals
Save this manual to your list of manuals |
ASRock H510M-HDV/M.2 SE manual content summary:
- ASRock H510M-HDV/M.2 SE | Software/BIOS Setup Guide - Page 1
H510M-HDV/M.2 SE Motherboard Software/BIOS Setup Guide Version 1.0 Published April 2023 Copyright©2023 ASRock INC. All rights reserved. - ASRock H510M-HDV/M.2 SE | Software/BIOS Setup Guide - Page 2
to visit ASRock's website at http://www.asrock.com; or you may contact your dealer for further information. For technical questions, please submit a support request form at https://event.asrock.com/tsd.asp ASRock Incorporation e-mail: [email protected] ASRock EUROPE B.V. e-mail: [email protected] - ASRock H510M-HDV/M.2 SE | Software/BIOS Setup Guide - Page 3
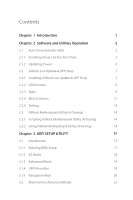
Contents Chapter 1 Introduction 1 Chapter 2 Software and Utilities Operation 2 2.1 Auto Driver Installer (ADI) 2 2.1.1 Installing Drivers for the First Time 2 2.1.2 Updating Drivers 6 2.2 ASRock Live Update & APP Shop 7 2.2.1 Installing ASRock Live Update & APP Shop 7 2.2.2 UI - ASRock H510M-HDV/M.2 SE | Software/BIOS Setup Guide - Page 4
3.3 OC Tweaker Screen 22 3.4 Advanced Screen 34 3.4.1 CPU Configuration 36 3.4.2 Chipset Configuration 39 3.4.3 Storage Configuration 42 3.4.4 Super IO Configuration 43 3.4.5 ACPI Configuration 44 3.4.6 USB Configuration 46 3.4.7 Trusted Computing 47 3.5 Tools 49 3.6 Hardware - ASRock H510M-HDV/M.2 SE | Software/BIOS Setup Guide - Page 5
1 Introduction This user guide is a complete setup guide for H510M-HDV/M.2 SE motherboard series. The screenshots in this manual are for reference only. ASRock's website without further notice. If you require technical support related to this motherboard, please visit our website for specific - ASRock H510M-HDV/M.2 SE | Software/BIOS Setup Guide - Page 6
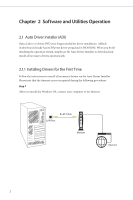
simply use the Auto Driver Installer to download and install all necessary drivers automatically. 2.1.1 Installing Drivers for the First Time Follow the instructions to install all necessary drivers via the Auto Driver Installer. Please note that the Internet access is required during the following - ASRock H510M-HDV/M.2 SE | Software/BIOS Setup Guide - Page 7
H510M-HDV/M.2 SE Step 2 Boot into the system, and a notification will pop up in the lower right corner of your screen saying, "Do you want to one-step-install the latest drivers simply from ASRock Auto Driver Installer?". Select "Yes" to install Auto Driver Installer. Select "No" to skip the - ASRock H510M-HDV/M.2 SE | Software/BIOS Setup Guide - Page 8
Step 4 The Auto Driver Installer panel lists all available drivers that your motherboard supports. Select one or more drivers to be installed. Click "Select All" to select all items. Click "Unselect All" to remove all of your selections. Click " - ASRock H510M-HDV/M.2 SE | Software/BIOS Setup Guide - Page 9
H510M-HDV/M.2 SE Step 5 A messages pops up saying, "During installation, your system may reboot and continue installing remaining item(s)". Click "Yes" to continue. Click "No" to exit. Step 6 Once all drivers are successfully installed, a message pops up saying, "Installation has been successfully - ASRock H510M-HDV/M.2 SE | Software/BIOS Setup Guide - Page 10
2.1.2 Updating Drivers Updating drivers ensures that your system work well without any issue. To update drivers, please go to ASRock' website (https://www.asrock.com) and select "Support" > "Latest Drivers Update". 6 - ASRock H510M-HDV/M.2 SE | Software/BIOS Setup Guide - Page 11
Shop is an online store for purchasing and downloading software applications for your ASRock computer. You can quickly and easily install various apps and support utilities. With ASRock Live Update & APP Shop, you can optimize your system and keep your motherboard up to date simply with a few clicks - ASRock H510M-HDV/M.2 SE | Software/BIOS Setup Guide - Page 12
2.2.2 UI Overview Category Panel Hot News Information Panel Category Panel: The category panel contains several category tabs or buttons that when selected the information panel below displays the relative information. Information Panel: The information panel in the center displays data about the - ASRock H510M-HDV/M.2 SE | Software/BIOS Setup Guide - Page 13
H510M-HDV/M.2 SE 2.2.3 Apps When the "Apps" tab is selected, you will see all the available apps on screen for you to download. Installing an App Step 1 Find the app you want to install. The most recommended app appears on the left side of the screen. The other various apps are shown on the right. - ASRock H510M-HDV/M.2 SE | Software/BIOS Setup Guide - Page 14
Step 3 If you want to install the app, click on the red icon to start downloading. Step 4 When installation completes, you can find the green "Installed" icon appears on the upper right corner. To uninstall it, simply click on the trash can icon . *The trash icon may not appear for certain apps. - ASRock H510M-HDV/M.2 SE | Software/BIOS Setup Guide - Page 15
H510M-HDV/M.2 SE Upgrading an App You can only upgrade the apps you have already installed. When there is an available new version for your app, you will find the mark of "New Version" appears below the installed app icon. Step 1 Click on the app icon to see more details. Step 2 Click on the - ASRock H510M-HDV/M.2 SE | Software/BIOS Setup Guide - Page 16
2.2.4 BIOS & Drivers Installing BIOS or Drivers When the "BIOS & Drivers" tab is selected, you will see a list of recommended or critical updates for the BIOS or drivers. Please update them all soon. Step 1 Please check the item information before update. Click on Step 2 to see more details. - ASRock H510M-HDV/M.2 SE | Software/BIOS Setup Guide - Page 17
H510M-HDV/M.2 SE 2.2.5 Setting In the "Setting" page, you can change the language, select the server location, and determine if you want to automatically run the ASRock Live Update & APP Shop on Windows startup. 13 - ASRock H510M-HDV/M.2 SE | Software/BIOS Setup Guide - Page 18
also download the utility from the ASRock's website: "https://www.asrock.com". Go to the product page of your motherboard, select "Support" > "Download" to download "ASRock Motherboard Utility". After the installation, you will find the icon "ASRock Motherboard Utility (ATuning)" on your desktop - ASRock H510M-HDV/M.2 SE | Software/BIOS Setup Guide - Page 19
OC Tweaker Configurations for overclocking the system. H510M-HDV/M.2 SE System Info View information about the system. *The System Browser tab may not appear for certain models. 15 - ASRock H510M-HDV/M.2 SE | Software/BIOS Setup Guide - Page 20
FAN-Tastic Tuning Configure up to five different fan speeds using the graph. The fans will automatically shift to the next speed level when the assigned temperature is met. Settings Configure ASRock ASRock Motherboard Utility (A-Tuning). Click to select "Auto run at Windows Startup" if you want - ASRock H510M-HDV/M.2 SE | Software/BIOS Setup Guide - Page 21
. You may also restart by turning the system off and then back on. This setup guide explains how to use the UEFI SETUP UTILITY to configure all the supported system. The screenshots in this manual are for reference only. UEFI Settings and options may vary owing to different BIOS release versions - ASRock H510M-HDV/M.2 SE | Software/BIOS Setup Guide - Page 22
3.1.2 EZ Mode The EZ Mode screen appears when you enter the BIOS setup program by default. EZ mode is a dashboard which contains multiple readings of the system's current status. You can check the most crucial information of your system, such as CPU speed, DRAM frequency, SATA information, fan speed - ASRock H510M-HDV/M.2 SE | Software/BIOS Setup Guide - Page 23
H510M-HDV/M.2 SE 3.1.3 Advanced Mode The Advanced Mode provides more options to configure the BIOS settings. Refer to the following sections for the detailed configurations. To access the EZ Mode, press or click the "EZ Mode" button at the upper right corner of the screen. 3.1.4 UEFI Menu Bar - ASRock H510M-HDV/M.2 SE | Software/BIOS Setup Guide - Page 24
3.1.5 Navigation Keys Use < > key or < > key to choose among the selections on the menu bar, and use < > key or < > key to move the cursor up or down to select items, then press to get into the sub screen. You can also use the mouse to click your required item. Please check the following - ASRock H510M-HDV/M.2 SE | Software/BIOS Setup Guide - Page 25
H510M-HDV/M.2 SE 3.2 Main Screen (Advanced Mode) When you enter the UEFI SETUP UTILITY, the Main screen will appear and display the system overview. My Favorite Display your collection of BIOS items. Press F5 to add/remove your favorite items. Because the UEFI software is constantly being updated, - ASRock H510M-HDV/M.2 SE | Software/BIOS Setup Guide - Page 26
3.3 OC Tweaker Screen In the OC Tweaker screen, you can set up overclocking features. CPU Configuration AVX2 Ratio Offset AVX2 Ratio Offset specifies a negative offset from the CPU Ratio for AVX workloads. AVX is a more stressful workload that lower the AVX ratio to ensure maximum possible ratio for - ASRock H510M-HDV/M.2 SE | Software/BIOS Setup Guide - Page 27
for Intel Turbo Boost Max Technology 3.0 (ITBMT 3.0), you have to enable Intel Speed Shift Technology. If your CPU does not support ITMBT 3.0, option will still be grayed out. Configuration options: [Enabled] [Disabled] Intel Turbo Boost Max Technology 3.0 Allows you to enable or disable the Intel - ASRock H510M-HDV/M.2 SE | Software/BIOS Setup Guide - Page 28
Processors supporting the ITBMT 3.0 feature contain at least one processor core whose maximum ratio is higher than the others. Configuration options: [Enabled] [Disabled] Intel Thermal Velocity Boost Voltage Optimizations This service controls thermal based voltage optimizations for processors that - ASRock H510M-HDV/M.2 SE | Software/BIOS Setup Guide - Page 29
H510M-HDV/M.2 SE RAS# Active Time (tRAS) The number of clock cycles required between a bank active command and issuing the precharge command. Command Rate (CR) The delay between when a memory chip is selected and when the first active command can be issued. Secondary Timing Write Recovery Time (tWR) - ASRock H510M-HDV/M.2 SE | Software/BIOS Setup Guide - Page 30
Third Timing tREFI Configure refresh cycles at an average periodic interval. tCKE Configure the period of time the DDR4 initiates a minimum of one refresh command internally once it enters Self-Refresh mode. Turn Around Timing Turn Around Timing Optimization Auto is enabled in general case. - ASRock H510M-HDV/M.2 SE | Software/BIOS Setup Guide - Page 31
tRDWR_dr Configure between module read to write delay. Configuration options: [Auto] [0] - [255] tRDWR_dd Configure between module read to write delay. Configuration options: [Auto] [0] - [255] tWRRD_sg Configure between module write to read delay. Configuration options: [Auto] [0] - [511] tWRRD_dg - ASRock H510M-HDV/M.2 SE | Software/BIOS Setup Guide - Page 32
tWRWR_dd Configure between module write to write delay. Configuration options: [Auto] [0] - [255] TAT Runtime Value tRDRD_sg Configure between module write to read delay. Configuration options: [Auto] [0] - [127] tRDRD_dg Configure between module write to read delay. Configuration options: [Auto] - ASRock H510M-HDV/M.2 SE | Software/BIOS Setup Guide - Page 33
tWRRD_sg Configure between module write to read delay. Configuration options: [Auto] [0] - [511] tWRRD_dg Configure between module write to read delay. Configuration options: [Auto] [0] - [511] tWRRD_dr Configure between module write to read delay. Configuration options: [Auto] [0] - [127] tWRRD_dd - ASRock H510M-HDV/M.2 SE | Software/BIOS Setup Guide - Page 34
Rx FIFO Delay Offset Configure Rx FIFO Delay Offset. Configuration options: [Auto] [1] - [255] Initial RTL Configure round trip latency initial value. Default value is IOL Offset + IOL + (2*tCL) + 10. Configuration options: [Auto] [1] - [127] RTL (A1 Rank1) Configure round trip latency. - ASRock H510M-HDV/M.2 SE | Software/BIOS Setup Guide - Page 35
H510M-HDV/M.2 SE Configuration options: [Auto] [34] [40] [48] [60] [80] [120] [240] [Disabled] ODT NOM Rd (B1) Configure the memory on die termination resistors' NOM Rd. Configuration options: [Auto] [34] [40] [48] [60] [80] [120] [240] [Disabled] ODT PARK (A1) Configure the memory on die - ASRock H510M-HDV/M.2 SE | Software/BIOS Setup Guide - Page 36
Configuration options: [Enabled] [Disabled] Train on Warm Boot When enabled, memory training will be executed when warm boot. Configuration options: [Auto] [Enabled] [Disabled] MRC Fast Boot When enabled, portions of memory reference code will be skipped when possible to increase boot speed. - ASRock H510M-HDV/M.2 SE | Software/BIOS Setup Guide - Page 37
H510M-HDV/M.2 SE VCCST Voltage Configure the voltage for the VCCST. Configuration options: [Auto] [0.950V] - [1.350V] AVX Configuration AVX2 Voltage Guardband Scale Factor AVX2 Voltage Guardband Scale Factor controls the voltage guardband applied to AVX2 workloads. A value > 1.00 will increase the - ASRock H510M-HDV/M.2 SE | Software/BIOS Setup Guide - Page 38
] [Advanced] [Tool] [H/ W Monitor] [Security] [Boot] [Exit] Full HD UEFI [Auto] When [Auto] is selected, the resolution will be set to 1920 x 1080 if the monitor supports Full HD resolution. If the monitor does not support Full HD resolution, then the resolution will be set to 1024 x 768. 34 - ASRock H510M-HDV/M.2 SE | Software/BIOS Setup Guide - Page 39
H510M-HDV/M.2 SE [Disabled] When [Disabled] is selected, the resolution will be set to 1024 x 768 directly. 35 - ASRock H510M-HDV/M.2 SE | Software/BIOS Setup Guide - Page 40
Enabled] [Disabled] Active Processor Cores Allows you to select the number of cores to enable in each processor package. CPU C States Support Allows you to enable CPU C States Support for power saving. It is recommended to keep C3, C6 and C7 all enabled for better power saving. Configuration options - ASRock H510M-HDV/M.2 SE | Software/BIOS Setup Guide - Page 41
[Enabled] [Disabled] Package C State Support Allows you to enable CPU, PCIe, Memory, Graphics C State Support for power saving. Configuration options: AVX/AVX2 Allows you to enable or disable the Intel AVX and AVX2 Instructions. This is applicable for Big Core only. Configuration options: [Enabled] - ASRock H510M-HDV/M.2 SE | Software/BIOS Setup Guide - Page 42
Configuration options: [Enabled] [Disabled] Hardware Prefetcher Allows you to enable or disable Hardware Prefetcher that automatically prefetches data and code for the processor. Enable this item for better performance. Configuration options: [Enabled] [Disabled] Adjacent Cache Line Prefetch Allows - ASRock H510M-HDV/M.2 SE | Software/BIOS Setup Guide - Page 43
application compatibility and reliability, and providing additional levels of manageability, security, isolation, and I/O performance. Configuration options: [Enabled] [Disabled] SR-IOV Support If system has SR-IOV capable PCIe Devices, this option Enables or Disables Single Root IO Virtualization - ASRock H510M-HDV/M.2 SE | Software/BIOS Setup Guide - Page 44
Allows you to configure the PCH DMI ASPM Setting. Configuration options: [Enabled] [Disabled] PCH DMI ASPM Support Allows you to enable or disable the ASPM support for all PCH DMI devices. Configuration options: [Enabled] [Disabled] Share Memory Allows you to configure the size of memory that - ASRock H510M-HDV/M.2 SE | Software/BIOS Setup Guide - Page 45
H510M-HDV/M.2 SE processor when the system boots up. Configuration options: [Auto] [32M] [64M] [128M] [256M] [512M] [1024M] Options vary depending on the memory you use on your motherboard. IGPU Multi-Monitor Select [Disabled] to disable the integrated graphics when an external graphics card is - ASRock H510M-HDV/M.2 SE | Software/BIOS Setup Guide - Page 46
Link Power Management allows SATA devices to enter a low power state during periods of inactivity to save power. It is only supported by AHCI mode. Configuration options: [Enabled] [Disabled] Hard Disk S.M.A.R.T. S.M.A.R.T stands for Self-Monitoring, Analysis, and Reporting Technology. It is - ASRock H510M-HDV/M.2 SE | Software/BIOS Setup Guide - Page 47
3.4.4 Super IO Configuration H510M-HDV/M.2 SE Serial Port Allows you to enable or disable the Serial port. Configuration options: [Enabled] [Disabled] Serial Port Address Allows you to select the address of the Serial port. Configuration options: [3F8h/IRQ4] [3E8h/IRQ4] Serial Port/UART Switch - ASRock H510M-HDV/M.2 SE | Software/BIOS Setup Guide - Page 48
options: [Auto] [Disabled] PS/2 Keyboard S4/S5 Wakeup Support Allows the system to be waked up by a PS/2 Keyboard in S4/S5. This item appears only for the motherboard that supports the PS/2 port. Configuration options: [Any Key] [Disabled] PCIE Devices - ASRock H510M-HDV/M.2 SE | Software/BIOS Setup Guide - Page 49
H510M-HDV/M.2 SE handled by your operating system. Configuration options: [Enabled] [Disabled] [By OS] USB Keyboard/Remote Power On Allows the system to be waked up by an USB keyboard or remote controller. Configuration options: [Enabled] [Disabled] USB Mouse Power On Allows the system to be waked - ASRock H510M-HDV/M.2 SE | Software/BIOS Setup Guide - Page 50
available only for EFI applications. [UEFI Setup Only] sets to support USB devices under the UEFI setup and Windows/Linux operating systems only. XHCI Hand-off This is a workaround for OSes without XHCI hand-off support. The XHCI ownership change should be claimed by XHCI driver. Configuration - ASRock H510M-HDV/M.2 SE | Software/BIOS Setup Guide - Page 51
Trusted Computing H510M-HDV/M.2 SE NOTE: Options vary depending on the version of your connected TPM module. Security Device Support Allows you to enable or disable BIOS support for security device. O.S. will not show Security Device. TCG EFI protocol and INT1A interface will not be available - ASRock H510M-HDV/M.2 SE | Software/BIOS Setup Guide - Page 52
TPM 2.0 Device: CRB or ITS. Device Select Allows you to select the TPM device to be supported. [TPM 1.2] restricts support to TPM 1.2 devices. [TPM 2.0] restricts support to TPM 2.0 devices. [Auto] supports both TPM 1.2 and TPM 2.0 devices with the default set to TPM 2.0 devices. If TPM 2.0 devices - ASRock H510M-HDV/M.2 SE | Software/BIOS Setup Guide - Page 53
-HDV/M.2 SE UEFI Tech Service Contact ASRock Tech Service if you are having trouble with your PC. Please setup network configuration before using UEFI Tech Service. SSD Secure Erase Tool Use this tool to securely erase SSD. This tool only lists the SSDs that support the Secure Erase function. NVME - ASRock H510M-HDV/M.2 SE | Software/BIOS Setup Guide - Page 54
Instant Flash Allows you to save UEFI files in your USB storage device and run Instant Flash to update your UEFI. Pleaes note that your USB storage device must be FAT32/16/12 file system. 50 - ASRock H510M-HDV/M.2 SE | Software/BIOS Setup Guide - Page 55
H510M-HDV/M.2 SE 3.6 Hardware Health Event Monitoring Screen This section allows you to monitor the status of the hardware on your system, including the parameters of the CPU temperature, motherboard temperature, fan speed and voltage. NOTE: Options vary depending on the features of your motherboard - ASRock H510M-HDV/M.2 SE | Software/BIOS Setup Guide - Page 56
Fan-Tastic Tuning Allows you to select a fan mode for CPU Fan, or choose Customize to set 5 CPU temperatures and assign a respective fan speed for each temperature. Select a fan mode or customize the profile Select Fan(s) to adjust Select a fan temperature source Save the setting CPU Fan 1 - ASRock H510M-HDV/M.2 SE | Software/BIOS Setup Guide - Page 57
H510M-HDV/M.2 SE CPU Fan 2 Control Mode Allows you to select PWM mode or DC mode for CPU Fan 2. [Auto] Select this mode to detect the type of installed fan and automatically switch the control modes. [DC Mode] Select this mode for 3-pin fan. [PWM Mode] Select this mode for 4-pin fan. CPU Fan 2 - ASRock H510M-HDV/M.2 SE | Software/BIOS Setup Guide - Page 58
[PWM Mode] Select this mode for 4-pin fan. Chassis Fan 1 Setting Allows you to select a fan mode for Chassis Fan 1, or choose [Customize] to set 5 CPU temperatures and assign a respective fan speed for each temperature. Configuration options: [Customize] [Silent Mode] [Standard Mode] [Performance - ASRock H510M-HDV/M.2 SE | Software/BIOS Setup Guide - Page 59
H510M-HDV/M.2 SE [Customize] [Silent Mode] [Standard Mode] [Performance Mode] [Full Speed] Chassis Fan 2 Temp Source Allows you to select a fan temperature source for Chassis Fan 2. [Monitor M/B] Select this item to set motherboard as the fan temperature source. [Monitor CPU] Select this item to set - ASRock H510M-HDV/M.2 SE | Software/BIOS Setup Guide - Page 60
3.7 Security Screen In this section you may set or change the supervisor/user password for the system. You may also clear the user password. Supervisor Password Set or change the password for the administrator account. Only the administrator has authority to change the settings in the UEFI Setup - ASRock H510M-HDV/M.2 SE | Software/BIOS Setup Guide - Page 61
H510M-HDV/M.2 SE Install Default Secure Boot Keys Please install default secure boot keys if it's the first time you use secure boot. Clear Secure Boot Keys This item appears only when you load the default Secure Boot keys. Use this item to clear all default Secure Boot keys. Key Management This - ASRock H510M-HDV/M.2 SE | Software/BIOS Setup Guide - Page 62
1. Public Key Certificate: a) EFI_SIGNATURE_LIST b) EFI_CERT_X509 (DER) c) EFI_CERT_RSA2048 (bin) d) EFI_CERT_SHAXXX 2. Authenticated UEFI Variable 3. EFI PE/COFF Image(SHA256) Key Source: Factory, External, Mixed Key Exchange Keys Enroll Factory Defaults or load certificates from a file: 1. Public - ASRock H510M-HDV/M.2 SE | Software/BIOS Setup Guide - Page 63
Forbidden Signatures Enroll Factory Defaults or load certificates from a file: 1. Public Key Certificate: a) EFI_SIGNATURE_LIST b) EFI_CERT_X509 (DER) c) EFI_CERT_RSA2048 (bin) d) EFI_CERT_SHAXXX 2. Authenticated UEFI Variable 3. EFI PE/COFF Image(SHA256) Key Source: Factory, External, Mixed - ASRock H510M-HDV/M.2 SE | Software/BIOS Setup Guide - Page 64
3. EFI PE/COFF Image(SHA256) Key Source: Factory, External, Mixed Intel(R) Platform Trust Technology Allows you to enable or disable Intel PTT function. [Enabled] Enables Intel PTT in ME. [Disabled] Disables Intel PTT in ME. Use a discrete TPM Module. Configuration options: [Enabled] [Disabled] 60 - ASRock H510M-HDV/M.2 SE | Software/BIOS Setup Guide - Page 65
your computer's boot time; however, you won't be able to boot from an USB storage device. Ultra Fast mode is supported by UEFI aware OS or later versions, and a VBIOS that supports UEFI GOP is required if you are using an external graphics card. Please note that Ultra Fast mode boots so - ASRock H510M-HDV/M.2 SE | Software/BIOS Setup Guide - Page 66
Configuration options: [On] [Off] Boot Beep Allows you to select whether the Boot Beep should be turned on or off when the system boots up. Please note that a buzzer is needed. Configuration options: [Enabled] [Disabled] Full Screen Logo [Enabled] Select this item to display the boot logo. [Disabled - ASRock H510M-HDV/M.2 SE | Software/BIOS Setup Guide - Page 67
Launch PXE OpROM Policy [UEFI only] Select this item to run those that support UEFI option ROM only. [Do not launch] Select this item to not execute UEFI option ROM. [Legacy only] Select this item to run those that support Legacy option ROM only. Other PCI Device ROM Priority Allows you to select - ASRock H510M-HDV/M.2 SE | Software/BIOS Setup Guide - Page 68
3.9 Exit Screen Save Changes and Exit When you select this option the following message, "Save configuration changes and exit setup?" will pop out. Press key or select [Yes] to save the changes and exit the UEFI SETUP UTILITY. Discard Changes and Exit When you select this option the following
-
 1
1 -
 2
2 -
 3
3 -
 4
4 -
 5
5 -
 6
6 -
 7
7 -
8
-
9
-
10
-
11
-
12
-
13
-
14
-
15
-
16
-
17
-
18
-
19
-
20
-
21
-
22
-
23
-
24
-
25
-
26
-
27
-
28
-
29
-
30
-
31
-
32
-
33
-
34
-
35
-
36
-
37
-
38
-
39
-
40
-
41
-
42
-
43
-
44
-
45
-
46
-
47
-
48
-
49
-
50
-
51
-
52
-
53
-
54
-
55
-
56
-
57
-
58
-
59
-
60
-
61
-
62
-
63
-
64
-
65
-
66
-
67
-
68
 |
 |

H510M-HDV/M.2 SE
Motherboard
Software/BIOS Setup Guide
Version 1.0
Published April 2023
Copyright©2023 ASRock INC. All rights reserved.