ASRock K8SLI-eSATA2 User Manual - Page 33
AII HDDs Without RAID F
 |
View all ASRock K8SLI-eSATA2 manuals
Add to My Manuals
Save this manual to your list of manuals |
Page 33 highlights
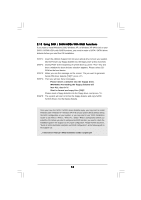
2.14 Using SATA / SATAII HDDs Without RAID Functions If you want to install Windows 2000, Windows XP, or Windows XP 64-bit OS on your SATA / SATAII HDDs without RAID functions, you are allowed to choose non-RAID mode or AHCI mode. For users who plan to install Windows 2000, Windows XP, or Windows XP 64-bit OS on your SATA / SATAII HDDs without RAID and Hot Plug functions, please choose non-RAID mode. However, if you plan to install Windows 2000, Windows XP, or Windows XP 64-bit OS on your SATA / SATAII HDDs without RAID functions but still keeping Hot Plug function, please choose AHCI mode. Please follow the below procedures for selecting the mode you need. A. Using SATA / SATAII HDDs Operating in Non-RAID Mode 1. Enter "SATA Operation Mode" in BIOS setup to set the option from [RAID] to [non- RAID]. 2. Start Windows 2000, windows XP, or Windows XP 64-bit OS installation. B. Using SATA / SATAII HDDs Operating in AHCI Mode 1. Enter "SATA Operation Mode" in BIOS setup to set the option from [RAID] to [AHCI]. 2. Make a SATA / SATAII driver diskette by following the proper steps of section 2.13 on page 32. 3. Start Windows 2000, windows XP, or Windows XP 64-bit OS installation. 2.15 Untied Overclocking Technology This motherboard supports Untied Overclocking Technology, which means during overclocking, FSB enjoys better margin due to fixed PCI / PCIE buses. Before you enable Untied Overclocking function, please enter "Overclock Mode" option of BIOS setup to set the selection from [Auto] to [CPU, PCIE, Async.]. Therefore, CPU FSB is untied during overclocking, but PCI and PCIE buses are in the fixed mode so that FSB can operate under a more stable overclocking environment. 33
-
 1
1 -
2
-
3
-
4
-
5
-
6
-
7
-
8
-
9
-
10
-
11
-
12
-
13
-
14
-
15
-
16
-
17
-
18
-
19
-
20
-
21
-
22
-
23
-
24
-
25
-
26
-
27
-
 28
28 -
 29
29 -
 30
30 -
 31
31 -
 32
32 -
 33
33 -
 34
34 -
 35
35 -
 36
36 -
 37
37 -
 38
38 -
39
-
40
-
41
-
42
-
43
-
44
-
45
-
46
-
47
-
48
-
49
-
50
-
51
-
52
 |
 |
