ASRock K8SLI-eSATA2 Quick Installation Guide - Page 23
see p.2 No.11 and the orange eSATAII connector eSATAII_TOP; see p.2 No.
 |
View all ASRock K8SLI-eSATA2 manuals
Add to My Manuals
Save this manual to your list of manuals |
Page 23 highlights
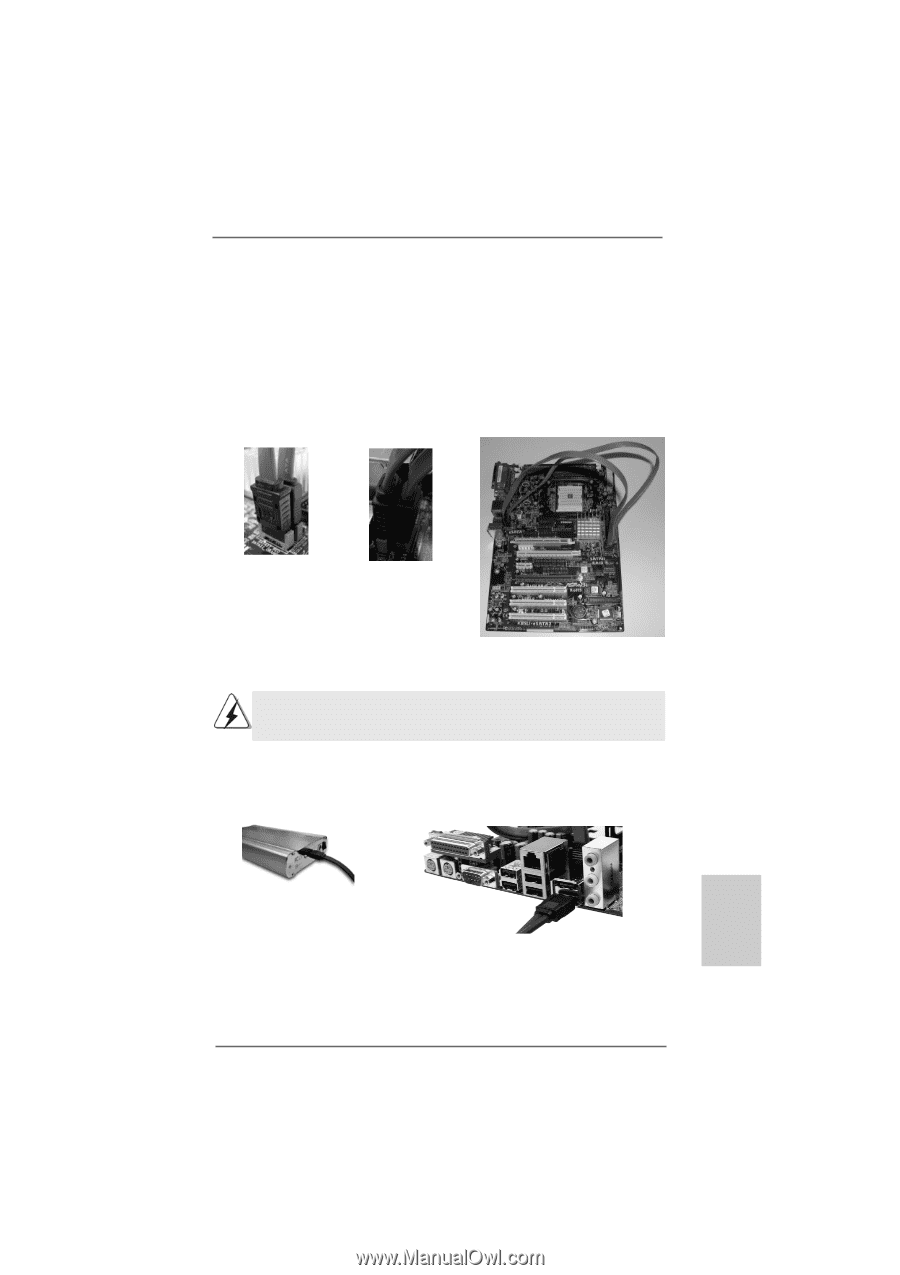
2. If you plan to install two eSATAII devices to this motherboard, you need to enable both the top and the bottom eSATAII ports of the I/O shield. In order to enable the top and the bottom eSATAII ports of the I/O shield, you have to connect the red SATAII connector (SATAII_RED; see p.2 No.10) and the red eSATAII connector (eSATAII_BOTTOM; see p.2 No.38) with a SATA data cable first, and then connect the orange SATAII connector (SATAII_ORANGE; see p.2 No.11) and the orange eSATAII connector (eSATAII_TOP; see p.2 No. 37) with another SATA data cable. After that, both the top and the bottom eSATAII ports of the I/O shield are enabled. Connect the SATA data cables to both red SATAII connector (SATAII_RED) and orange SATAII connector (SATAII_ ORANGE) Connect the SATA data cables to both red eSATAII connector (eSATAII_BOTTOM) and orange eSATAII connector (eSATAII_TOP) Please make sure to correctly connect the SATAII and eSATAII connectors with corresponding color so that the eSATAII function will work successfully. 3. Use the eSATAII device cable to connect eSATAII device and the eSATAII port of the I/O shield according to the eSATAII port that you enable. Connect one end of the eSATAII device cable to eSATAII device Connect the other end of the eSATAII device cable to eSATAII port of the I/O shield 23 ASRock K8SLI-eSATA2 Motherboard English
-
 1
1 -
2
-
3
-
4
-
5
-
6
-
7
-
8
-
9
-
10
-
11
-
12
-
13
-
14
-
15
-
16
-
17
-
 18
18 -
 19
19 -
 20
20 -
 21
21 -
 22
22 -
 23
23 -
 24
24 -
 25
25 -
 26
26 -
 27
27 -
 28
28 -
29
-
30
-
31
-
32
-
33
-
34
-
35
-
36
-
37
-
38
-
39
-
40
-
41
-
42
-
43
-
44
-
45
-
46
-
47
-
48
-
49
-
50
-
51
-
52
-
53
-
54
-
55
-
56
-
57
-
58
-
59
-
60
-
61
-
62
-
63
-
64
-
65
-
66
-
67
-
68
-
69
-
70
-
71
-
72
-
73
-
74
-
75
-
76
-
77
-
78
-
79
-
80
-
81
-
82
-
83
-
84
-
85
-
86
-
87
-
88
-
89
-
90
-
91
-
92
-
93
-
94
-
95
-
96
-
97
-
98
-
99
-
100
-
101
-
102
-
103
-
104
-
105
-
106
-
107
-
108
-
109
-
110
-
111
-
112
-
113
-
114
-
115
-
116
-
117
-
118
-
119
-
120
-
121
-
122
-
123
-
124
-
125
-
126
-
127
-
128
-
129
-
130
-
131
-
132
-
133
-
134
-
135
-
136
-
137
-
138
-
139
-
140
-
141
-
142
-
143
-
144
-
145
-
146
-
147
-
148
-
149
-
150
-
151
-
152
-
153
-
154
-
155
-
156
-
157
-
158
-
159
-
160
 |
 |