ASRock X670E Taichi Carrara User Manual - Page 82
M.2 connector 3.
 |
View all ASRock X670E Taichi Carrara manuals
Add to My Manuals
Save this manual to your list of manuals |
Page 82 highlights
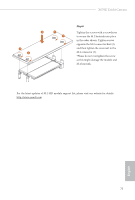
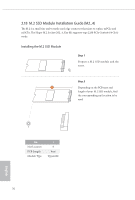
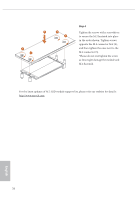
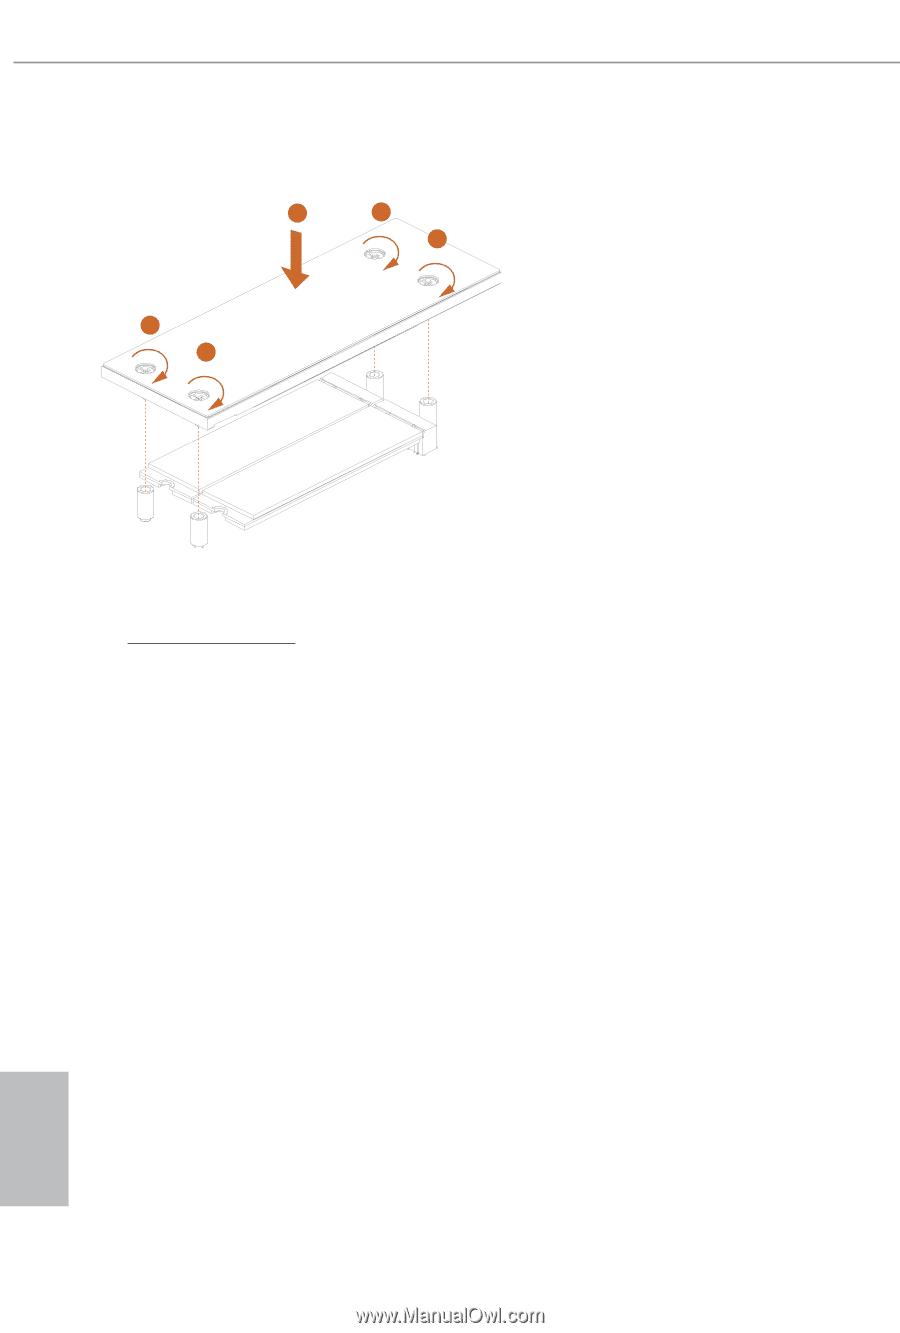
2 2 1 3 3 Step 6 Tighten the screws with a screwdriver to secure the M.2 heatsink into place in the order shown. Tighten screws opposite the M.2 connector first (2), and then tighten the ones next to the M.2 connector (3). *Please do not overtighten the screw as this might damage the module and M.2 heatsink. For the latest updates of M.2 SSD module support list, please visit our website for details: http://www.asrock.com English 78
-
 1
1 -
2
-
3
-
4
-
5
-
6
-
7
-
8
-
9
-
10
-
11
-
12
-
13
-
14
-
15
-
16
-
17
-
18
-
19
-
20
-
21
-
22
-
23
-
24
-
25
-
26
-
27
-
28
-
29
-
30
-
31
-
32
-
33
-
34
-
35
-
36
-
37
-
38
-
39
-
40
-
41
-
42
-
43
-
44
-
45
-
46
-
47
-
48
-
49
-
50
-
51
-
52
-
53
-
54
-
55
-
56
-
57
-
58
-
59
-
60
-
61
-
62
-
63
-
64
-
65
-
66
-
67
-
68
-
69
-
70
-
71
-
72
-
73
-
74
-
75
-
76
-
 77
77 -
 78
78 -
 79
79 -
 80
80 -
 81
81 -
 82
82 -
 83
83 -
 84
84 -
 85
85 -
 86
86
 |
 |
English
78
1
3
3
2
2
For the latest updates of M.2 SSD module support list, please visit our website for details:
Step 6
Tighten the screws with a screwdriver
to secure the M.2 heatsink into place
in the order shown. Tighten screws
opposite the M.2 connector first (2),
and then tighten the ones next to the
M.2 connector (3).
*Please do not overtighten the screw
as this might damage the module and
M.2 heatsink.