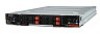
Acer AB2x280 F1 Acer AB7000 Enclosure with AB2x280 F1 and AB460 F1 Blade Serve - Page 47
AB460 F1 Memory removal and installation, Memory Support, Installing DIMM Memory Modules
 |
View all Acer AB2x280 F1 manuals
Add to My Manuals
Save this manual to your list of manuals |
Page 47 highlights
AB460 F1 Memory removal and installation WARNING:Exercise extreme care when installing or removing DIMM modules to prevent any possible damage. Memory Support The AB460 F1 blade module supports up to 192 GB/48 GB of ECC Registered/Unbuffered ECC DDR3-1333 SDRAM in twelve DIMM sockets. Installing DIMM Memory Modules 1. Power down the blade module. 2. Remove the blade from the enclosure (see "Removing the blade unit" on page 36). 3. Remove the cover from the blade (see "Removing/Replacing the blade cover" on page 38). 4. Insert each DIMM vertically into its slot, starting with slots 1A and 2A. 5. Pay attention to the notch along the bottom of the module to prevent inserting the DIMM incorrectly. To Install: Insert module vertically and press down until it snaps into place. Pay attention to the bottom notch. To Remove: Use your thumbs to gently push each release tab outward to free the DIMM from the slot. 6. Gently press down on the DIMM until it snaps into place in the slot. Repeat for all modules. Refer to the DIMM population rules for each blade before installing. 7. Replace the air shroud and the blade cover and install the blade module back into the enclosure. 8. Power up the blade unit. Populating Memory Slots The mainboard of a AB460 F1 blade module has twelve memory slots, depending upon the blade model. Both interleaved and non-interleaved memory are supported, so you may populate any number of DIMM slots. Populating three slots at a time (DIMM1A + DIMM2A+ DIMM3A, etc.) with memory modules of the same size and of the same type will result in dual-channel, interleaved memory, which is faster than single-channel, noninterleaved memory. See the following tables and figure for details. NOTE: For an interleaved configuration, memory modules of the same size and speed must be installed in pairs. You should not mix DIMMs of different sizes and speeds. Hardware removal and installation 39