Acer Altos R720 Altos R720 User's Guide - Page 64
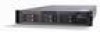
Slide the optical drive tray into the front opening in the server
 |
View all Acer Altos R720 manuals
Add to My Manuals
Save this manual to your list of manuals |
Page 64 highlights
54 3 System upgrade 6 Install the new optical drive into the optical drive tray by aligning the two holes on the left edge of the optical device with the two metal tabs in the tray (A). 7 Lower the right side of the device into the tray until it clicks into place (B). 8 Secure the interposer board to the optical drive tray with the scew supplied with the optical drive kit. B A 9 Slide the optical drive tray into the front opening in the server (A). Make sure the back end of the interposer board plugs into the matching connector on the backplane board (B). 10 Verify that the blue release lever on the tray locks into place.
-
 1
1 -
2
-
3
-
4
-
5
-
6
-
7
-
8
-
9
-
10
-
11
-
12
-
13
-
14
-
15
-
16
-
17
-
18
-
19
-
20
-
21
-
22
-
23
-
24
-
25
-
26
-
27
-
28
-
29
-
30
-
31
-
32
-
33
-
34
-
35
-
36
-
37
-
38
-
39
-
40
-
41
-
42
-
43
-
44
-
45
-
46
-
47
-
48
-
49
-
50
-
51
-
52
-
53
-
54
-
55
-
56
-
57
-
58
-
 59
59 -
 60
60 -
 61
61 -
 62
62 -
 63
63 -
 64
64 -
 65
65 -
 66
66 -
 67
67 -
 68
68 -
 69
69 -
70
-
71
-
72
-
73
-
74
-
75
-
76
-
77
-
78
-
79
-
80
-
81
-
82
-
83
-
84
-
85
-
86
-
87
-
88
-
89
-
90
-
91
-
92
-
93
-
94
-
95
-
96
-
97
-
98
-
99
-
100
-
101
-
102
-
103
-
104
-
105
-
106
-
107
-
108
-
109
-
110
-
111
-
112
-
113
-
114
-
115
-
116
-
117
-
118
-
119
-
120
-
121
-
122
-
123
-
124
-
125
-
126
-
127
-
128
-
129
-
130
-
131
-
132
-
133
-
134
-
135
-
136
-
137
-
138
-
139
-
140
-
141
-
142
-
143
-
144
-
145
-
146
-
147
-
148
-
149
-
150
-
151
-
152
-
153
-
154
-
155
-
156
-
157
-
158
-
159
-
160
-
161
-
162
-
163
-
164
-
165
-
166
-
167
-
168
-
169
-
170
-
171
-
172
-
173
-
174
-
175
-
176
-
177
-
178
-
179
-
180
-
181
-
182
-
183
-
184
-
185
-
186
 |
 |

3 System upgrade
54
6
Install the new optical drive into the optical drive tray by aligning
the two holes on the left edge of the optical device with the two
metal tabs in the tray
(A)
.
7
Lower the right side of the device into the tray until it clicks into
place
(B)
.
8
Secure the interposer board to the optical drive tray with the scew
supplied with the optical drive kit.
9
Slide the optical drive tray into the front opening in the server
(A)
.
Make sure the back end of the interposer board plugs into the
matching connector on the backplane board
(B)
.
10
Verify that the blue release lever on the tray locks into place.