Acer EB321HQU User Manual - Page 21
Adjusting the OSD settings
 |
View all Acer EB321HQU manuals
Add to My Manuals
Save this manual to your list of manuals |
Page 21 highlights
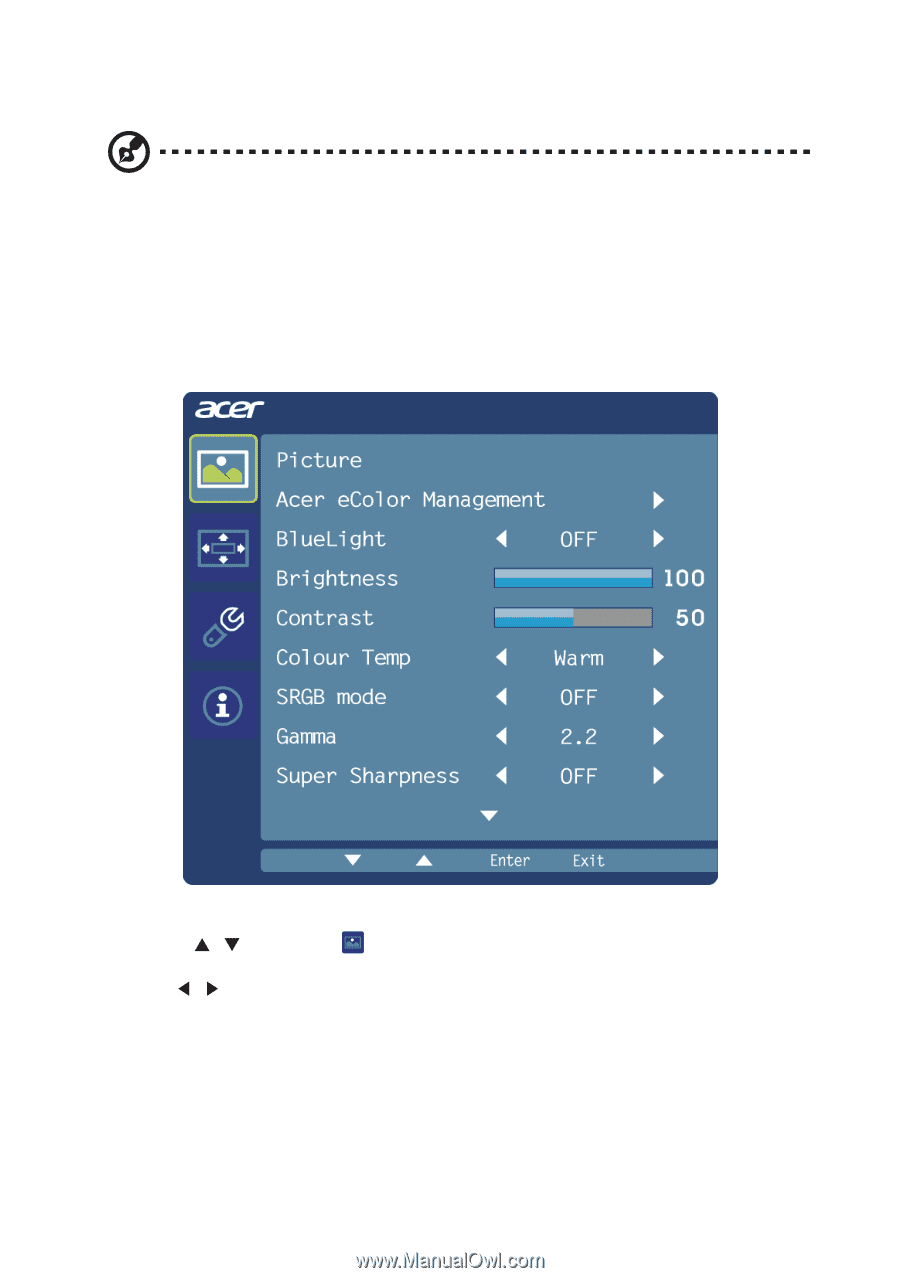
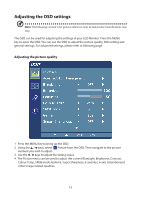
Adjusting the OSD settings Note: The following content is for general reference only. Actual product specifications may vary. The OSD can be used for adjusting the settings of your LCD Monitor. Press the MENU key to open the OSD. You can use the OSD to adjust the picture quality, OSD setting and general settings. For advanced settings, please refer to following page: Adjusting the picture quality 1 Press the MENU key to bring up the OSD. 2 Using the / keys, select Picture from the OSD. Then navigate to the picture element you wish to adjust. 3 Use the / keys to adjust the sliding scales. 4 The Picture menu can be used to adjust the current BlueLight, Brightness, Contrast, Colour Temp, SRGB mode, Gamma, Super Sharpness, 6‐axis Hue, 6‐axis Saturationand other image‐related qualities. 12
-
 1
1 -
2
-
3
-
4
-
5
-
6
-
7
-
8
-
9
-
10
-
11
-
12
-
13
-
14
-
15
-
 16
16 -
 17
17 -
 18
18 -
 19
19 -
 20
20 -
 21
21 -
 22
22 -
 23
23 -
 24
24 -
 25
25
 |
 |