Acer S1213Hne User Manual - Page 37
About Acer SmartPen Setting, Note 1, Setting, SmartPen, Pen Function, Overview of the Acer SmartPen
 |
View all Acer S1213Hne manuals
Add to My Manuals
Save this manual to your list of manuals |
Page 37 highlights
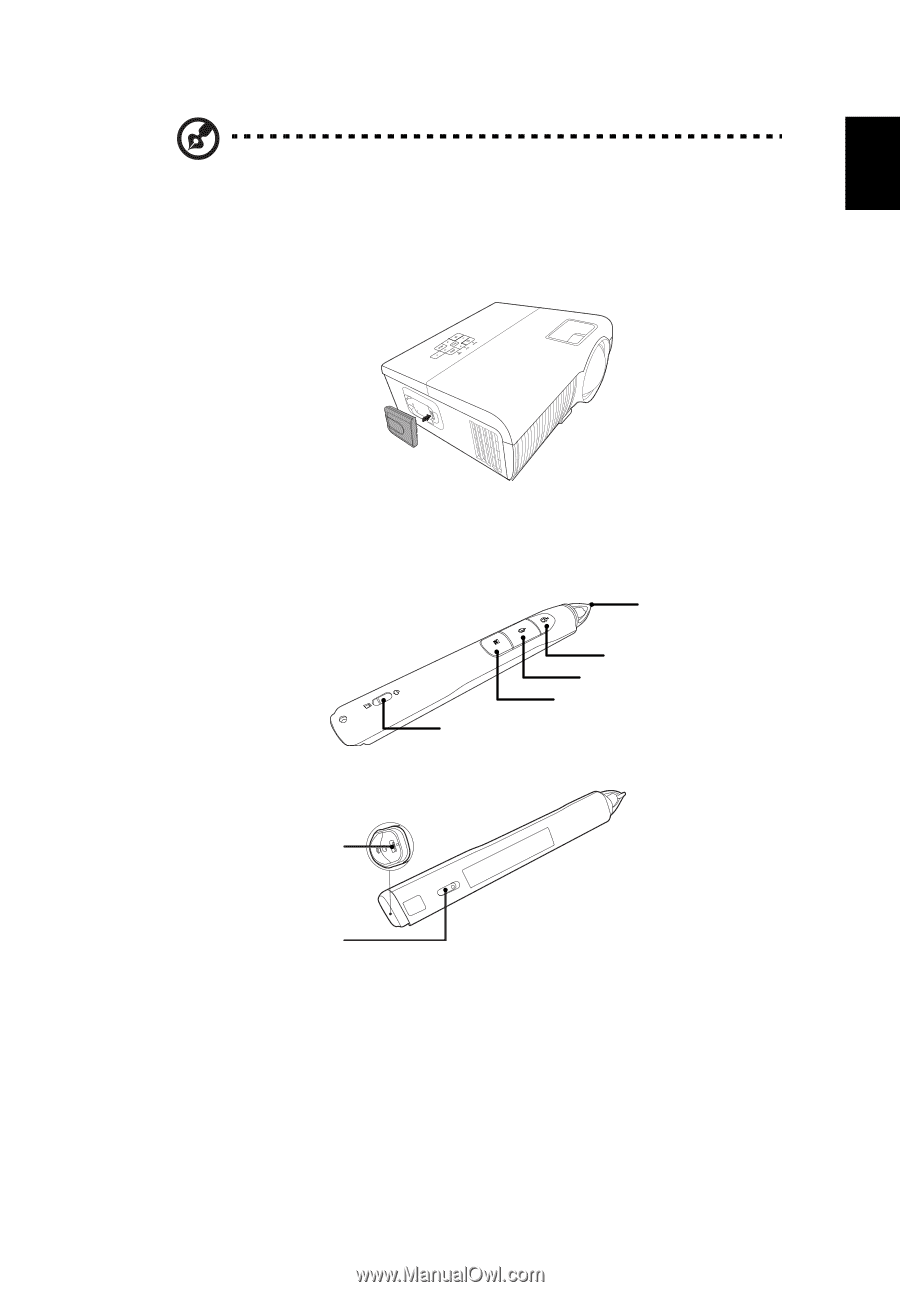
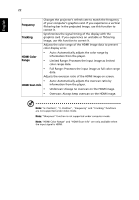
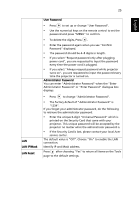
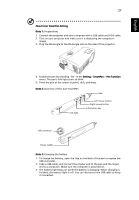
English 27 About Acer SmartPen Setting Note 1: Preparations 1. Connect the projector and your computer with a USB cable and VGA cable. 2. Turn on your projector and make sure it is displaying the computer's image. 3. Plug the PB dongle to the PB dongle slot on the side of the projector. 4. Enable the pen by selecting "On" in the Setting > SmartPen > Pen Function menu. The pen's link light starts to blink. 5. Point the pen at the screen to point, click, and drag. Note 2: Overview of the Acer SmartPen Nib Link light Left mouse button Right mouse button Information key USB connector Power switch Note 3: Charging the battery 1. To charge the battery, open the flap on the back of the pen to expose the USB connector. 2. Take a USB cable, and connect the smaller end to the pen and the larger end to a computer. Make sure the computer is powered on. 3. The battery light stays on while the battery is charging. When charging is finished, the battery light is off. You can disconnect the USB cable or keep it connected.
-
 1
1 -
2
-
3
-
4
-
5
-
6
-
7
-
8
-
9
-
10
-
11
-
12
-
13
-
14
-
15
-
16
-
17
-
18
-
19
-
20
-
21
-
22
-
23
-
24
-
25
-
26
-
27
-
28
-
29
-
30
-
31
-
 32
32 -
 33
33 -
 34
34 -
 35
35 -
 36
36 -
 37
37 -
 38
38 -
 39
39 -
 40
40 -
 41
41 -
 42
42 -
43
-
44
-
45
-
46
-
47
-
48
-
49
-
50
-
51
-
52
-
53
-
54
-
55
-
56
-
57
-
58
-
59
-
60
 |
 |