Acer Veriton 7600G Veriton 7600G - Page 75
Replacing the hard disk, To recon your computer
 |
View all Acer Veriton 7600G manuals
Add to My Manuals
Save this manual to your list of manuals |
Page 75 highlights
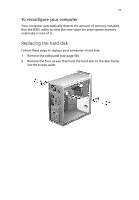
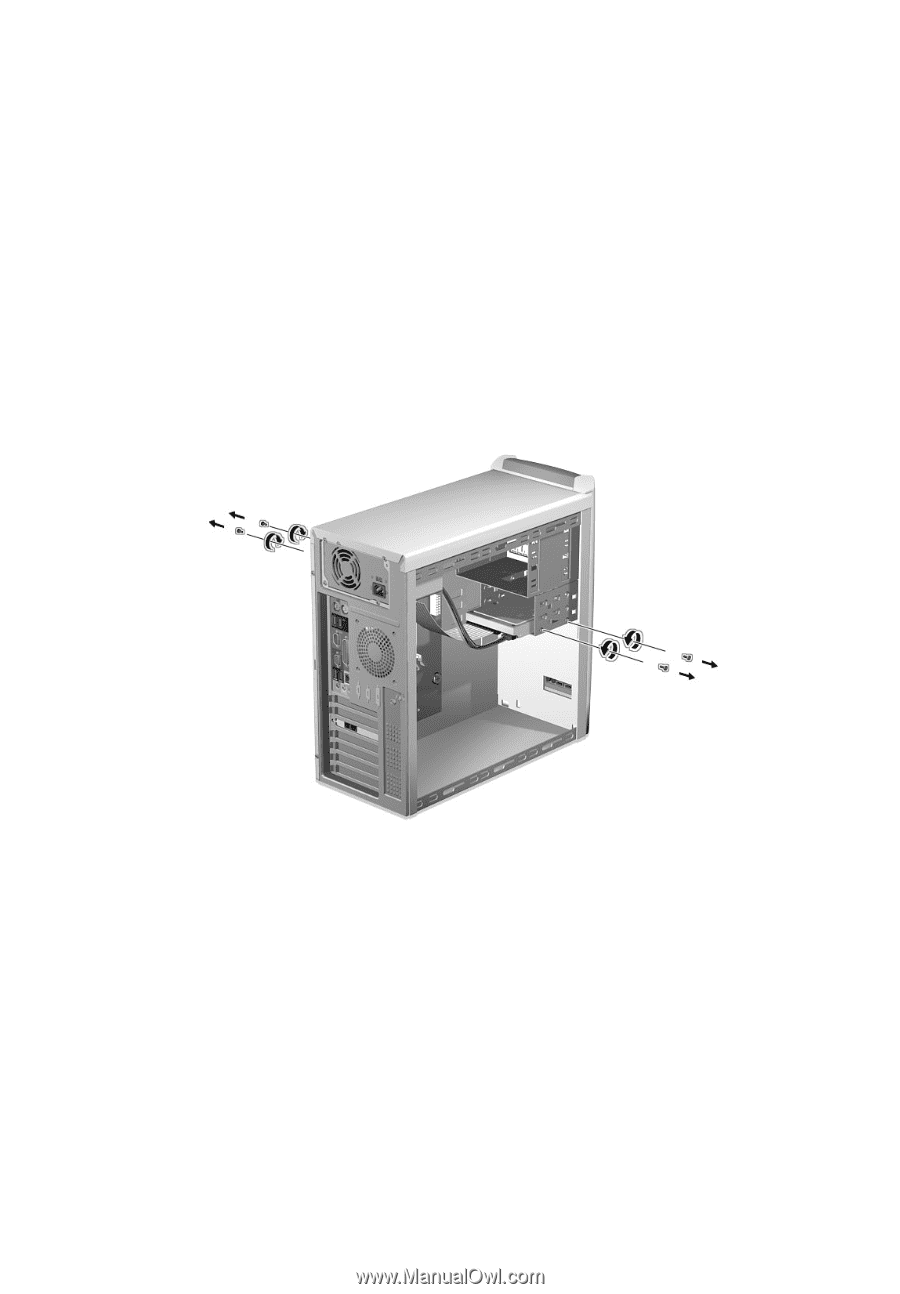
69 To reconfigure your computer Your computer automatically detects the amount of memory installed. Run the BIOS utility to view the new value for total system memory and make a note of it. Replacing the hard disk Follow these steps to replace your computer's hard disk: 1 Remove the side panel (see page 58). 2 Remove the four screws that hold the hard disk to the disk frame. Set the screws aside.
-
 1
1 -
2
-
3
-
4
-
5
-
6
-
7
-
8
-
9
-
10
-
11
-
12
-
13
-
14
-
15
-
16
-
17
-
18
-
19
-
20
-
21
-
22
-
23
-
24
-
25
-
26
-
27
-
28
-
29
-
30
-
31
-
32
-
33
-
34
-
35
-
36
-
37
-
38
-
39
-
40
-
41
-
42
-
43
-
44
-
45
-
46
-
47
-
48
-
49
-
50
-
51
-
52
-
53
-
54
-
55
-
56
-
57
-
58
-
59
-
60
-
61
-
62
-
63
-
64
-
65
-
66
-
67
-
68
-
69
-
 70
70 -
 71
71 -
 72
72 -
 73
73 -
 74
74 -
 75
75 -
 76
76 -
 77
77 -
 78
78 -
 79
79 -
 80
80 -
81
-
82
-
83
-
84
-
85
-
86
-
87
-
88
-
89
-
90
-
91
-
92
-
93
-
94
-
95
-
96
-
97
-
98
-
99
-
100
-
101
-
102
-
103
-
104
-
105
-
106
-
107
-
108
-
109
-
110
-
111
-
112
-
113
-
114
-
115
-
116
-
117
-
118
 |
 |
69
To reconfigure your computer
Your computer automatically detects the amount of memory installed.
Run the BIOS utility to view the new value for total system memory
and make a note of it.
Replacing the hard disk
Follow these steps to replace your computer’s hard disk:
1
Remove the side panel (see page 58).
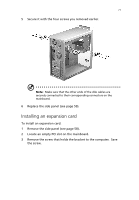
2
Remove the four screws that hold the hard disk to the disk frame.
Set the screws aside.