Akai MPC500 User Manual - Page 7
Playing back the sequences in the selected order, Recording a Sound, Preparing the recording
 |
View all Akai MPC500 manuals
Add to My Manuals
Save this manual to your list of manuals |
Page 7 highlights
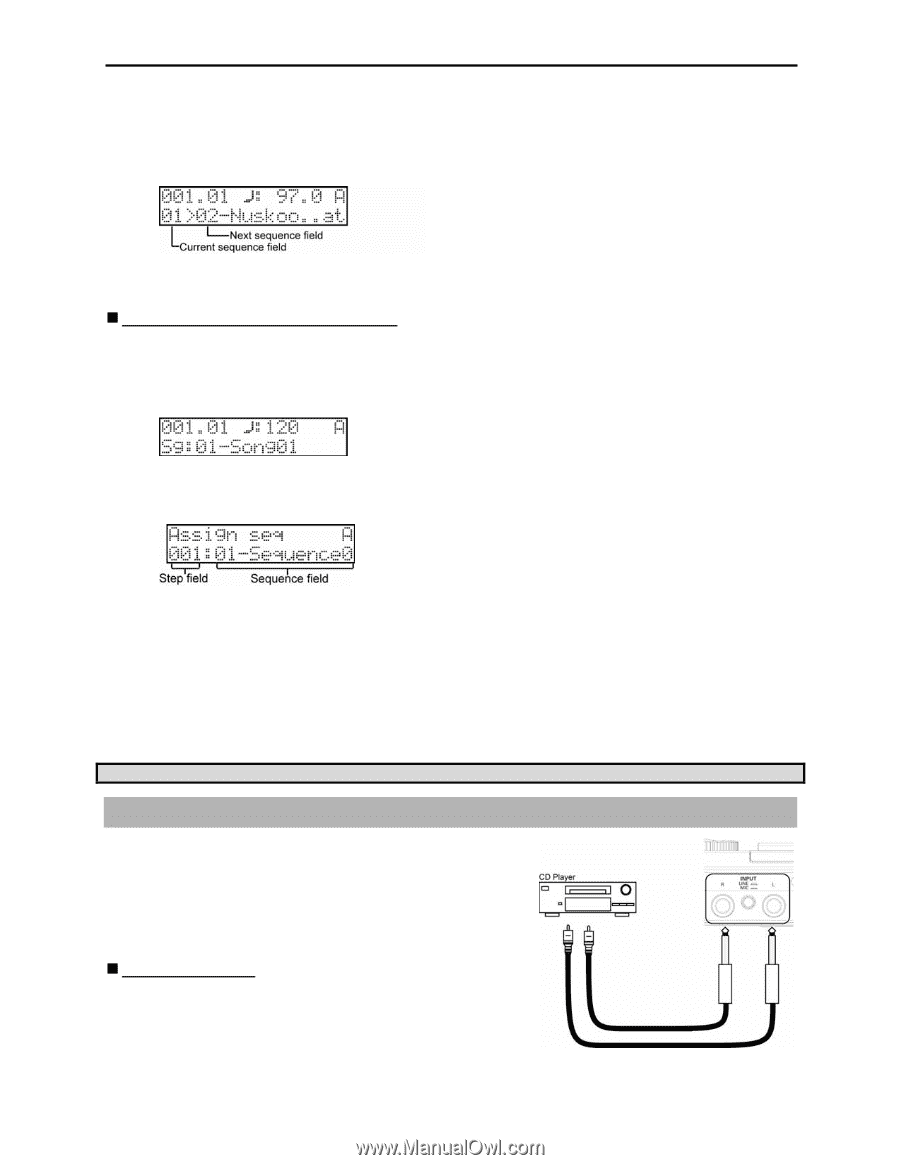
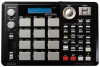
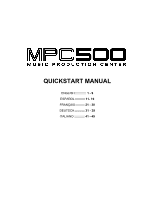
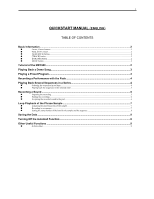
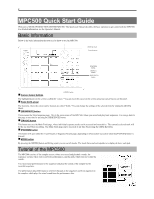
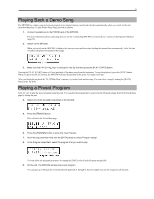
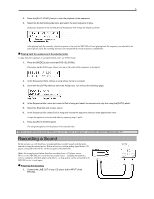
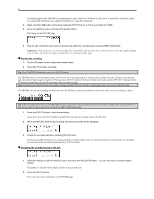
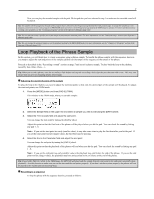
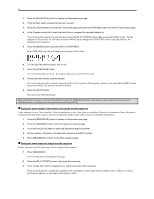
5 2. Press the [PLAY START] button to start the playback of the sequence. 3. Select the Sq field during play back, and select the next sequence to play. Selecting a sequence in the Sq field during the playback will change the display as shown After playing back the currently selected sequence to the end, the MPC500 will start playing back the sequence you selected in the next sequence field. By repeating this step, you can play back several sequences continuously. „ Playing back the sequences in the selected order To play back the sequences in a predetermined order, use SONG mode. 1. Press the [MODE] button and then [PAD 12] (SONG). This brings up the SONG page, where you can set the order of the sequences to be played. 2. In the Song select field, choose a song whose name is (unused). 3. Scroll with the [DATA] wheel to select the Assign seq. You will see the following page: 4. In the Sequence field, move the cursor to End of song and select the sequence to play first using the [DATA] wheel. 5. Select the Step field and choose step 2. 6. In the Sequence field, select End of song and choose the sequence that you want played back next. Assign the sequences in the desired order by repeating steps 3 and 4. 7. Press the [PLAY START] button. The assigned sequence will be played in the selected order. Tip: For more information about the SONG mode, see the "Chapter 6: Song mode" section of the Operator's Manual. (page 79) Recording a Sound In this section, you will learn how to assign and play recorded sounds with the pads, instead of using the internal preset. Below is how to record an analog signal from a CD player connected to the INPUT on the rear panel of the MPC500. Note: The example given below describes recording from a CD player source. However, the MPC500 can record from any sound source - including microphones, mixers, computers, Minidisk players and others - as long as they can be connected to the MPC500 via its ¼ inch inputs. „ Preparing the recording 1. Connect the LINE OUT of your CD player to the INPUT of the MPC500.
-
 1
1 -
 2
2 -
 3
3 -
 4
4 -
 5
5 -
 6
6 -
 7
7 -
 8
8 -
 9
9 -
 10
10 -
 11
11 -
 12
12 -
13
-
14
-
15
-
16
-
17
-
18
-
19
-
20
-
21
-
22
-
23
-
24
-
25
-
26
-
27
-
28
-
29
-
30
-
31
-
32
-
33
-
34
-
35
-
36
-
37
-
38
-
39
-
40
-
41
-
42
-
43
-
44
-
45
-
46
-
47
-
48
-
49
-
50
-
51
-
52
-
53
 |
 |