Akai MPC500 User Manual - Page 9
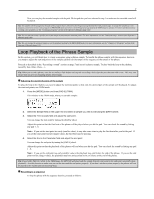
Loop Playback of the Phrase Sample, Adjusting the start/end points of the sample, Recording to - beat making
 |
View all Akai MPC500 manuals
Add to My Manuals
Save this manual to your list of manuals |
Page 9 highlights
7 Now you can play the recorded sample with the pads. Hit the pad that you have selected in step 1 to make sure the recorded sound will be played. Tip: The samples will be assigned to the pads of the program that is selected in the Program assign field of the Track params page. To assign the samples to a new program, you need to create a new program in PROGRAM mode and select it in the Program assign field of the MAIN page in advance. For more information about creating a new program, see the "Creating a program" section of the Operator's Manual. (page 115) Tip: You can play back only a specific part of the sample by adjusting the start/end points. For more information, see the "Setting the loop" section of the Operator's Manual. (page 108) Tip: You can change the assigned sample or set the playback method in the PROGRAM mode. For more information, see the "Chapter 12: Program" section of the Operator's Manual. (page 115) Loop Playback of the Phrase Sample In this section, you will learn how to create a sequence using a phrase sample. To handle the phrase sample with the sequence function, you need to adjust the start/end points of the sample add then set the tempo of the sequence to the tempo of the phrase. Proceed as described in the "Recording a sound" section on page 5 and record a phrase sample. To play back the loop to the rhythm, record by bars (1bar, 2 bars....). Tip: When you record a phrase, start the recording a little before and stop the recording a little after the part that you wish to use. This way, you ensure that you are not chopping off any desired audi. „ Adjusting the start/end points of the sample To play the loop to the rhythm, you need to adjust the start/end points so that only the desired part of the sample will be played. To adjust the start/end points, use TRIM mode. 1. Press the [MODE] button and then [PAD 5] (TRIM). This switches to the TRIM mode, where you can edit samples. 2. Select the Sample field on the upper line and select a sample you wish to edit using the [DATA] wheel. 3. Select the Trim st (start) field and adjust the start point. You can change the start point by turning the [DATA] wheel. Adjust this point so that the first beat of the phrase will be played when you hit the pad. You can check the sound by hitting any pad 1 - 8. Note : If you set the start point too early (smaller value), it may take some time to play the first beat after you hit the pad. If you set the start point too late (larger value), the first beat may be missing. 4. Select the End in the Parameter field and adjust the end point. You can change the end point by turning the [DATA] wheel. Adjust this point so that the playback of the phrase will end when you hit the pad. You can check the sound by hitting any pad 1 - 8. Note : If you set the end point too early (smaller value), the playback may end before the end of the phrase. If you set the end point too late (larger value), the playback may have unnecessary noise or silence at the end of the phrase. Tip: If you hold [ PAD 10 ] while in the TRIM page, the MPC500 will play back the sample from the start point to the end point repeatedly (loop playback). Use this function to make sure you set the start and the end points properly. If you don't set those points properly, the phrase will not be played to the rhythm and will sound off-beat. „ Recording to a sequence To loop the phrase with the sequence function, proceed as follows:
-
 1
1 -
2
-
3
-
 4
4 -
 5
5 -
 6
6 -
 7
7 -
 8
8 -
 9
9 -
 10
10 -
 11
11 -
 12
12 -
 13
13 -
 14
14 -
15
-
16
-
17
-
18
-
19
-
20
-
21
-
22
-
23
-
24
-
25
-
26
-
27
-
28
-
29
-
30
-
31
-
32
-
33
-
34
-
35
-
36
-
37
-
38
-
39
-
40
-
41
-
42
-
43
-
44
-
45
-
46
-
47
-
48
-
49
-
50
-
51
-
52
-
53
 |
 |