Amana AGR3311WDW Installation Instruction - Page 10
Electronic Ignition System - oven igniter
 |
UPC - 883049185231
View all Amana AGR3311WDW manuals
Add to My Manuals
Save this manual to your list of manuals |
Page 10 highlights
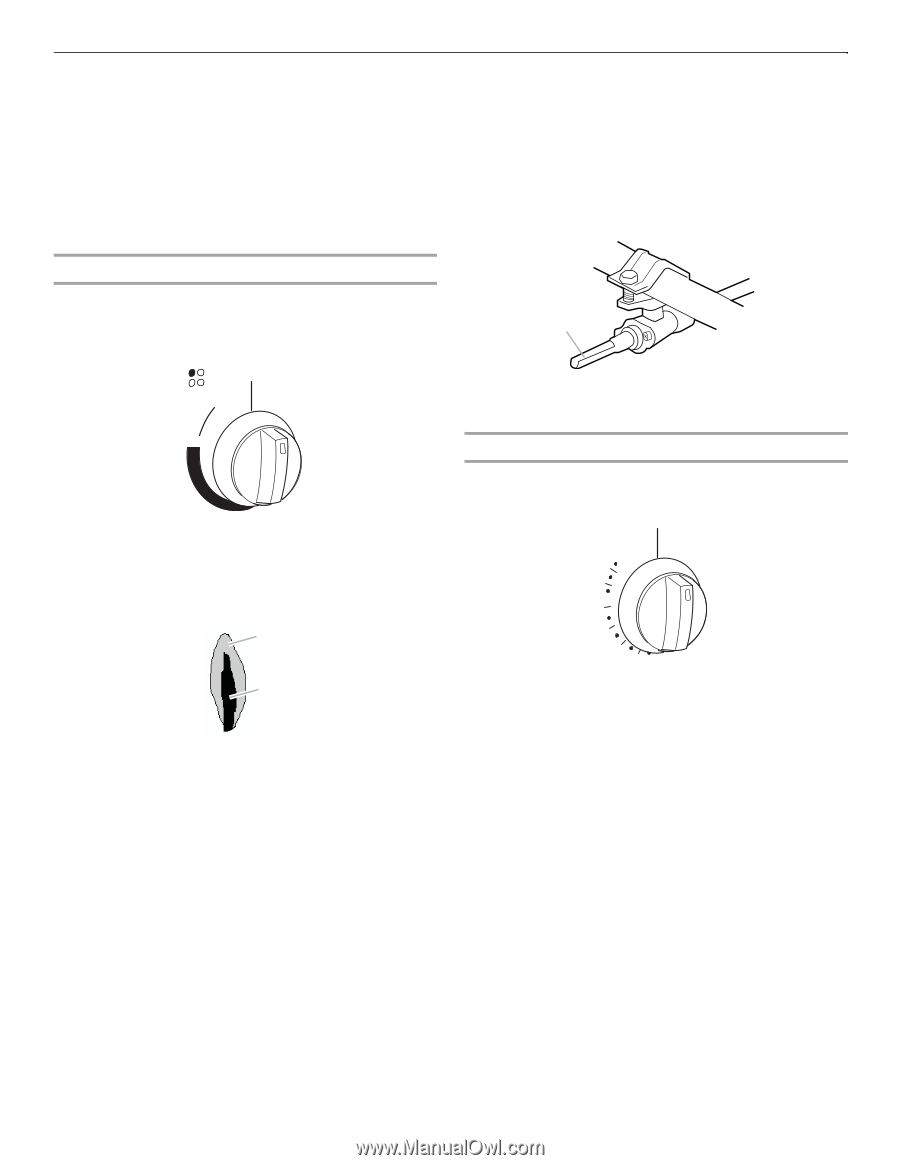
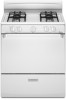
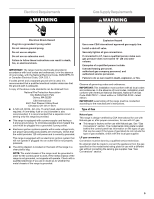
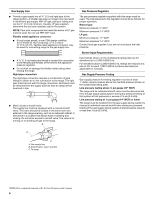
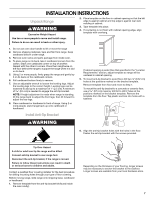
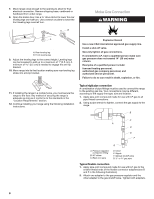
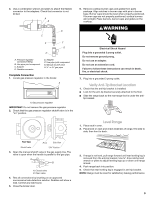
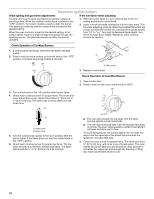
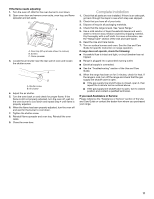
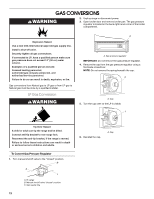
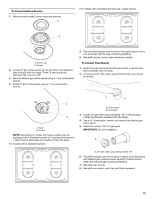
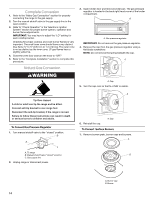
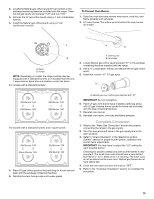
Electronic Ignition System Initial lighting and gas flame adjustments If the low flame needs adjusting: Cooktop and oven burners use electronic igniters in place of standing pilots. When the cooktop control knob is turned to the "LITE" position, the system creates a spark to light the burner. This sparking continues until the control knob is turned to the desired setting. When the oven control is turned to the desired setting, a hot surface igniter heats to a bright orange and ignites the gas. No sparking occurs. The glow bar remains on while the burner operates. 1. With the burner flame on, turn control knob to the "Lo" setting and remove control knob. 2. Insert a small flat-blade screwdriver into the valve stem. Turn the valve adjusting screw to obtain the smallest flame that will not go out when the control of a cold burner is quickly turned from "HI" to "Lo." Turn right to decrease flame height. Turn left to increase flame height. Repeat for other cooktop burners as needed. Check Operation of Cooktop Burners 1. If control panel and knobs were removed earlier, reinstall knobs. 2. Push in and turn each surface unit control knob to the "LITE" position. The flame should light within 4 seconds. OFF LITE LO HI MED 3. Turn control knob to the "HI" position after burner lights. 4. Check each cooktop burner for proper flame. The small inner cone should have a very distinct blue flame ¼" (0.64 cm) to ½" (0.13 cm) long. The outer cone is not as distinct as the inner cone. A B A. Outer cone B. Inner cone 5. Turn the control knob quickly to the "LO" position after the burner lights. If the flame goes out, turn the control knob to the "OFF" position. 6. Check each cooktop burner for proper low flame. The low flame should be a minimum, steady blue flame. The flame size should be ¼" to ³⁄₈" (0.64 cm to 0.95 cm) high. A A. Valve stem 3. Replace control knob. Check Operation of Oven/Broil Burner 1. Open broiler door. 2. Press in and turn the oven control knob to 350°F. OFF 140 170 200 250 300 350 400 450 OVEN TEMP BROIL 350 ■ The oven pilot should now be larger with the flame burning against a small metal bulb. ■ The oven burner should light in 20-40 seconds; this delay is normal. The oven valve requires a certain time before it will open and allow gas to flow. To avoid damaging the hot surface igniter, do not insert any object into the openings of the shield that surrounds the igniter. Do not clean that area. 3. Check the oven burner for proper flame. The flame should be ½" (0.13 cm) long, with inner cone of bluish-green. The outer mantle should be dark blue and should be clean and soft in character. No yellow tips (not enough air), blowing or lifting (too much air) of flame should occur. 10
-
 1
1 -
2
-
3
-
4
-
 5
5 -
 6
6 -
 7
7 -
 8
8 -
 9
9 -
 10
10 -
 11
11 -
 12
12 -
 13
13 -
 14
14 -
 15
15 -
16
-
17
-
18
-
19
-
20
-
21
-
22
-
23
-
24
-
25
-
26
-
27
-
28
-
29
-
30
-
31
-
32
 |
 |