Amana AGR3311WDW Installation Instruction - Page 14
Complete Conversion, Natural Gas Conversion
 |
UPC - 883049185231
View all Amana AGR3311WDW manuals
Add to My Manuals
Save this manual to your list of manuals |
Page 14 highlights
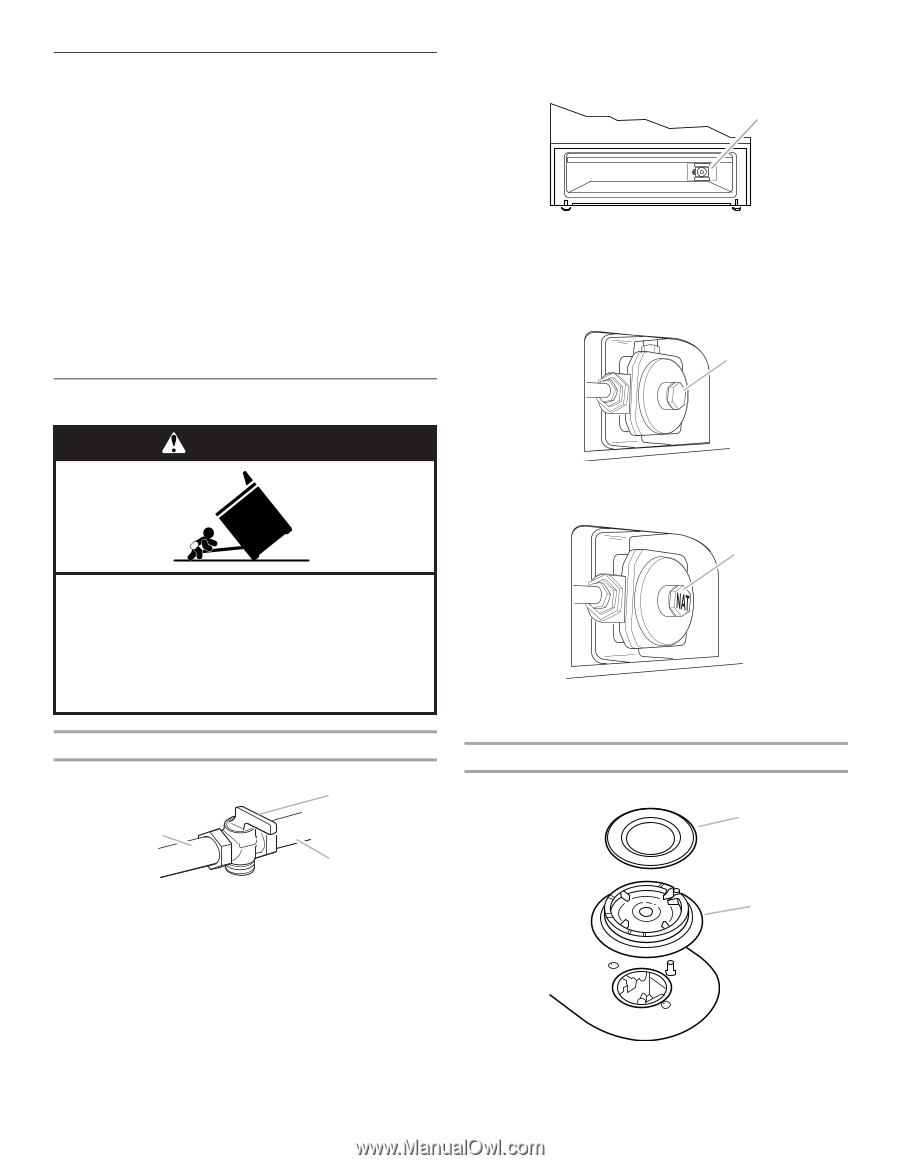
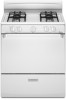
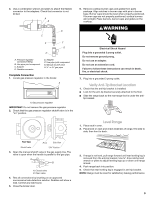
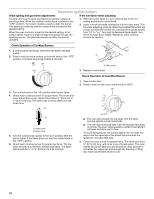
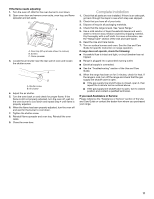
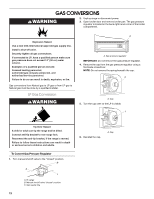
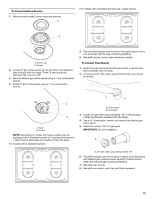
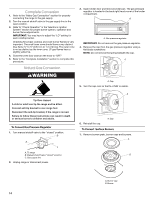
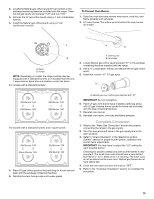
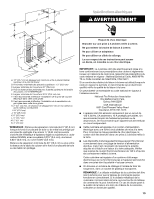
Complete Conversion 1. Refer to the "Make Gas Connection" section for properly connecting the range to the gas supply. 2. Turn the manual shutoff valve in the gas supply line to the open position. 3. Refer to "Check Operation" in the "Electronic Ignition System" section for proper burner ignition, operation and burner flame adjustments. IMPORTANT: You may have to adjust the "LO" setting for each cooktop burner. Checking for proper cooktop and oven burner flames is very important. The small inner cone should have a very distinct blue flame ¼" to ½" (0.64 cm to 1.3 cm) long. The outer cone is not as distinct as the inner cone. LP gas flames have a slightly yellow tip. 4. Close the oven door and turn the knob to "OFF." 5. Refer to the "Complete Installation" section to complete this procedure. Natural Gas Conversion WARNING 3. Open broiler door and remove broiler pan. The gas pressure regulator is located in the back right hand corner of the broiler compartment. A A. Gas pressure regulator IMPORTANT: Do not remove the gas pressure regulator. 4. Remove the cap from the gas pressure regulator using a flat-blade screwdriver. NOTE: Do not remove the spring beneath the cap. A A. Cap 5. Turn the cap over so that N or NAT is visible. Tip Over Hazard A child or adult can tip the range and be killed. Connect anti-tip bracket to rear range foot. Reconnect the anti-tip bracket, if the range is moved. Failure to follow these instructions can result in death or serious burns to children and adults. To Convert Gas Pressure Regulator 1. Turn manual shutoff valve to the "closed" position. B A C A. To range B. Manual shutoff valve "closed" position C. Gas supply line 2. Unplug range or disconnect power. A 6. Reinstall the cap. A. Cap To Convert Surface Burners 1. Remove burner grate, burner caps and burners. A B A. Burner cap B. Burner 14
-
 1
1 -
2
-
3
-
4
-
5
-
6
-
7
-
8
-
 9
9 -
 10
10 -
 11
11 -
 12
12 -
 13
13 -
 14
14 -
 15
15 -
 16
16 -
 17
17 -
 18
18 -
 19
19 -
20
-
21
-
22
-
23
-
24
-
25
-
26
-
27
-
28
-
29
-
30
-
31
-
32
 |
 |