Asus A88XM-A/USB 3.1 A88XM-A/USB 3.1 Users manual English - Page 17
Accelerated Processing Unit (APU), Installing the APU - fm2
 |
View all Asus A88XM-A/USB 3.1 manuals
Add to My Manuals
Save this manual to your list of manuals |
Page 17 highlights
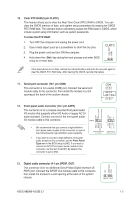
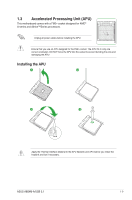
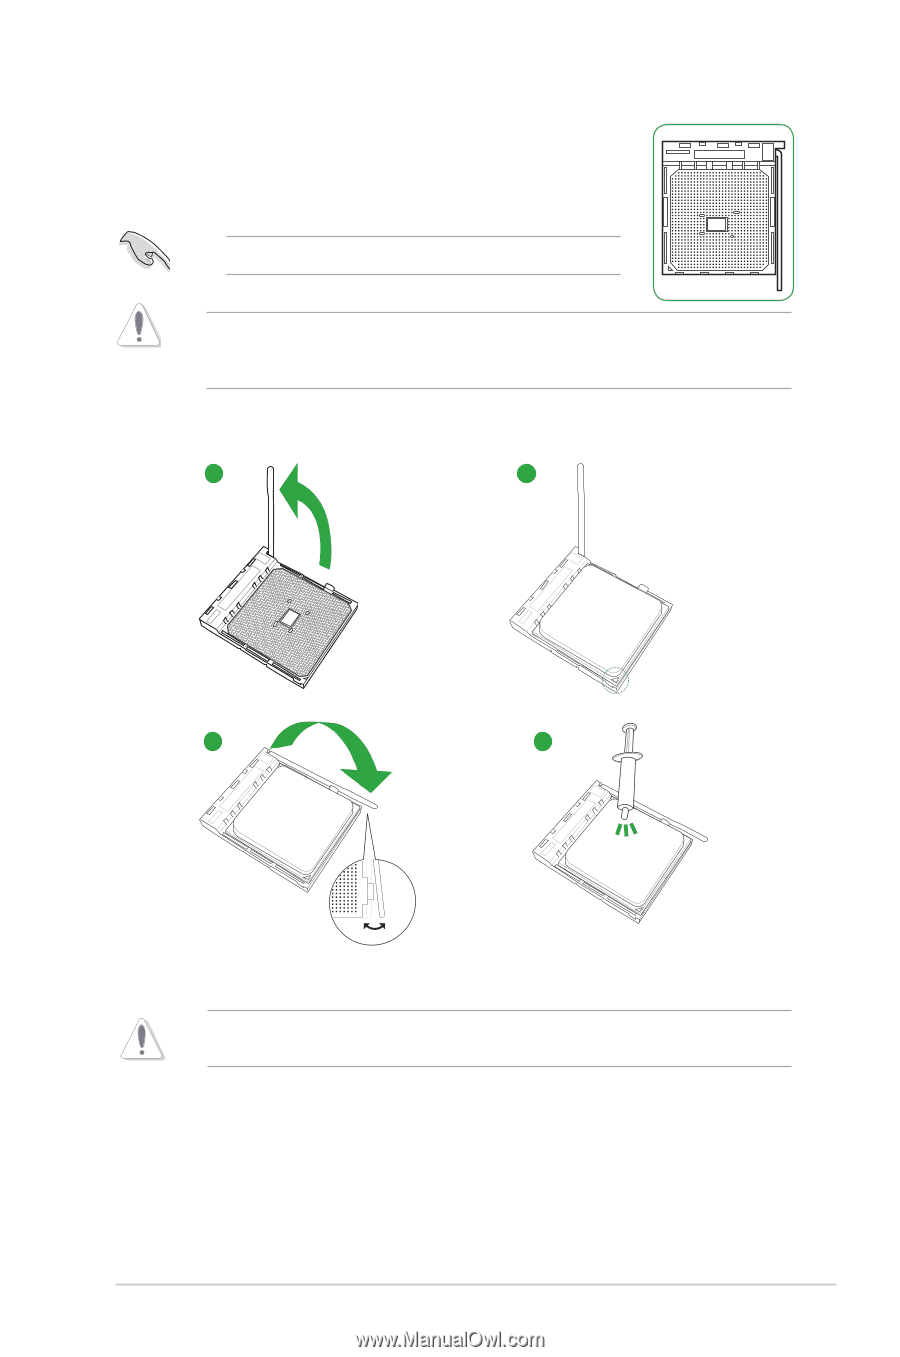
1.3 Accelerated Processing Unit (APU) This motherboard comes with a FM2+ socket designed for AMD® A-series and Athlon™Series processors. Unplug all power cables before installing the APU. Ensure that you use an APU designed for the FM2+ socket. The APU fits in only one correct orientation. DO NOT force the APU into the socket to prevent bending the pins and damaging the APU! Installing the APU 1 2 3 4 Apply the Thermal Interface Material to the APU heatsink and APU before you install the heatsink and fan if necessary. ASUS A88XM-A/USB 3.1 1-9
-
 1
1 -
2
-
3
-
4
-
5
-
6
-
7
-
8
-
9
-
10
-
11
-
 12
12 -
 13
13 -
 14
14 -
 15
15 -
 16
16 -
 17
17 -
 18
18 -
 19
19 -
 20
20 -
 21
21 -
 22
22 -
23
-
24
-
25
-
26
-
27
-
28
-
29
-
30
-
31
-
32
-
33
-
34
-
35
-
36
 |
 |
ASUS A88XM-A/USB 3.1
1-9
1.3
Accelerated Processing Unit (APU)
This motherboard comes with a FM2+ socket designed for AMD
®
A-series and Athlon™Series processors.
Unplug all power cables before installing the APU.
Ensure that you use an APU designed for the FM2+ socket. The APU fits in only one
correct orientation. DO NOT force the APU into the socket to prevent bending the pins and
damaging the APU!
Installing the APU
Apply the Thermal Interface Material to the APU heatsink and APU before you install the
heatsink and fan if necessary.
1
4
3
2