Asus AP120-E1 User Guide - Page 35
Removing the chassis fan
 |
View all Asus AP120-E1 manuals
Add to My Manuals
Save this manual to your list of manuals |
Page 35 highlights
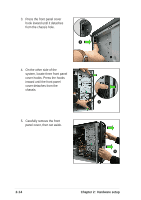
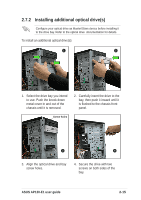
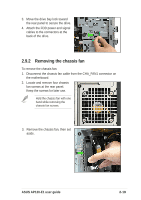
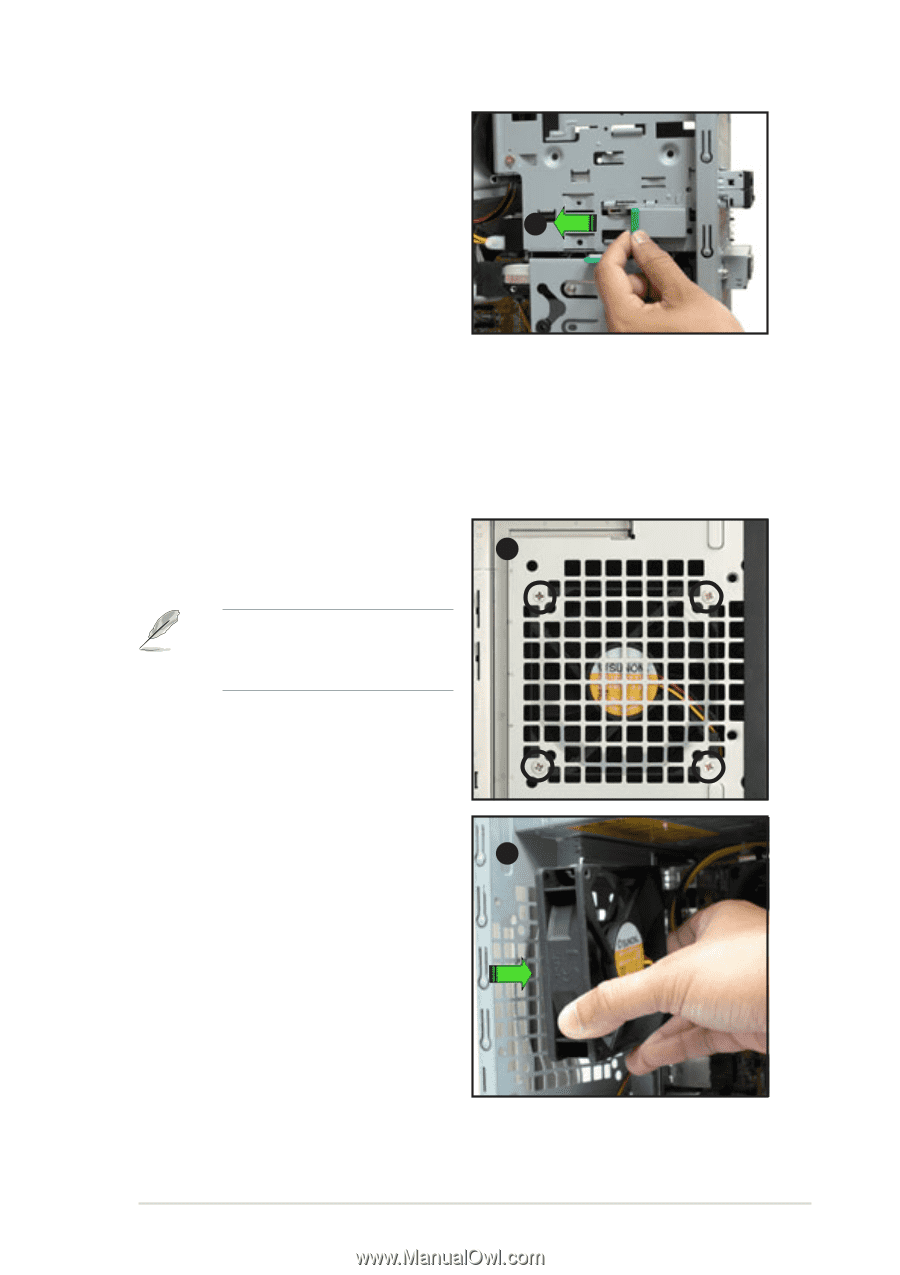
3. Move the drive bay lock toward the rear panel to secure the drive. 4. Attach the FDD power and signal cables to the connectors at the back of the drive. 3 2.9.2 Removing the chassis fan To remove the chassis fan: 1. Disconnect the chassis fan cable from the CHA_FAN1 connector on the motherboard. 2. Locate and remove four chassis fan screws at the rear panel. 2 Keep the screws for later use. Hold the chassis fan with one hand while removing the chassis fan screws. 3. Remove the chassis fan, then set aside. 3 ASUS AP120-E1 user guide 2-19
-
 1
1 -
2
-
3
-
4
-
5
-
6
-
7
-
8
-
9
-
10
-
11
-
12
-
13
-
14
-
15
-
16
-
17
-
18
-
19
-
20
-
21
-
22
-
23
-
24
-
25
-
26
-
27
-
28
-
29
-
 30
30 -
 31
31 -
 32
32 -
 33
33 -
 34
34 -
 35
35 -
 36
36 -
 37
37 -
 38
38 -
 39
39 -
 40
40 -
41
-
42
-
43
-
44
-
45
-
46
-
47
-
48
-
49
-
50
-
51
-
52
 |
 |
2-19
ASUS AP120-E1 user guide
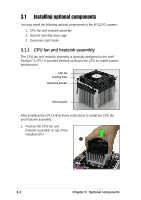
3.
Move the drive bay lock toward
the rear panel to secure the drive.
4.
Attach the FDD power and signal
cables to the connectors at the
back of the drive.
3
2.9.2
Removing the chassis fan
To remove the chassis fan:
1.
Disconnect the chassis fan cable from the CHA_FAN1 connector on
the motherboard.
2.
Locate and remove four chassis
fan screws at the rear panel.
Keep the screws for later use.
Hold the chassis fan with one
hand while removing the
chassis fan screws.
2
3
3.
Remove the chassis fan, then set
aside.