Asus DVD-E616P2 English User Manual - Page 23
Connecting the drive cables
 |
View all Asus DVD-E616P2 manuals
Add to My Manuals
Save this manual to your list of manuals |
Page 23 highlights
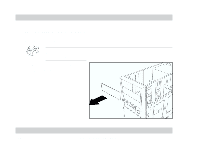
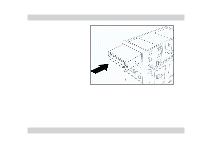
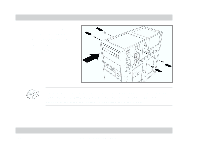
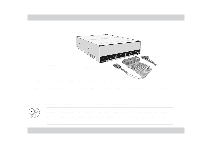
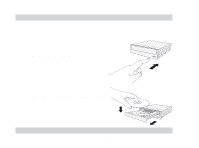
Connecting the drive cables 1. Connect the power cable plug to the power connector on the rear panel. 2. Connect the 40-pin IDE cable plug to the IDE connector, 4-pin Audio cable matching the red pin stripe on the cable with Pin 1 on the connector. Power cable IDE cable 3. If your computer has a sound card or an onboard audio feature, connect an audio interface cable to the 4-pin analog audio connector on the rear of the drive. Connect the other end of the audio cable to the connector on the sound card or on the 4-pin CD connector on the motherboard. All the cable plugs are slotted so that they fit in only one orientation. If a plug does not fit in completely, try reversing it. DO NOT apply too much force when fitting the cable plugs. ASUS DVD-E616P2 23
-
 1
1 -
2
-
3
-
4
-
5
-
6
-
7
-
8
-
9
-
10
-
11
-
12
-
13
-
14
-
15
-
16
-
17
-
 18
18 -
 19
19 -
 20
20 -
 21
21 -
 22
22 -
 23
23 -
 24
24 -
 25
25 -
 26
26 -
 27
27 -
 28
28 -
29
-
30
-
31
-
32
-
33
-
34
 |
 |
