Asus RT-N12 User Manual - Page 13
Apply all settings, Launch your web browser and the QIS starts to detect your Internet connection - password
 |
View all Asus RT-N12 manuals
Add to My Manuals
Save this manual to your list of manuals |
Page 13 highlights
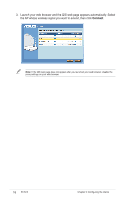
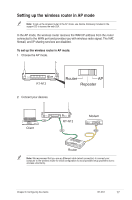
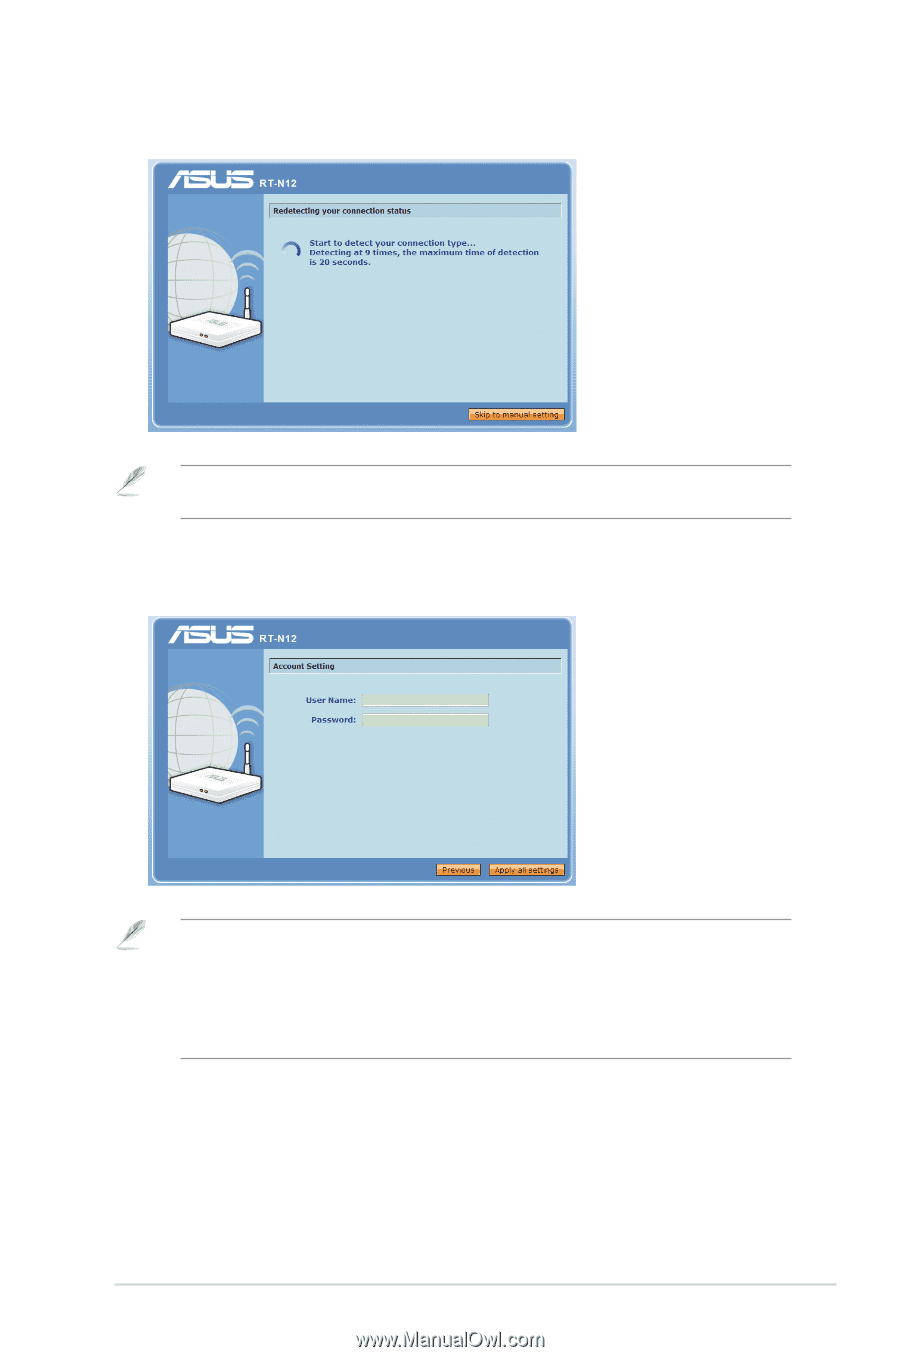
3. Launch your web browser and the QIS starts to detect your Internet connection type. Note: If the QIS web page does not appear after you launched your web browser, disable the proxy settings on your web browser. 4. Key in the user name and password. Click Apply all settings. Note: • The PPPoE Internet connection type is used in this setup case. The setup screen varies with different Internet connection types. • Obtain the required information such as the username and password from your Internet Service Provider (ISP). Chapter 2: Setting up the hardware RT-N12 13
-
 1
1 -
2
-
3
-
4
-
5
-
6
-
7
-
 8
8 -
 9
9 -
 10
10 -
 11
11 -
 12
12 -
 13
13 -
 14
14 -
 15
15 -
 16
16 -
 17
17 -
 18
18 -
19
-
20
-
21
-
22
-
23
-
24
-
25
-
26
-
27
-
28
-
29
-
30
-
31
-
32
-
33
-
34
-
35
-
36
-
37
-
38
-
39
-
40
-
41
-
42
-
43
-
44
-
45
-
46
-
47
-
48
-
49
-
50
-
51
-
52
-
53
-
54
-
55
-
56
-
57
-
58
 |
 |
1²
Chapter ±: Setting up the hardware
RT-N1±
².
Launch your web browser and the QIS starts to detect your Internet connection
type.
Note:
If the QIS web page does not appear after you launched your web browser, disable the
proxy settings on your web browser.
4.
Key in the user name and password. Click
Apply all settings
.
Note:
• The PPPoE Internet connection type is used in this setup case. The setup screen varies with
different Internet connection types.
• Obtain the required information such as the username and password from your Internet
Service Provider (ISP).