Asus TUF Z270 MARK 1 TUF Z270 MARK 1 Users manual ENGLISH - Page 42
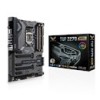
Place nine screws into the holes indicated by circles to secure the motherboard to the, chassis.
 |
View all Asus TUF Z270 MARK 1 manuals
Add to My Manuals
Save this manual to your list of manuals |
Page 42 highlights
3. Place nine screws into the holes indicated by circles to secure the motherboard to the chassis. Chapter 2 DO NOT overtighten the screws! Doing so can damage the motherboard. 2-4 Chapter 2: Basic Installation

2-4
Chapter 2: Basic Installation
Chapter 2
3.
Place nine screws into the holes indicated by circles to secure the motherboard to the
chassis.
DO NOT overtighten the screws! Doing so can damage the motherboard.


