Asus Tinker Board E15215TinkerBoardSeriesEMWEB - Page 7
Writing the OS image
 |
View all Asus Tinker Board manuals
Add to My Manuals
Save this manual to your list of manuals |
Page 7 highlights
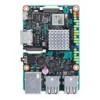
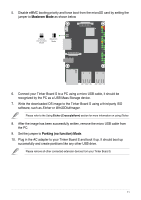
3. Writing the OS image You may write your downloaded OS image to a microSD card or built-in eMMC using Etcher (supports Windows®, Mac OS, and Linux), or dd command (Linux only). eMMC is only supported on Tinker Board S. 3.1 Using Etcher (Cross-platform) Etcher is an image file utility used for burning image files, and supports Windows®, Mac OS, and Linux. Etcher also supports burning images directly from the zip file, without having to unzip the zip file first. To write an image using Etcher: 1. Insert a microSD card to a card reader connected to your PC, or connect your Tinker Board S to a PC via a micro USB cable. (Tinker Board S only) Please refer to your Tinker Board product manual for the location of the microSD slot. 2. Download Etcher from http://etcher.io/, then launch it. 3. Click on Select image, then select the downloaded OS image. Please refer to the screenshots below for TinkerOS_Debian and Android OS examples: The following screenshots are for reference only. TinkerOS_Debian 7
-
 1
1 -
 2
2 -
 3
3 -
 4
4 -
 5
5 -
 6
6 -
 7
7 -
 8
8 -
 9
9 -
 10
10 -
 11
11 -
 12
12
 |
 |
