Asus VINTAGE-AH1 Vintage-AH1 User's Manual for English Edtion - Page 47
Software information
 |
View all Asus VINTAGE-AH1 manuals
Add to My Manuals
Save this manual to your list of manuals |
Page 47 highlights
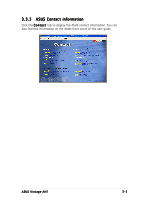
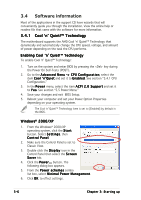
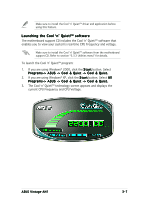
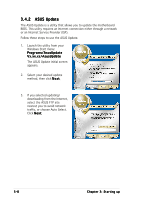
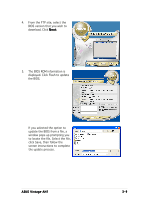
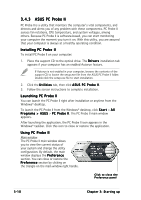
3.4 Software information Most of the applications in the support CD have wizards that will conveniently guide you through the installation. View the online help or readme file that came with the software for more information. 3.4.1 Cool 'n' Quiet!™ Technology The motherboard supports the AMD Cool 'n' Quiet!™ Technology that dynamically and automatically change the CPU speed, voltage, and amount of power depending on the task the CPU performs. Enabling Cool 'n' Quiet!™ Technology To enable Cool 'n' Quiet!™ Technology: 1. Turn on the system and enter BIOS by pressing the key during the Power On Self-Tests (POST). 2. Go to the A d v a n c e d M e n u - > C P U C o n f i g u r a t i o n, select the item C o o l ' n ' Q u i e t and set it to E n a b l e d. See section "5.4.1 CPU Configuration." 3. In the P o w e r menu, select the item A C P I 2 . 0 S u p p o r t and set it to Y e s. See section "5.5 Power Menu." 4. Save your changes and exit BIOS Setup. 5. Reboot your computer and set your Power Option Properties depending on your operating system. The Cool 'n' Quiet!™ Technology item is set to [Enabled] by default in the BIOS. Windows® 2000/XP 1. From the Windows® 2000/XP operating system, click the S t a r t button. Select S e t t i n g s, then Control Panel. 2. Make sure the Control Panel is set to Classic View. 3. Double-click the D i s p l a y icon in the Control Panel then select the S c r e e n S a v e r tab. 4. Click the P o w e r . . . button. The following dialog box appears. 5. From the P o w e r s c h e m e s combo list box, select M i n i m a l P o w e r M a n a g e m e n t. 6. Click O K to effect settings. 3-6 Chapter 3: Starting up
-
 1
1 -
2
-
3
-
4
-
5
-
6
-
7
-
8
-
9
-
10
-
11
-
12
-
13
-
14
-
15
-
16
-
17
-
18
-
19
-
20
-
21
-
22
-
23
-
24
-
25
-
26
-
27
-
28
-
29
-
30
-
31
-
32
-
33
-
34
-
35
-
36
-
37
-
38
-
39
-
40
-
41
-
 42
42 -
 43
43 -
 44
44 -
 45
45 -
 46
46 -
 47
47 -
 48
48 -
 49
49 -
 50
50 -
 51
51 -
 52
52 -
53
-
54
-
55
-
56
-
57
-
58
-
59
-
60
-
61
-
62
-
63
-
64
-
65
-
66
-
67
-
68
-
69
-
70
-
71
-
72
-
73
-
74
-
75
-
76
-
77
-
78
-
79
-
80
-
81
-
82
-
83
-
84
-
85
-
86
-
87
-
88
-
89
-
90
-
91
-
92
-
93
-
94
-
95
-
96
-
97
-
98
-
99
-
100
-
101
-
102
-
103
-
104
-
105
-
106
-
107
-
108
-
109
-
110
-
111
-
112
-
113
 |
 |
