Asus VW192G User Guide - Page 12
Detaching the arm/stand, for VESA wall mount - vw192s
 |
UPC - 610839219278
View all Asus VW192G manuals
Add to My Manuals
Save this manual to your list of manuals |
Page 12 highlights
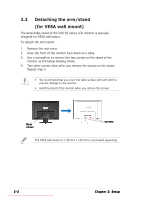
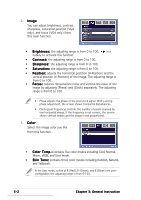
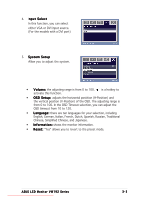
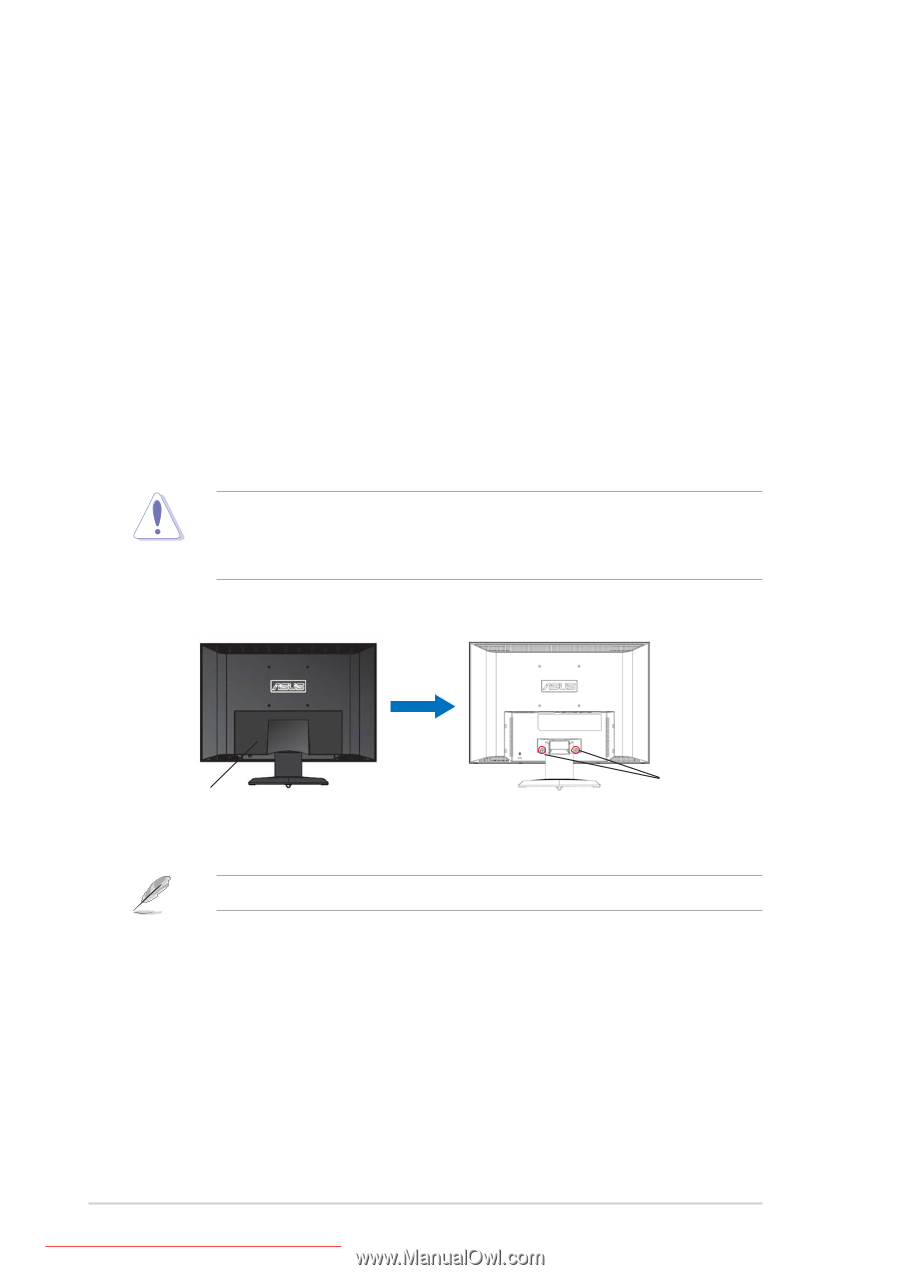
2.2 Detaching the arm/stand (for VESA wall mount) The detachable stand of the VW192 Series LCD monitor is specially designed for VESA wall mount. To detach the arm/stand: 1. Remove the rear cover. 2. Have the front of the monitor face down on a table. 3. Use a screwdriver to remove the two screws on the stand of the monitor as the below drawing shows. 4. Two other screws show after you remove the screws on the stand. Repeat step 3. • We recommend that you cover the table surface with soft cloth to prevent damage to the monitor. • Hold the stand of the monitor when you remove the screws. Rear cover screws The VESA wall mount kit (100 mm x 100 mm) is purchased separately. 2-2 Downloaded from ManualMonitor.com Manuals Chapter 2: Setup
-
 1
1 -
2
-
3
-
4
-
5
-
6
-
 7
7 -
 8
8 -
 9
9 -
 10
10 -
 11
11 -
 12
12 -
 13
13 -
 14
14 -
 15
15 -
 16
16 -
 17
17 -
18
 |
 |
2-2
2-2
2-2
2-2
2-2
Chapter 2: Setup
Chapter 2: Setup
Chapter 2: Setup
Chapter 2: Setup
Chapter 2: Setup
2.2
Detaching the arm/stand
(for VESA wall mount)
The detachable stand of the VW192 Series LCD monitor is specially
designed for VESA wall mount.
To detach the arm/stand:
1.
Remove the rear cover.
2.
Have the front of the monitor face down on a table.
3.
Use a screwdriver to remove the two screws on the stand of the
monitor as the below drawing shows.
4.
Two other screws show after you remove the screws on the stand.
Repeat step 3.
•
We recommend that you cover the table surface with soft cloth to
prevent damage to the monitor.
•
Hold the stand of the monitor when you remove the screws.
The VESA wall mount kit (100 mm x 100 mm) is purchased separately.
screws
screws
screws
screws
screws
Rear
Rear
Rear
Rear
Rear
cover
cover
cover
cover
cover
Downloaded from ManualMonitor.com Manuals