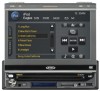
Audiovox VM9314 Operating Instructions - Page 83
Optional, Equipment, Disconnecting, Battery, Pre-installation
 |
View all Audiovox VM9314 manuals
Add to My Manuals
Save this manual to your list of manuals |
Page 83 highlights
Optional Equipment • NAV102: Allows you to access navigation features. All installation and operating instructions are included with the navigation module. • BTM 15: Allows you to connect to a Bluetooth enabled cell phone or other device. • Rear Camera Disconnecting the Battery To prevent a short circuit, be sure to turn off the ignition and remove the negative (-) battery cable prior to installation. NO TE: If the VM9314 is to be installed in a car equipped with an on-board drive or navigation computer, do not disconnect the battery cable. If the cable is disconnected, the computer memory may be lost. Under these conditions, use extra caution during installation to avoid causing a short circuit. Pre-installation D Remove the four screws that attach the mounting sleeve to the radio and remove the sleeve. I I Install the mounting sleeve. a. Install mounting sleeve into the dashboard or optional adapter. Do not force the sleeve into the opening or cause it to bend or bow. b. Locate the series of bend-tabs along the top, bottom and sides of the mounting sleeve. With the sleeve fully inserted into the dashboard opening, bend as many of the tabs outward as necessary so that the sleeve is firmly secured to the dashboard. c. Install support strap to make the unit more stable. , .... I I Place the radio in front of the dashboard opening so the wiring can be brought through the mounting sleeve. CAUTIONI Be careful not to damage the car wiring. DASHBOARD 2
-
 1
1 -
2
-
3
-
4
-
5
-
6
-
7
-
8
-
9
-
10
-
11
-
12
-
13
-
14
-
15
-
16
-
17
-
18
-
19
-
20
-
21
-
22
-
23
-
24
-
25
-
26
-
27
-
28
-
29
-
30
-
31
-
32
-
33
-
34
-
35
-
36
-
37
-
38
-
39
-
40
-
41
-
42
-
43
-
44
-
45
-
46
-
47
-
48
-
49
-
50
-
51
-
52
-
53
-
54
-
55
-
56
-
57
-
58
-
59
-
60
-
61
-
62
-
63
-
64
-
65
-
66
-
67
-
68
-
69
-
70
-
71
-
72
-
73
-
74
-
75
-
76
-
77
-
 78
78 -
 79
79 -
 80
80 -
 81
81 -
 82
82 -
 83
83 -
 84
84 -
 85
85 -
 86
86 -
 87
87 -
 88
88 -
89
-
90
-
91
-
92
-
93
-
94
-
95
 |
 |
