Audiovox VOH1042DL Owners Manual - Page 9
Channel Tuning Setup, Turning The Voh1042 Dl On And Off
 |
UPC - 044476007095
View all Audiovox VOH1042DL manuals
Add to My Manuals
Save this manual to your list of manuals |
Page 9 highlights
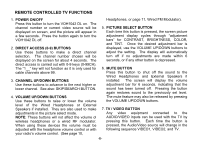
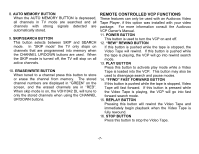
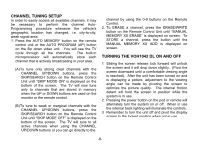
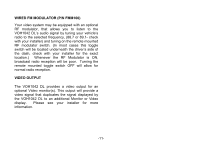
CHANNEL TUNING SETUP In order to easily access all available channels, it may be necessary to perform the channel AutoProgramming procedure whenever the vehicle's geographic location has changed, i.e. city-to-city, weak signal area. 1. Press the AUTO MEMORY button on the remote control unit or the AUTO PROGRAM (AP) button on the flip down video unit. You will see the TV cycle through all the channels. The built-in microprocessor will automatically store each channel that is actively broadcasting in your area. (A)To tune only strong clear channels with the CHANNEL UP/DOWN buttons, press the SKIP/SEARCH button on the Remote Control Unit until "SKIP MODE ON" is displayed on the bottom of the screen. The TV will now tune only to channels that are stored in memory when the UP or DOWN buttons are used on the monitor or the remote control. (B)To tune to weak or marginal channels with the CHANNEL UP/DOWN buttons, press the SKIP/SEARCH button on the Remote Control Unit until "SKIP MODE OFF" is displayed on the bottom of the screen. The TV will tune to all active channels when using the CHANNEL UP/DOWN buttons or you can go directly to the channel by using the 0-9 buttons on the Remote Control. 2. To ERASE a channel, press the ERASE/WRITE button on the Remote Control Unit until "MANUAL MEMORY XX ERASE" is displayed on screen. To STORE a channel, press the button until the MANUAL MEMORY XX ADD is displayed on screen. TURNING THE VOH1042 DL ON AND OFF 1 Sliding the screen release lock forward will unlock the screen and it will drop down slightly. (Pivot the screen downward until a comfortable viewing angle is reached). After the unit has been turned on and is displaying a picture, adjustment to the viewing angle can be made by pivoting the screen to optimize the picture quality. The internal friction detent will hold the screen in position while the system is in use. 2 Pressing the power button on the pod or remote will alternately turn the system on or off. When in use the internal back lighting will illuminate the controls. 3 Remember to turn the unit off and pivot the display screen to the locked position when not in use. -8-
-
 1
1 -
2
-
3
-
 4
4 -
 5
5 -
 6
6 -
 7
7 -
 8
8 -
 9
9 -
 10
10 -
 11
11 -
 12
12 -
 13
13 -
 14
14 -
15
-
16
 |
 |