Autodesk 05720-017408-9621 Tutorial - Page 6
GRID ON, button
 |
UPC - 606121033783
View all Autodesk 05720-017408-9621 manuals
Add to My Manuals
Save this manual to your list of manuals |
Page 6 highlights
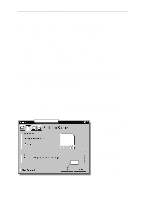
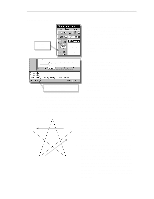
Geometric Construction Basics 1-5 Option Buttons GRID ON 1. Left-click the GRID button in the Status Bar to turn ON the GRID option. (Notice in the command prompt area, the message "" is also displayed.) 2. Move the cursor inside the Graphics window, and estimate the distance in between the grid points by watching the coordinates display at the bottom of the screen. GRID turned ON The GRID option creates a pattern of dots that extends over an area on the screen. Using the grid is similar to placing a sheet of grid paper under a drawing. The grid helps you align objects and visualize the distance between them. The grid is not displayed in the plotted drawing. The default grid spacing, which means the distance in between two dots on the screen, is 0.5 inches. We can see that the sketched horizontal line in the above sketch is about 2.5 inches long.
-
 1
1 -
 2
2 -
 3
3 -
 4
4 -
 5
5 -
 6
6 -
 7
7 -
 8
8 -
 9
9 -
 10
10 -
 11
11 -
 12
12 -
13
-
14
-
15
-
16
-
17
-
18
-
19
-
20
-
21
 |
 |
