Avanti DG202BS Instruction Manual - Page 16
Burners And Grids
 |
View all Avanti DG202BS manuals
Add to My Manuals
Save this manual to your list of manuals |
Page 16 highlights
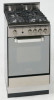
Figure 18 C F S Figure 20a Figure 21 16 CARE & MAINTENANCE Figure 19 Figure 20b Do not use this step Safety catch Figure 22 BURNERS AND GRIDS ‡ These parts can be removed and cleaned with appropriate products. ‡ After cleaning, the burners and their flame distributors must be well dried and correctly replaced. ‡ It is very important to check that the burner flame distributor and the cap has been correctly positioned - failure to do so can cause serious problems. ‡ In appliances with electric ignition keep the electrode clean so that the sparks always strike. ‡ Note: To avoid damage to the electric ignition do not use it when the burners are not in place. CORRECT REPLACEMENT OF THE BURNERS It is very important to check that the burner flame spreader "F" and the cap "C" have been correctly positioned (see figs. 18 and 19). Failure to do so can cause serious problems. In appliances with electric ignition, check that the electrode "S" (fig. 18) is always clean to ensure trouble-free sparking. The ignition plug must be very carefully cleaned. OVEN ACCESSORIES INSTALLATION AND REMOVAL - Assemble the wire racks on the oven walls using the 2 screws (fig. 20a). - Slide in, on the guides, the shelves (fig. 20b). Do not use the first step from the top. The rack must be fitted so that the safety catch, which stops it sliding out, faces the inside of the oven. - Position the broiling pan above the oven shelf (see page 14). - To dismantle, operate in reverse order. OVEN DOOR The internal glass of the oven door can be easily removed for cleaning by unscrewing the two lateral fixing screws (fig. 21). REMOVABLE STORAGE DRAWER The drawer (fig. 22) comes out like a normal drawer. To remove the drawer open and lift it. Do not store flammable material in the oven or in the bottom drawer.
-
 1
1 -
2
-
3
-
4
-
5
-
6
-
7
-
8
-
9
-
10
-
 11
11 -
 12
12 -
 13
13 -
 14
14 -
 15
15 -
 16
16 -
 17
17 -
 18
18 -
 19
19 -
 20
20
 |
 |
