Axis Communications 212 PTZ 212 PTZ/-V - User's Manual - Page 9
AXIS Media Control, Accessing the camera from the Internet, Adjust focus - axis manual
 |
View all Axis Communications 212 PTZ manuals
Add to My Manuals
Save this manual to your list of manuals |
Page 9 highlights
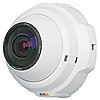
AXIS 212 PTZ/-V - Accessing the Camera AXIS Media Control The AXIS Media Control (AMC) is installed automatically the first time the camera is accessed from Microsoft Internet Explorer. The AMC control panel can be opened by right-clicking on the video image in the Live View web page. The AMC control panel can be used to configure various video and audio settings. Please see the readme file included in the tool for more information. The AMC manual is available from the Network Video link in axis.com/techsup Accessing the camera from the Internet Once installed, the camera is accessible on your local network (LAN). To access the camera from the Internet you must configure your broadband router to allow incoming data traffic to the camera. One way to do this is to enable the NAT-traversal feature, which will attempt to automatically configure the router to allow access to the camera. This is enabled from Setup > System Options > Network > TCP/IP Advanced. For more information, please see NAT traversal (port mapping), on page 35. See also the AXIS Internet Dynamic DNS Service at www.axiscam.net or, for Technical notes on this and other topics, visit the Axis Support Web at www.axis.com/techsup Adjust focus If the image is out of focus, the camera's preset focus position needs to be adjusted. Follow these instructions to focus the camera: 1. Remove the dome casing. 2. Open the Live View page in a web browser. 3. Set the camera view to maximum zoom, i.e. click on a suitable detail in the image to zoom in. 4. Rotate the metal focus adjustment ring (see illustration) to set the focus. Important! Older camera models have a fixing screw that must be loosened before rotating the focus adjustment ring. The screw is located close to the audio in/audio out connectors. Gently tighten the screw when satisfied with the image. 5. When satisfied with the image, mount the dome casing. For instructions please refer to the Installation Guide supplied with the camera. Focus adjustment ring 9
-
 1
1 -
2
-
3
-
 4
4 -
 5
5 -
 6
6 -
 7
7 -
 8
8 -
 9
9 -
 10
10 -
 11
11 -
 12
12 -
 13
13 -
 14
14 -
15
-
16
-
17
-
18
-
19
-
20
-
21
-
22
-
23
-
24
-
25
-
26
-
27
-
28
-
29
-
30
-
31
-
32
-
33
-
34
-
35
-
36
-
37
-
38
-
39
-
40
-
41
-
42
-
43
-
44
-
45
-
46
-
47
-
48
-
49
-
50
-
51
-
52
-
53
-
54
-
55
-
56
-
57
 |
 |
