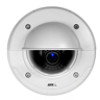
Axis Communications P3367-VE Assign an IP Address and Access the Video Stream - Page 4
Assign IP Addresses in Multiple Devices, Other Operating Systems and Methods - manual
 |
View all Axis Communications P3367-VE manuals
Add to My Manuals
Save this manual to your list of manuals |
Page 4 highlights
Assign an IP Address and Access the Video Stream Assign an IP Address 3. Connect to a server. To connect to a server on the network, select Remote server and select a server from the drop-down list or enter the IP or DNS address in the field. To connect to a server running locally on your computer, select This computer. 4. Click Log On to log on as the current computer user, or de-select Log on as current user and enter the user name and password to log on with. 5. The first time AXIS Camera Management runs it automatically searches for Axis products on the network. To manually search for products, select Configuration > Add Devices. The software displays a list of the products found. Select the products to add and click Next and then click Finish. 6. In the list of devices, click on the address to open the product's web pages. 7. For information about how to set the password, see page 6 . Assign IP Addresses in Multiple Devices AXIS Camera Management speeds up the process of assigning IP addresses to multiple devices by suggesting IP addresses from a specified range. 1. Select the devices you wish to configure (different models can be selected) and click Assign IP address to selected devices . 2. Click Yes in the Device Maintenance dialog. 3. Select Assign the following IP address range and enter the IP address range, subnet mask and default router the devices will use. Click Next. 4. Suggested IP addresses are listed under New IP Addresses and can be edited by selecting a device and clicking Edit IP. 5. Click Finish. Other Operating Systems and Methods The list below shows the other methods available for assigning or discovering the IP address. All methods are enabled by default, and all can be disabled. • AVHS Service Connection (all operating systems). To connect to an AVHS service, refer to the service provider's Installation guide. For information and help in finding a local AVHS Service Provider, go to www.axis.com/hosting • UPnP™ (Windows®). When enabled on your computer, the Axis network product is automatically detected and added to Network/My Network Places. • Bonjour (Mac OS X® 10.4 or later). Applicable to browsers with support for Bonjour. Navigate to the Bonjour bookmark in your browser (for example Safari) and click on the link to access the web pages. • AXIS Dynamic DNS Service (all operating systems). A free service from Axis that allows you to quickly and simply install your Axis network product. Requires an Internet connection without an HTTP proxy. For more information, see www.axiscam.net • ARP/Ping (all operating systems). See Assign IP Address Using ARP/Ping. The command must be issued within 2 minutes of connecting power. • DHCP server (all operating systems). To view the admin pages for the network DHCP server, see the server's user documentation. 4
-
 1
1 -
 2
2 -
 3
3 -
 4
4 -
 5
5 -
 6
6 -
 7
7 -
 8
8 -
 9
9
 |
 |