Behringer DIGITAL RACK MIXER X32 RACK User Manual - Page 53
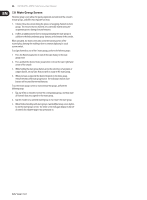
Setup Screen: DCA Tab, snippets, for the currently selected DCA groups.
 |
View all Behringer DIGITAL RACK MIXER X32 RACK manuals
Add to My Manuals
Save this manual to your list of manuals |
Page 53 highlights
53 X32 DIGITAL MIXER Preliminary User Manual 7.5.5 Setup Screen: DCA Tab The setup screen's DCA tab allows setup of the console's digitally controlled amplifiers grouping feature, also known as DCAs. A DCA group is a grouping function, made possible by the console's digital operation, where individual input channels can be grouped together and controlled with a single output fader on the right-hand side of the console. Unlike the traditional sub grouping function found on analog consoles, a DCA group does not combine the different input channels into a common sub-mix. Instead, the individual input channels still retain their original routing characteristics, but their level adjustments are all commonly controlled. On the DCA screen, the user can make useful adjustments such as assigning real names to the DCA groups (such as "drums" or "background vocals"), as well as assigning colors to them that are then reflected in the console's multicolor channel LCD screens. To adjust the various DCA settings, perform the following steps: 1. Adjust the 1st encoder to select which of the eight DCA groups you wish to edit. 2. Tap the 1st encoder to enter the "edit" page for the currently highlighted DCA, where its color, icon, and name can be adjusted. On the DCA edit page, perform the following steps: 1. Adjust the 1st encoder to set the color for the currently selected DCA group. • The selected color will be shown in the LCD screen above the selected DCA's output fader, on the right hand side of the console. For example, if DCA#5 is assigned the color red, the LCD screen above output fader #5 will illuminate in red. 2. Adjust the 2nd encoder to select the graphical icon for the DCA. A large variety of clip-art is available to represent various input sources and output destinations. 3. Adjust the 3rd encoder to select a name from a list of common preset names (snippets), for the currently selected DCA groups. 4. Tap the 3rd encoder to assign the currently highlighted preset text (snippet) to the DCA. 5. Adjust the 4th encoder to move the text entry cursor forward/backward, in the DCA's name field. 6. Tap the 4th encoder to issue a "backspace" command, deleting the currently highlighted character. 7. Adjust the 5th encoder to select a letter, number, or symbol to enter into the DCA's name field 8. Tap the 5th encoder to insert the currently highlighted letter, number, or symbol into the DCA's name field. 9. Adjust the 6th encoder to select whether the text entry choices offer capitals, normal characters, or numbers and symbols. 10. Tap the 6th encoder to exit the DCA editing page, and save the current parameters to the DCA.
-
 1
1 -
2
-
3
-
4
-
5
-
6
-
7
-
8
-
9
-
10
-
11
-
12
-
13
-
14
-
15
-
16
-
17
-
18
-
19
-
20
-
21
-
22
-
23
-
24
-
25
-
26
-
27
-
28
-
29
-
30
-
31
-
32
-
33
-
34
-
35
-
36
-
37
-
38
-
39
-
40
-
41
-
42
-
43
-
44
-
45
-
46
-
47
-
 48
48 -
 49
49 -
 50
50 -
 51
51 -
 52
52 -
 53
53 -
 54
54 -
 55
55 -
 56
56 -
 57
57 -
 58
58 -
59
-
60
-
61
-
62
-
63
-
64
-
65
-
66
-
67
-
68
-
69
-
70
 |
 |
