Behringer EUROGRAND EG2280USB Manual - Page 15
process will be terminated., Recording mode will thus be canceled automatically.
 |
View all Behringer EUROGRAND EG2280USB manuals
Add to My Manuals
Save this manual to your list of manuals |
Page 15 highlights
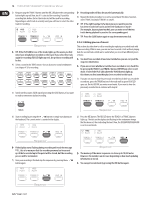
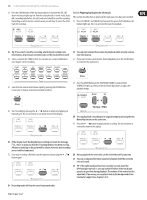
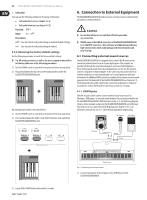
15 EUROGRAND EG8280USB/EG2280USB User Manual 3) Press the TRACK button of the track you want to record until the REC LED above the button lights up red. Now the selected track is record-ready. If you did a recording take before, the last track selected will be used for recording. Depending on which track is currently used, you will have to select the other track for recording. 5.5.3 Playing back pieces of music This section describes how to play back the music piece you have just recorded. 1) Press the TRACK 1 and TRACK 2 buttons until the green PLAY LED above the buttons lights up. This is to activate the tracks for playback. ◊ Tip: If you select a track for recording, which already contains note information, all previously recorded notes on this track will be erased! 4) Select a sound in the TONE section. You can also use a sound combination (see chapter 4.1) for recording. ◊ You can only activate those tracks for playback which actually contain note information. 2) If you want to have a metronome-backed playback, press the CLICK button to switch on the metronome. 5) Switch on the acoustic metronome signal by pressing the CLICK button, if you want to make a metronome-backed recording. 3) Press the MODE button in the TEMPO/EDIT MODE section until the TEMPO LED lights up, then use the two Down/Up buttons to adjust the playback tempo. 6) Start recording by pressing the button or simply start playing on the keyboard. The current meter is constantly shown in the display. ◊ You can play back a recording at its original tempo by pressing the two Down/Up buttons at the same time. 4) Press the button to play back the recording. The current meter is constantly shown in the display. ◊ If the display starts flashing during recording and reads the message FUL, this is to warn you that the recording memory has been used up. All data recorded up to this point will be stored, however, but recording process will be terminated. 7) Once your recording is finished stop the sequencer by pressing the button again. ◊ During playback the two tracks can be switched on/off at any time. ◊ You can accompany the music sequencer playback with the currently selected sound. ◊ TIP: If the right-hand part has been recorded on track 2 and the left-hand part on track 1, you can switch off either of the tracks and practice its part live during playback. The volume of the muted track is adjustable. If necessary you can play it back in the background at low volume for support (see chapter 5.5.5). ◊ Recording mode will thus be canceled automatically.
-
 1
1 -
2
-
3
-
4
-
5
-
6
-
7
-
8
-
9
-
 10
10 -
 11
11 -
 12
12 -
 13
13 -
 14
14 -
 15
15 -
 16
16 -
 17
17 -
 18
18 -
 19
19 -
 20
20 -
21
-
22
-
23
-
24
-
25
-
26
-
27
-
28
-
29
-
30
-
31
-
32
 |
 |
