Behringer ULTRALINK UL2000B Manual - Page 14
User preset Preset 1
 |
View all Behringer ULTRALINK UL2000B manuals
Add to My Manuals
Save this manual to your list of manuals |
Page 14 highlights
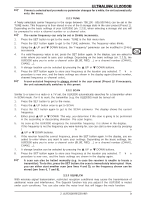
ULTRALINK UL2000B The value 0 is indicated by a very short blink of the LED, and you will easily tell a 0 from a 1. If no entry is made for more than 5 seconds (either on the selection switch or by pressing the POWER button), the LED blinks quickly 5 times, and the programming mode is aborted. After entering the 6 digits for the frequency value, enter another value to indicate the channel number under which the frequency will be stored. 4. Select a desired channel number on the selection switch, for example channel 2 (possible values: 1 - 8). If a valid value is selected, the LED blinks quickly once to confirm. This way, you can be sure that a correct channel number is being entered even before confirming your selection. 5. Confirm your selection by briefly pressing the POWER button. 6. When a valid value is selected, the LED blinks briefly again. When an invalid value is selected, the LED blinks quickly 5 times and the unit is no longer in the programming mode. In this case, start anew with step 2. After a brief interruption, a second blink code is given: the LED blinks corresponding to the value selected (in this case, 2 times) with medium tempo. 7. After a second blink pause, an additional blink code is given as a confirmation: A successfully stored frequency is signaled with 2 slow blinks. The transmitter leaves the programming mode. If the LED blinks quickly 5 times, the frequency was not stored. In this case, start anew with step 2. If no entry is made for more than 5 seconds (either on the selection switch or by pressing the POWER button), the LED blinks quickly 5 times, and the programming mode is aborted. 8. Disengage the MUTE switch. A user-assigned frequency is automatically stored in the user preset (Preset 1)! 3.2.4 Preset The ULB2000 lets you work with 4 presets, each with 8 channels. Factory presets (Presets 2, 3 and 4) In the ULB2000, there are 3 factory presets (each with 8 interference-free channels). That means that all 8 channels of one preset can run simultaneously with 8 different transmitters and receivers without causing interference to one another. The channels in the 3 factory presets are all assigned to different frequencies. This way, you can always select a frequency range that assures the best signal transmission. The following table shows which frequencies are stored in the factory presets. CHANNEL PRESET 2 PRESET 3 PRESET 4 1 798,700 MHz 798,400 MHz 798,100 MHz 2 799,950 MHz 798,950 MHz 798,650 MHz 3 800,650 MHz 799,800 MHz 799,500 MHz 4 801,050 MHz 801,450 MHz 801,150 MHz 5 802,850 MHz 803,250 MHz 802,950 MHz 6 804,500 MHz 803,650 MHz 803,350 MHz 7 805,350 MHz 804,350 MHz 804,050 MHz 8 805,900 MHz 805,600 MHz 805,300 MHz Table 3.1: Factory preset frequencies (presets 2,3 and 4) User preset (Preset 1) Preset 1 is meant for the user. Frequencies of your own choice can be stored in the 8 storage slots of this preset. 14 3. ULB2000 TRANSMITTER
-
 1
1 -
2
-
3
-
4
-
5
-
6
-
7
-
8
-
 9
9 -
 10
10 -
 11
11 -
 12
12 -
 13
13 -
 14
14 -
 15
15 -
 16
16 -
 17
17 -
 18
18 -
 19
19 -
20
-
21
-
22
-
23
-
24
-
25
-
26
 |
 |
