Behringer V-TONE GMX212 Manual - Page 5
Introduction - amp
 |
View all Behringer V-TONE GMX212 manuals
Add to My Manuals
Save this manual to your list of manuals |
Page 5 highlights
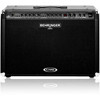
5 V-TONE GMX1200H/GMX212/GMX210/GMX112/GMX110 User Manual 1. Introduction 1.3 Before you get started Thank you for the trust that you have placed in us by buying your V-TONE. You have gotten your hands on a latest-generation guitar amp that sets completely new standards when it comes to analog modeling. Our primary goal during development was to simulate the typical sounds of analog guitar amps, and at the same time give you a powerful sound tool that you can use flexibly. In doing so, we constantly strove to create a piece of equipment that is intuitive and easy to use. The demands placed on a guitar amp are nowadays very broad. A guitarist should offer a wide array of sounds, but at the same time be able to quickly adapt to specific requirements of various applications-be it home recording, studio, live perfor-mances, etc. That's why it is very important to us to be able to offer you a maximal sound diversity as well as diverse connection possibilities with our V-TONE. Fret not: you will quickly master the V-TONE and will be able to quickly learn how to use all of its capabilities easily and intuitively. With its up-to-date circuitry, its digital signal processor (DSP) and its integrated tuner, the V-TONE features the functionality and dependability of a truly modern guitar amp. Yet it is user-friendly and problem-free as if it were a classic tube combo. We highly recommend taking your time to truly learn all of the V-TONE's functions so you can reach its maximum potential. 1.3.1 Shipment The V-TONE was carefully packed at the assembly plant to ensure secure transport. If the cardboard box is damaged, please inspect the V-Tone equipment immediately for physical damage. ◊ Damaged equipment should NEVER be sent directly to us. Please inform the dealer from whom you acquired it immediately as well as the transportation company from which you took delivery. Otherwise, all claims for replacement/repair may be rendered invalid. ◊ If the unit needs to be shipped, please always use the original packaging to avoid damage. ◊ Never let unsupervised children play with the V-TONE or with its packaging. ◊ Please dispose of all packaging materials in an environmentallyfriendly fashion. 1.3.2 Initial operation 1.1 The concept The BEHRINGER company philosophy guarantees a perfectly thought-out circuitry concept, with components that were selected without cutting any corners. The operational amplifiers that BEHRINGER uses in the V-TONE are some of the most noise-free operational amps around, and are characterized by extreme linearity and low distortion. They are complemented by low-tolerance resistors and capacitors, high-value potentiometers and switches as well as additional select components. The robust housing of your V-TONE, with its oversize power supply, gives you the peace of mind that the V-TONE will hold its own even under the most demanding stage conditions. The housing is made of high-grade, environment-friendly MDF wood consisting of multiply impregnated layers. 1.2 Dynamizer technology and analog modeling When an electric instrument is amplified, that's where you either make it or break it. Unlike the signals that have been mixed and mastered, the signals of electric instruments have extremely high signal peaks, placing the dynamic range of the amp's circuitry under immense strain. How your amp reacts to these signal peaks is one of its most defining characteristics. That's why we've equipped all V-TONE Series amps with our unique Dynamizer preamplifier circuitry. It guarantees a lively sound with a lot of punch, even when the amp is pushed to its limits. Combine that with our V-TONE analog modeling, and not only do you have amazingly authentic tube sounds at your fingertips, you also get the dynamic performance typical of the respective amp type. Crystal-clear guitar tones come through with transparency, warmth and the compression typical of tube amps. Even as distortion increases, the sound remains lively and full of power, without losing any of its assertiveness. Please make sure that your V-TONE is provided with sufficient ventilation, and never place it on other amplifiers or in the vicinity of a heater to avoid the risk of overheating. ◊ Before plugging your V-TONE into a power socket, please make sure you have selected the correct voltage: The fuse retainer near the power cord connector has three triangular markings. Two of these triangles point in opposite directions. Your V-TONE is set up for the voltage indicated near these markings, and can be altered by turning the fuse mount by 180 degrees. ATTENTION: This does not apply to export models built for 120 V, for example! ◊ If you use your V-TONE unit with a different voltage, you must change the fuses accordingly. The correct value of the fuses needed can be found in the section "Specifications". ◊ Faulty fuses must be replaced with fuses of appropriate rating, without exception! The correct value of the fuses needed can be found in the section "Specifications". Power is delivered via the cable that was delivered with the V-TONE. All mandatory safety precautions have been adhered to. ◊ Please make sure that all of your equipment is grounded at all times. For your own protection, you should never tamper with the grounding of the cable or the unit itself. The unit shall always be connected to a mains socket outlet with a protective earthing connection. MIDI connection is established using a standard DIN connector. Data transfer occurs via isolated opto-couplers. Additional information can be found in section 6 "Installation". IMPORTANT NOTES CONCERNING INSTALLATION All along, you have full control over the volume. Plainly talking, you can take the same sound you are used to at your practice room and replicate it in your bedroom at much more reasonable volume levels, or you can even record yourself while playing. ◊ The sound quality may diminish within the range of powerful broadcasting stations and high-frequency sources. Increase the distance between the transmitter and the device and use shielded cables for all connections. ◊ This user's manual will allow you to familiarize yourself with the control elements of your new V-Tone and learn all of its functions. After reading this manual, store it where you can easily find it for future reference.
-
 1
1 -
 2
2 -
 3
3 -
 4
4 -
 5
5 -
 6
6 -
 7
7 -
 8
8 -
 9
9 -
 10
10 -
 11
11 -
12
-
13
-
14
-
15
-
16
-
17
-
18
-
19
-
20
-
21
-
22
-
23
 |
 |