Beko DSFN6839 User Manual - Page 11
Installation of dishwasher
 |
View all Beko DSFN6839 manuals
Add to My Manuals
Save this manual to your list of manuals |
Page 11 highlights
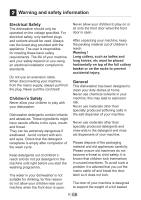
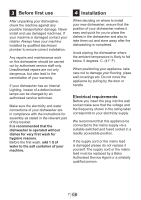
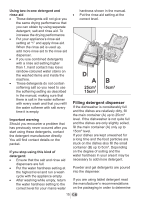
Installation of dishwasher Remove all packaging before positioning the machine. See the following diagram. Ensure there is a clearance each side of the machine to allow slight side ways movement for servicing. Note: If there is already enough space, you don't need to remove the worktop to install it under the counter. Position the machine next to a water tap and a drain. When inserting the machine, ensure that the water inlet and drain hoses are not linked or squashed. Care must be taken to ensure that the appliance does not stand on the electrical supply cable. Good levelling is essential for correct closure and sealing of the door. 10 GB
-
 1
1 -
2
-
3
-
4
-
5
-
 6
6 -
 7
7 -
 8
8 -
 9
9 -
 10
10 -
 11
11 -
 12
12 -
 13
13 -
 14
14 -
 15
15 -
 16
16 -
17
-
18
-
19
-
20
-
21
-
22
-
23
-
24
-
25
-
26
-
27
-
28
-
29
-
30
-
31
-
32
-
33
-
34
-
35
-
36
 |
 |

10
GB
ÇÆôÕÔÐÇÇ
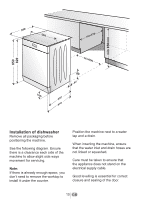
Installation of dishwasher
Remove all packaging before
positioning the machine.
See the following diagram. Ensure
there is a clearance each side of the
machine to allow slight side ways
movement for servicing.
Note:
If there is already enough space, you
don’t need to remove the worktop to
install it under the counter.
Position the machine next to a water
tap and a drain.
When inserting the machine, ensure
that the water inlet and drain hoses are
not linked or squashed.
Care must be taken to ensure that
the appliance does not stand on the
electrical supply cable.
Good levelling is essential for correct
closure and sealing of the door.