Beko HBG60 User Manual - Page 9
Filtering version
 |
View all Beko HBG60 manuals
Add to My Manuals
Save this manual to your list of manuals |
Page 9 highlights
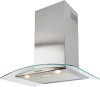
2 Installing your appliance Arrange the electrical power supply within the dimensions of the decorative flue. If your appliance is to be installed in the ducting version or in the version with external motor, prepare the air exhaust opening. Adjust the width of the support bracket of the upper flue (Fig.3). Then fix it to the ceiling using the screws A (Fig.3) in such a way that it is in line with your hood and respecting the distance from the ceiling indicated in Fig.2. Connect the flange C to the air exhaust hole using a connection pipe (Fig.5 - Stage 2). Insert the upper flue into the lower flue. Fix the lower flue to the hood using the screws B provided (Fig.5 - Stage 2), extract the upper flue up to the bracket and fix it with the screws B (Fig.3). To transform the hood from a ducting version into a filtering version, ask your dealer for the charcoal filters and follow the installation instructions. Filtering version: Install the hood and the two flues as described in the paragraph for installation of the hood in ducting version. To assemble the filtering flue refer to the instructions contained in the kit. If the kit is not provided, order it from your dealer as accessory. The filters must be applied to the suction unit positioned inside the hood. They must be centered by turning them 90 degrees until the stop catch is tripped (Fig.8). Cooker Hood / User Manual 9 / 13 EN
-
 1
1 -
2
-
3
-
 4
4 -
 5
5 -
 6
6 -
 7
7 -
 8
8 -
 9
9 -
 10
10 -
 11
11 -
 12
12 -
 13
13 -
 14
14 -
15
-
16
 |
 |
