Beko HNAG64225S User Manual - Page 13
Beko HNAG64225S Manual
 |
View all Beko HNAG64225S manuals
Add to My Manuals
Save this manual to your list of manuals |
Page 13 highlights
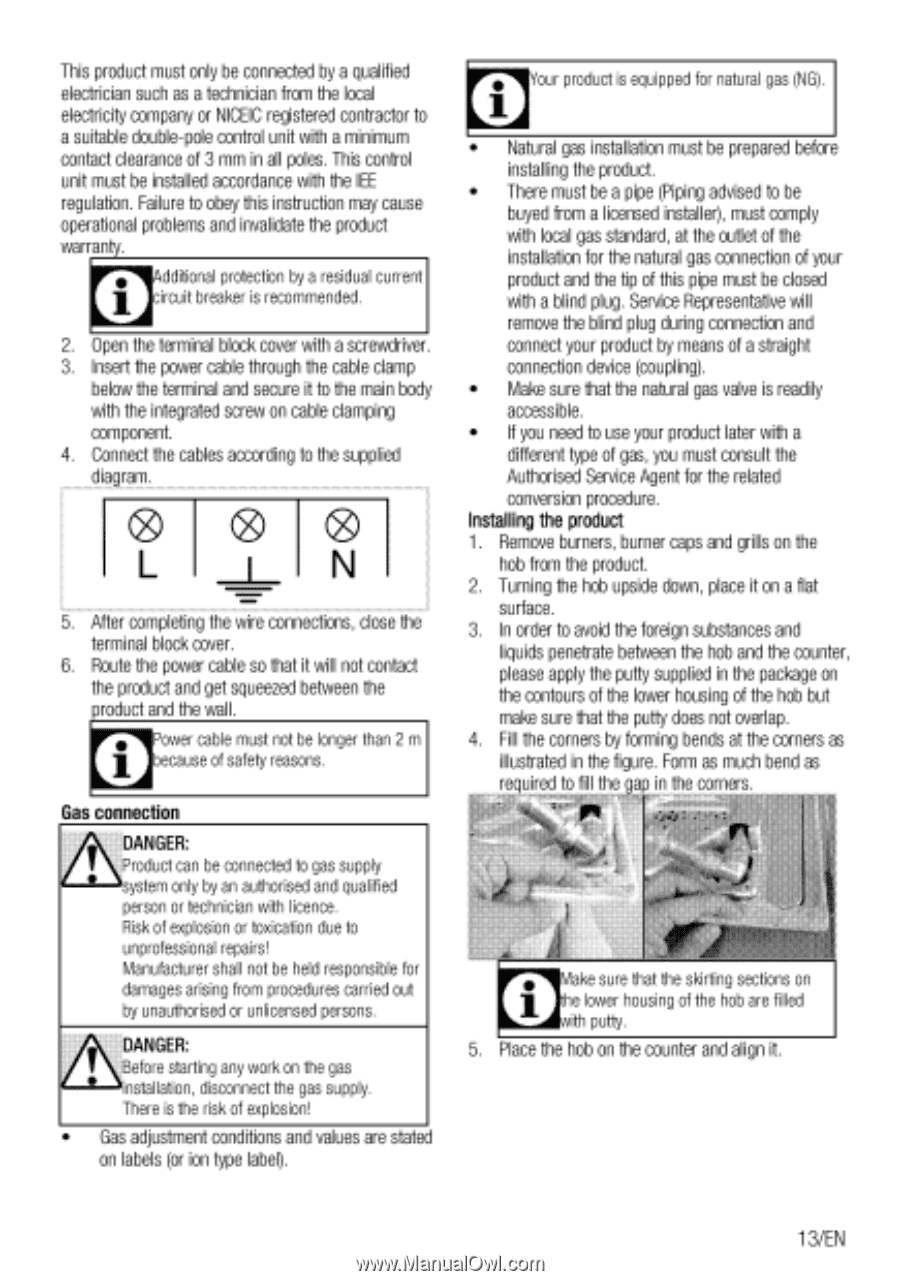
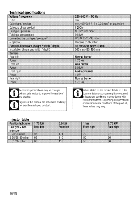
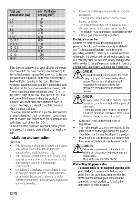
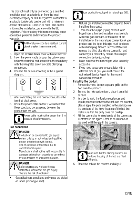
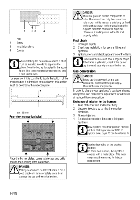
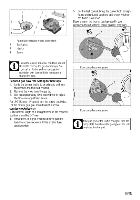
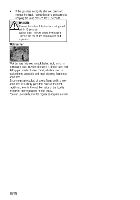
This product must only be connected by a qualified electrician such as a technician from the local electricity company or NICEIC registered contractor to a suitable double-pole control unit with a minimum contact clearance of 3 mm in all poles. This control unit must be installed accordance with the IEE regulation. Failure to obey this instruction may cause operational problems and invalidate the product warranty. Additional protection by a residual current circuit breaker is recommended. 2. Open the terminal block cover with a screwdriver 3. Insert the power cable through the cable clamp below the terminal and secure it to the main body with the integrated screw on cable clamping component. 4. Connect the cables according to the supplied diagram. I "4 N 5. After completing the wire connections, close the terminal block cover. 6. Route the power cable so that it will not contact the product and get squeezed between the product and the wall. Power cable must not be longer than 2 m because of safety reasons. Gas connection I•I DANGER: Product can be connected to gas supply system only by an authorised and qualified person or technician with licence. Risk of explosion or toxication due to unprofessional repairs! Manufacturer shall not be held responsible for damages arising from procedures carried out by unauthorised or unlicensed persons. DANGER: Before starting any work on the gas installation, disconnect the gas supply. There is the risk of explosion! • Gas adjustment conditions and values are stated on labels (or ion type label). our product is equipped for natural gas (NG). • Natural gas installation must be prepared before installing the product. • There must be a pipe (Piping advised to be buyed from a licensed installer), must comply with local gas standard, at the outlet of the installation for the natural gas connection of your product and the tip of this pipe must be closed with a blind plug. Service Representative will remove the blind plug during connection and connect your product by means of a straight connection device (coupling). • Make sure that the natural gas valve is readily accessible. • If you need to use your product later with a different type of gas, you must consult the Authorised Service Agent for the related conversion procedure. Installing the product 1. Remove burners, burner caps and grills on the hob from the product. 2. Turning the hob upside down, place it on a flat surface. 3. In order to avoid the foreign substances and liquids penetrate between the hob and the counter, please apply the putty supplied in the package on the contours of the lower housing of the hob but make sure that the putty does not overlap. 4. Fill the corners by forming bends at the corners as illustrated in the figure. Form as much bend as required to fill the gap in the corners. Make sure that the skirting sections on he lower housing of the hob are filled ith putty. 5. Place the hob on the counter and align it. 1 3/EN
-
 1
1 -
2
-
3
-
4
-
5
-
6
-
7
-
 8
8 -
 9
9 -
 10
10 -
 11
11 -
 12
12 -
 13
13 -
 14
14 -
 15
15 -
 16
16 -
 17
17 -
 18
18 -
19
-
20
-
21
-
22
-
23
-
24
 |
 |