Beko HQC64401 User Manual - Page 11
installation
 |
View all Beko HQC64401 manuals
Add to My Manuals
Save this manual to your list of manuals |
Page 11 highlights
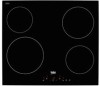
3. Fix the mounting springs inserting and screwing them through the holes of the bottom case as shown in the figure. For example, if it is possible to touch the bottom of the product since it is installed onto a drawer, this section must be covered with a wooden plate. min. 15 mm ear view (connection holes) For some models, your product may come with the mounting springs already tted on it. 4. Place the hob on the counter and align it. 5. When the hob is placed on the counter top it will be fixed easily with the help of the clamps. If the installation with this clamps are not in appropriate for your cooktop, additional 2 mounting clamps can be fixed to the front side of the product as shown in the below figure. 23 4 Hob Screw Installation clamp Counter When installing the hob onto a cabinet, a shelf must be installed in order to separate the cabinet from the hob as illustrated in the above figure. This is not required when installing onto a built-under oven. DANGER: Making connections to different holes is not a good practice in terms of safety since it can damage the gas and electrical system. DANGER: There are gas and electric components on hobs. Therefore stove, only the connection hole shown in this manual should only be fixed to the unit as shown in the manual using the supplied fasteners and screws supplied. Otherwise, it is dangerous to the life and property safety. Final check 1. Connect the power cable and switch on the product's fuse. 2. Check the functions. 11/EN
-
 1
1 -
2
-
3
-
4
-
5
-
 6
6 -
 7
7 -
 8
8 -
 9
9 -
 10
10 -
 11
11 -
 12
12 -
 13
13 -
 14
14 -
 15
15 -
 16
16 -
17
-
18
-
19
-
20
-
21
-
22
-
23
-
24
-
25
-
26
-
27
-
28
 |
 |
