BenQ PL460 P Series Video Wall Guide - Page 3
Checking the safe distance between displays, least 0.5 mm should be kept. Check
 |
View all BenQ PL460 manuals
Add to My Manuals
Save this manual to your list of manuals |
Page 3 highlights
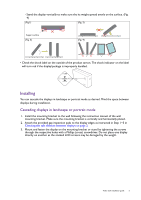
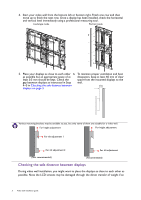
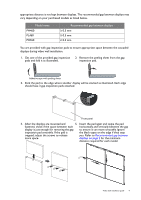
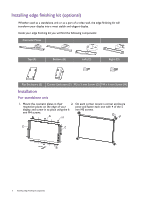
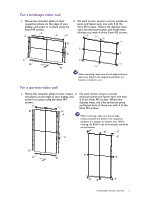
4. Start your video wall from the bottom left or bottom right. Finish one row and then move up to finish the next row. Once a display has been installed, check the horizontal and vertical level immediately using a professional measuring tool. Landscape mode Portrait mode 5. Place your displays as close to each other 6. To maintain proper ventilation and heat as possible but an appropriate space of at dissipation, keep at least 60 mm of clear least 0.5 mm should be kept. Check the space from the mounted displays to the gap between displays as instructed in Step wall. 4~5 in Checking the safe distance between displays on page 3. 60mm (1.52") Various mounting brackets may be available to you, but only some of them are suitable for a video wall. For height adjustment For height adjustment For tilt adjustment 1 For tilt adjustment 2 For tilt adjustment (Not recommended) (Recommended) Checking the safe distance between displays During video wall installation, you might want to place the displays as close to each other as possible. Note the LCD screens may be damaged through the direct transfer of weight if an 3 Video wall installation guide
-
 1
1 -
 2
2 -
 3
3 -
 4
4 -
 5
5 -
 6
6 -
 7
7
 |
 |
