Bernina 730 Manual - Page 48
stitch, right, Allow, needle, enter, otheh
 |
View all Bernina 730 manuals
Add to My Manuals
Save this manual to your list of manuals |
Page 48 highlights
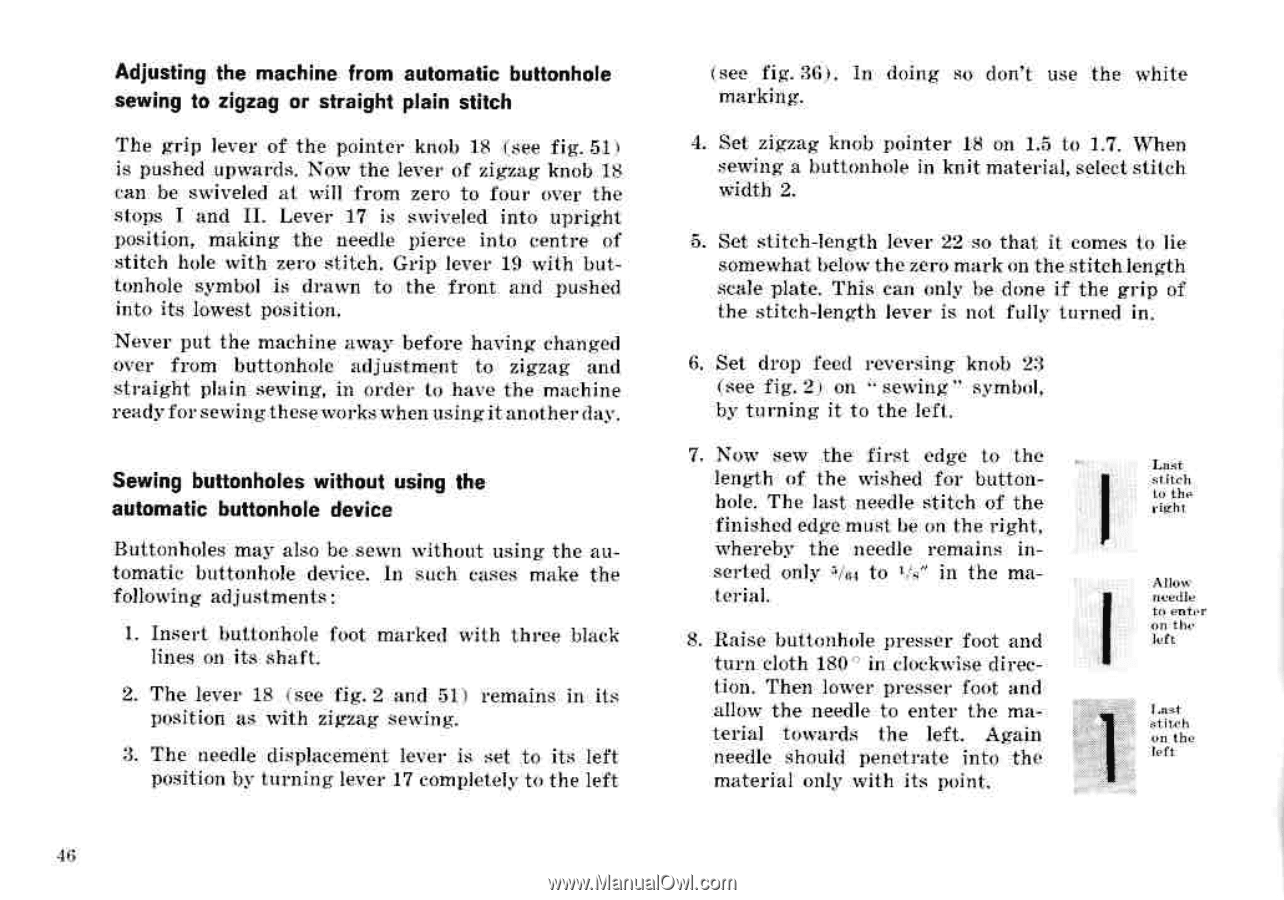
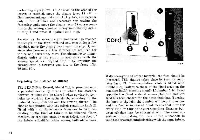
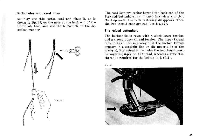
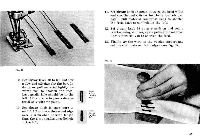
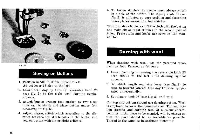
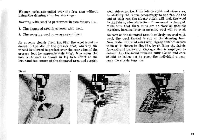
Adjusting the machine from automatic buttonhole sewing to zigzag or straight plain stitch The grip lever of the pointer knob 18 tsee fig. 511 is pushed upwards. New the lever of zigzag knob 18 can be swiveled at will from zero to four over the stops I and II. Lever 17 is swiveled into upright position, making the needle pierce into centre of stitch hole with zero stitch. Grip lever 19 with buttonhole symbol is drawn to the front and pushed into its lowest position. Never put the machine away before having changed over from buttonhole adjustment to zigzag and straight plain sewing, in order to have the machine ready for sewingtheseworks whenusingit-another day. Sewing buttonholes without using the automatic buttonhole device Buttonholes may also be.sewn without using the automatic buttonhole device. In such cases make the following adjustments: I. Insert buttonhole foot marked with three black lines on its, shaft. 2. The lever 18 isee fig. 2 and 51) remains in its position as with zigzag sewing. 3. The needle displacement lever is set to its left position by turning lever 17 completely to the left 46 ( see fig. 36,. In doing so don't use the white marking. 4. Set zigzag knob pointer 18 on 1.5 to 1.7. When sewing a buttonhole in knit material, select stitch width 2. Z. Set stitch-length lever 22 -so that it comes to lie somewhat below the zero mark on the stitchlength scale plate. This can only be done if the grip of the stitch-length lever is not fully turned in. 6. Set drop feed reversing knob 23 (see fig. 2) on " sewing" symbol, by turning it to the left. 7. Now sew the first edge to the length of the wished fOr buttonhole. The last needle stitch of the finished edge must be on the right. whereby the needle remains inserted only ahti to in the material. 8. Raise buttonhole presser foot and turn cloth 180 in clockwise direction. Then lower presser foot and allow the needle to enter the material towards the left. Again needle should penetrate into the material only with its point. Lnnt stitch to the right Allow needle to enter on the left Last otheh on the len
-
 1
1 -
2
-
3
-
4
-
5
-
6
-
7
-
8
-
9
-
10
-
11
-
12
-
13
-
14
-
15
-
16
-
17
-
18
-
19
-
20
-
21
-
22
-
23
-
24
-
25
-
26
-
27
-
28
-
29
-
30
-
31
-
32
-
33
-
34
-
35
-
36
-
37
-
38
-
39
-
40
-
41
-
42
-
 43
43 -
 44
44 -
 45
45 -
 46
46 -
 47
47 -
 48
48 -
 49
49 -
 50
50 -
 51
51 -
 52
52 -
 53
53 -
54
-
55
-
56
-
57
-
58
-
59
-
60
-
61
-
62
-
63
-
64
-
65
-
66
-
67
-
68
-
69
-
70
-
71
-
72
-
73
-
74
-
75
-
76
-
77
-
78
-
79
-
80
-
81
-
82
-
83
-
84
 |
 |