Biostar I945G-M7 Setup Manual - Page 8
Hardware Installation - cpu
 |
View all Biostar I945G-M7 manuals
Add to My Manuals
Save this manual to your list of manuals |
Page 8 highlights
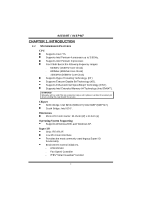
945G-M7 / 945P-M7 CHAPTER 2: HARDWARE INSTALLATION 2.1 INSTALLING CENTRAL PROCESSING UNIT (CPU) Special Notice: Remove Pin Cap before installation, and make good preservation for future use. When the CPU is removed, cover the Pin Cap on the empty socket to ensure pin legs won't be damaged. Pin Cap Step 1: Pull the socket locking lever out from the socket and then raise the lever up to a 90-degree angle. 6
-
 1
1 -
2
-
 3
3 -
 4
4 -
 5
5 -
 6
6 -
 7
7 -
 8
8 -
 9
9 -
 10
10 -
 11
11 -
 12
12 -
 13
13 -
14
-
15
-
16
-
17
-
18
-
19
-
20
-
21
-
22
-
23
-
24
-
25
-
26
-
27
-
28
-
29
-
30
-
31
-
32
-
33
-
34
-
35
-
36
-
37
-
38
-
39
-
40
-
41
-
42
-
43
-
44
-
45
-
46
-
47
-
48
-
49
-
50
-
51
-
52
-
53
-
54
-
55
-
56
-
57
-
58
-
59
-
60
-
61
-
62
-
63
-
64
-
65
-
66
-
67
-
68
 |
 |

945G-M7 / 945P-M7
6
Pin Cap
CHAPTER 2: HARDWARE INSTALLATION
2.1
I
NSTALLING
C
ENTRAL
P
ROCESSING
U
NIT
(CPU)
Step 1:
Pull the socket locking lever out from the socket and then raise
the lever up to a 90-degree angle.
Special Notice:
Remove Pin Cap before installation, and make
good preservation for future use. When the CPU
is removed, cover the Pin Cap on the empty
socket to ensure pin legs won’t be damaged.