Bissell Trilogy Pet User Guide - Page 5
Caution - vacuum cleaner
 |
View all Bissell Trilogy Pet manuals
Add to My Manuals
Save this manual to your list of manuals |
Page 5 highlights
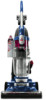
Assembly Tools needed: Philips head screwdriver. Attach handle to vacuum 1. Locate vacuum handle and the bag that contains extension wand support, lower cord wrap, and screws. Caution: Do not plug in your vacuum cleaner until you are familiar with all instructions and operating procedures. 2. Stand vacuum upright and from the back 2 of the vacuum, slide the base of the handle firmly into the grooves at the top of the vacuum body. Continue to push so there are no gaps and the front of the handle is flush with front of the vacuum body. 3 3. Insert two of the four screws provided into the existing holes and tighten with screw driver to fasten handle to vacuum body. Attach storage clips, tool, and vacuum hose 1. Locate the bag that contains extension wand support, lower cord wrap, and remaining two screws. 2. Attach extension wand support half way down on the back of the vacuum body. Insert one screw and tighten with screwdriver. 2 3 3. Attach lower cord wrap to back of the vacuum (position toward bottom of vacuum body). Insert remaining screw and tighten securely with screwdriver. 4. Attach Twist 'n Snap™ hose by lining up the tabbed end of the hose into the opening by 4 5 the clear tank on the back of the vacuum. Twist to the right to lock into place. 5. Insert opposite hose end base into suction inlet on the side of vacuum near the wheel. NOTE: The vacuum will not operate effectively unless the hose is firmly attached. 6. Store crevice tool into the extension wand and snap into extension wand support on the back of the vacuum. 7. Slide dusting brush into the storage clip on the right side of vacuum (when viewing from front). Model 81M9-1 comes with Pet Contour tool® that stores in same place. 8. Store TurboBrush® Tool in the hole marked "tool" on the top of the handle arch. Note: Model 81M9-1 comes with Pet TurboBrush® Tool. www.bissell.com 5 800.237.7691
-
 1
1 -
 2
2 -
 3
3 -
 4
4 -
 5
5 -
 6
6 -
 7
7 -
 8
8 -
 9
9 -
 10
10 -
 11
11 -
12
-
13
-
14
-
15
-
16
-
17
-
18
-
19
-
20
 |
 |
