Bosch B22CS50SNB Use and Care Manual - Page 9
Door opening angle, Unscrewing the appliance doors
 |
View all Bosch B22CS50SNB manuals
Add to My Manuals
Save this manual to your list of manuals |
Page 9 highlights
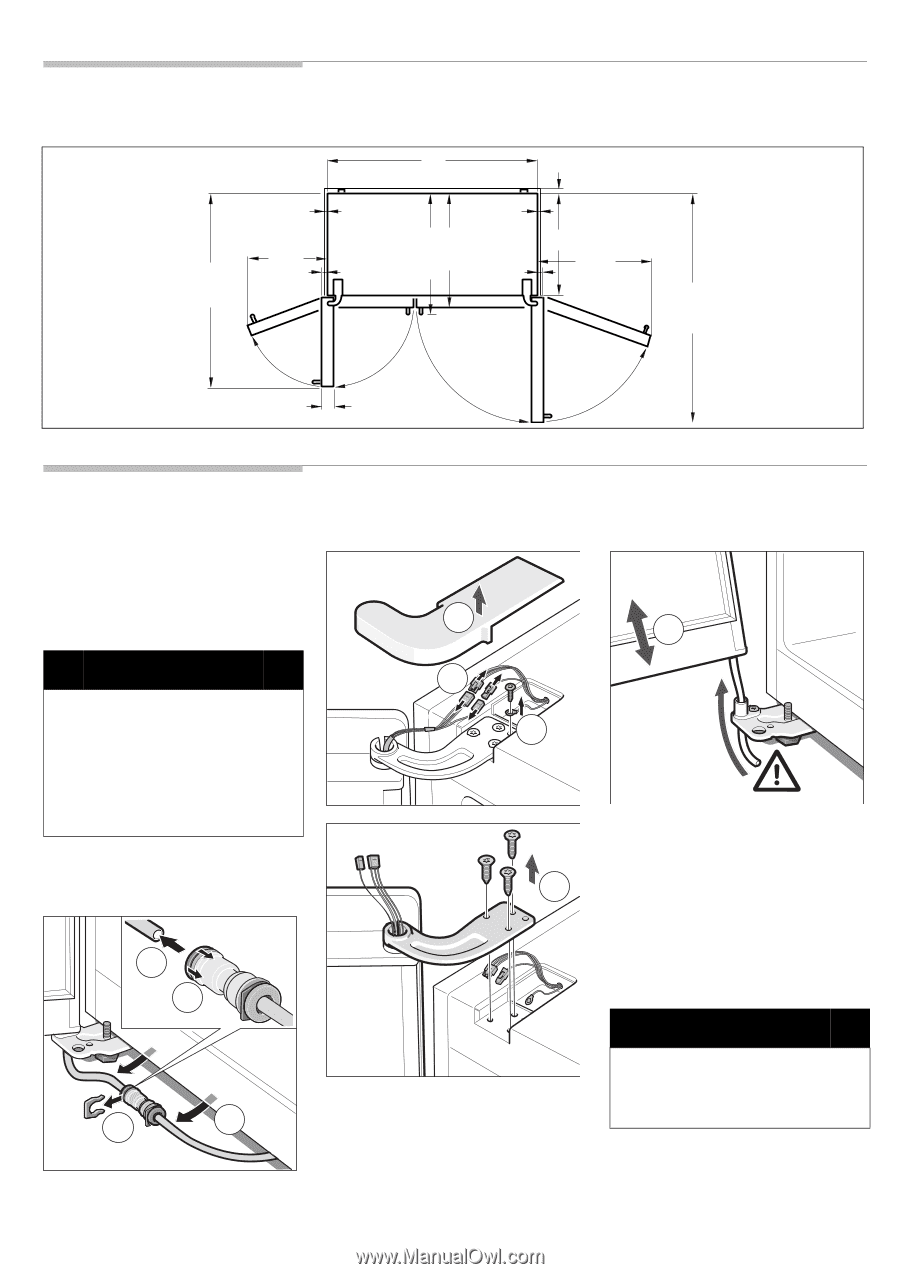
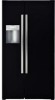
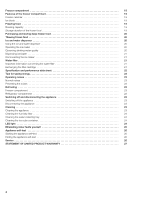
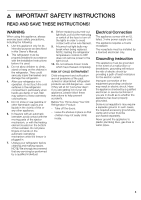
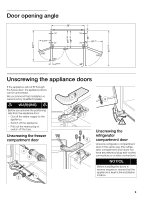
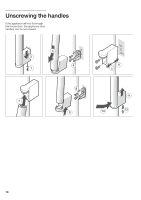
Door opening angle 1" 1/8" 131/2" 3/4" 3031/32" 286/16" 36" 1/8" 181/4" 3/4" 24" 409/16" 160° 90° 29/16" 160° 90° 4510/16" Unscrewing the appliance doors If the appliance will not fit through the house door, the appliance doors can be unscrewed. We recommend that installation is carried out by Qualified Installer. m WARNING m Before you unscrew the positioning aids from the appliance door: - Cut off the water supply to the appliance. - Switch off the appliance. - Pull out the mains plug or switch off the fuse. Unscrewing the freezer compartment door 4 3 2 1 5 9 6 7 Unscrewing the refrigerator 8 compartment door Unscrew refrigerator compartment door in the same way (the refrigerator compartment door does not have any electrical plug-and-socket connections or a water connection). NOTICE Before installing the doors in reverse sequence, ensure that the appliance is level in the installation location. 9
-
 1
1 -
2
-
3
-
 4
4 -
 5
5 -
 6
6 -
 7
7 -
 8
8 -
 9
9 -
 10
10 -
 11
11 -
 12
12 -
 13
13 -
 14
14 -
15
-
16
-
17
-
18
-
19
-
20
-
21
-
22
-
23
-
24
-
25
-
26
-
27
-
28
-
29
-
30
-
31
-
32
-
33
-
34
-
35
-
36
-
37
-
38
-
39
-
40
-
41
-
42
-
43
-
44
-
45
-
46
-
47
-
48
-
49
-
50
-
51
-
52
-
53
-
54
-
55
-
56
-
57
-
58
-
59
-
60
-
61
-
62
-
63
-
64
-
65
-
66
-
67
-
68
-
69
-
70
-
71
-
72
-
73
-
74
-
75
-
76
-
77
-
78
-
79
-
80
-
81
-
82
-
83
-
84
-
85
-
86
-
87
-
88
 |
 |