Bose Acoustimass 5 Series III Owner's guide - Page 9
Connecting the Acoustimass, Series III system to your receiver - 5 1 channel
 |
View all Bose Acoustimass 5 Series III manuals
Add to My Manuals
Save this manual to your list of manuals |
Page 9 highlights
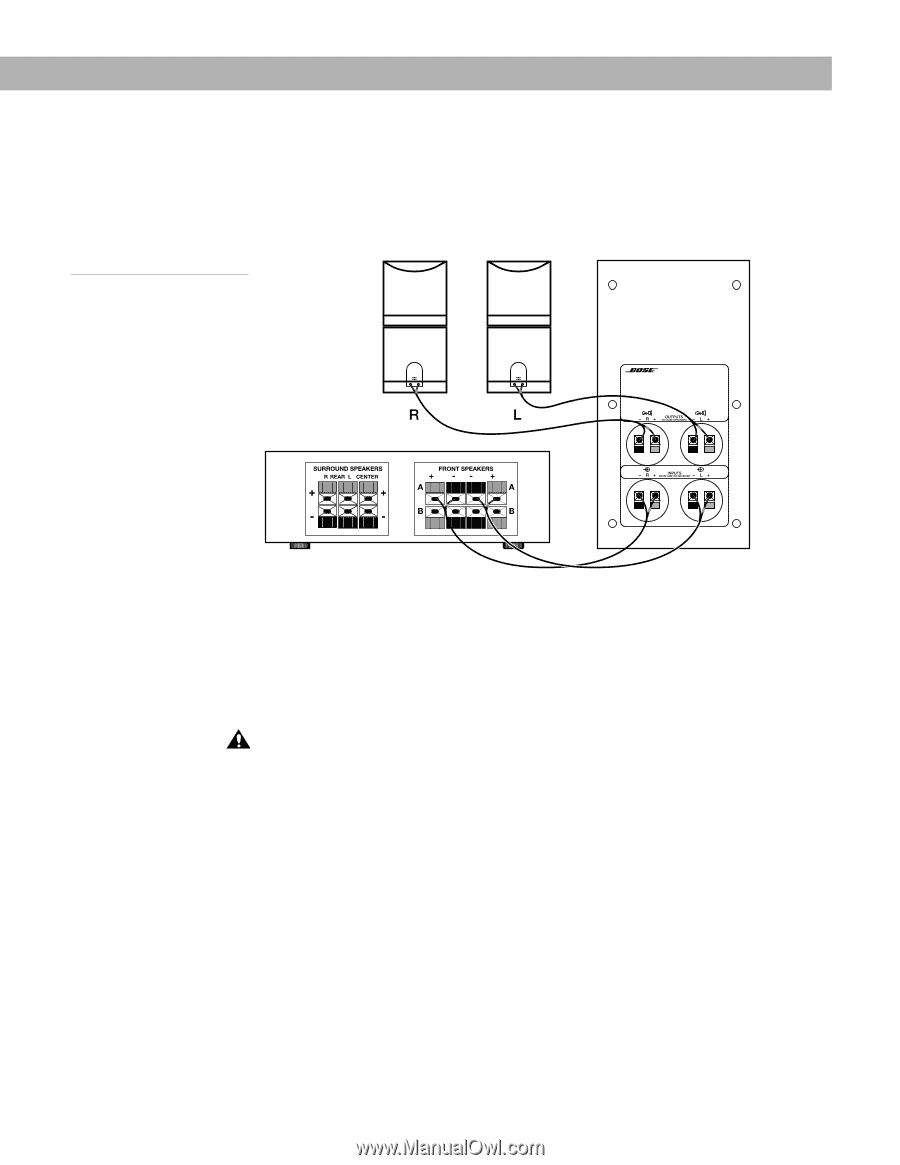
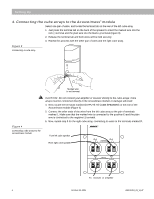
English Setting Up 5. Connecting the Acoustimass® 5 Series III system to your receiver 1. Select one of the remaining two pairs of wires, and locate the left channel terminals on the Acoustimass module marked INPUTS FROM AMP OR RECEIVER. Depress the red, positive (+) tab, insert the marked wire and release the tab. Repeat the process for the black, negative (-) tab and the plain wire (Figure 5). 2. Then follow the same procedure for the right channel, using the last pair of wires. Figure 5 Connecting the Acoustimass module to your receiver R L 3. Disconnect your receiver or amplifier from the AC power (mains) outlet. 4. Locate the speaker outputs on your receiver. Connect the other ends of the wire from the left channel of the Acoustimass module to the terminals marked L or LEFT. Make sure that the marked wire is connected to the positive (+) and the plain wire is connected to the negative (-) terminal. 5. Repeat these last two steps for the right channel. 6. Your set-up is complete. Plug in your receiver, turn the system on, and enjoy your Acoustimass 5 Series III speakers! CAUTION: Before you plug in your receiver or amplifier, make sure that no strands of wire from any terminal are brushing against any other terminal. Such "bridged" wires create short circuits which can damage your receiver or amplifier. AM196451_05_V.pdf October 23, 2001 7
-
 1
1 -
2
-
3
-
 4
4 -
 5
5 -
 6
6 -
 7
7 -
 8
8 -
 9
9 -
 10
10 -
 11
11 -
 12
12 -
 13
13 -
 14
14 -
15
-
16
 |
 |