Boss Audio 508UAB User Manual - Page 4
Installation
 |
View all Boss Audio 508UAB manuals
Add to My Manuals
Save this manual to your list of manuals |
Page 4 highlights
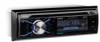
INSTALLATION Prepare Radio 1. Before you begin, disconnect the battery negative terminal. 2. Remove the transport screws. 3. Remove chassis from the mounting sleeve. BRACKET KEY PLASTIC TRIM OUT BRACKET KEY If you want to remove the chassis from the mounting sleeve, remove the plastic trim out from both sides. Next, insert the two bracket keys into the left and right side of the chassis, as illustrated, to separate the chassis from the housing. Mount Radio Refer to the "Installation Diagram" to install the unit. 1. Bend the tabs on the mounting sleeve, where necessary, to ensure than the front part of the main unit will remain into the vehicle dash opening. 2. Insert radio into the mounting sleeve. 3. Use a metal strap to secure the rear part of the chassis using the hardware indicated. 4. Make wiring connections, as illustrated in the "Wiring Diagram." 5. Install the plastic trim out. 2
-
 1
1 -
 2
2 -
 3
3 -
 4
4 -
 5
5 -
 6
6 -
 7
7 -
 8
8 -
 9
9 -
 10
10 -
11
-
12
-
13
-
14
-
15
-
16
 |
 |
