Boss Audio BV860B User Manual - Page 8
on/off, Wheel, setting
 |
View all Boss Audio BV860B manuals
Add to My Manuals
Save this manual to your list of manuals |
Page 8 highlights
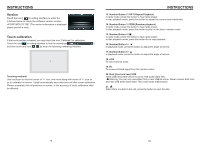
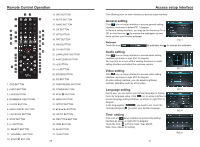
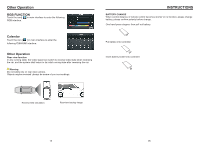
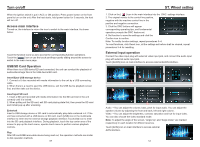
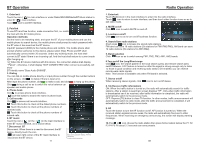
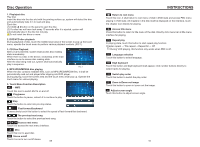
Turn on/off When the ignition switch is put in ACC or ON position, Press power button on the front panel to turn on the unit. After the host starts, hold power button for 3 seconds, the host will turn off. Access main interface Turned on, the interface to return the icon to switch to the main interface. As shown below: 90SY Ccl-01-aci5 U1 ) RADIO AM FREE STREAMING Touch the function icons so as to access the corresponding function operations. Touch the [il ] icon or use the touch pen/finger gently sliding around the screen to switch to the main menu page. USB/SD Card Operation When there is a USB device/SD card connected, the unit can conduct the playback of audio/video/image files in the USB device/SD card. Insert/Eject USB storage device 1. Connect a U disc recorded with media information to the unit by a USB connecting cable. 2. When there is a need to eject the USB device, exit the USB device playback screen first, and then take out the device. Insert/eject SD card 1. Insert a SD card recorded with media information into the SD card slot in the unit correctly until it is locked. 2. When pulling out the SD card, exit SD card playing state first, then press the SD card and it shall pop up after unlocking. Enter/exit Insert a USB storage device or SD card to automatically play data contained in it. If the unit has connected with a USB device or SD card, touch [USB] icon in the multimedia interface to enter into the external storage playback interface; Touch [SD] icon to enter into the SD card playback interface. During playback, touch the top center area of the screen to pop up the touch menu, operate touch menu to perform various playback controls. Play After SD card/USB removable device being read out, the operation methods are similar to disk operation methods. 07 ST. Wheel setting 1. Click on the [ ] icon in the main interface into the SWC. settings interface. 2. The original vehicle to the control line positive, • negative with the machine control line in the positive and negative connection. 3. Click the SWC buttons will appear HI H if corresponding operating tips, and fundamental 9 operation prompts the SWC feature set. ' . OK 4. Set function to save the settings and click the Confirm icon to confirm. Note: To modify function settings, repeat procedures 3-4. To reset functions, click Reset icon, all the settings set before shall be cleared, repeat procedures 3-4 for resetting. External input operation Connect the video input plug with external video input jack, and connect the audio input plug with external audio input jack. Touch [AUXIN] icon on main interface to access external AUXIN interface. •15 Eo 0000 0000 ROO P00 0 0 0 .5, .... 000 1111111 1215 2150m 111. X. IMPS 54xdard Ma Pack Pep Cptirt. I- 1 < 0 1 1 1 ouo 1.10 ICIAM A GErrERAL WALLPAPER 01..30AM INALIWAPER 15 Ler rod.ORESIaI C 54 0 41 b ID 0 0 -cluEo 01.10AM AMik. IS Me' 07 07 0 a7 Audio -You can adjust the volume, bass, pitch for input audio. You can adjust the speaker volume by adjusting the front and back, left and right column. Video -sYou can adjust the brightness, contrast, saturation and hue for input video. You can also choose the video standard mode. Note: To adjust the angle of the screen, "Angle Up" and "Angle Down" are marked respectively in each location for different sources. Touch [AVIN] icon on main interface to access external AVIN interface. 12
-
 1
1 -
2
-
 3
3 -
 4
4 -
 5
5 -
 6
6 -
 7
7 -
 8
8 -
 9
9 -
 10
10
 |
 |
