Brother International ADS-1700W BR-Receipts Users Guide Windows - Page 22
Creating Receipts Manually, Using Receipt Templates, Select Vendor, Automatically crop the receipts
 |
View all Brother International ADS-1700W manuals
Add to My Manuals
Save this manual to your list of manuals |
Page 22 highlights
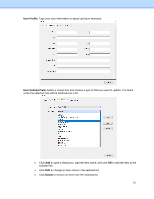
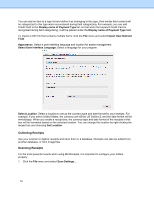
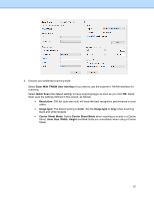
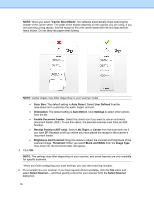
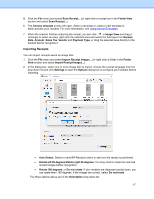
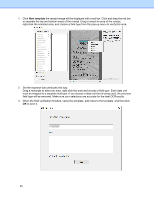
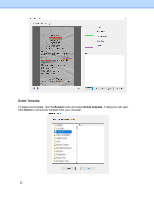
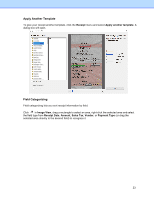
• Automatically crop the receipts: Select to have BR-Receipts cropimages automatically during importing. • Display the last receipt imported or scanned: Select to display the last receipt imported or scanned. If this option is not selected, the most recently opened receipt will be displayed. • Click OK to finish. 3. Click Open, the Choose template screen will open. Select a template or create a new template to batch-process your receipts. For more information, see Using Receipt Templates. 4. The image data will be added to the current receipt database. Creating Receipts Manually If your receipt is not in good condition or is unreadable by the scanner, you can manually add the receipt record to the database. 1. Click the Receipt menu and select Manually Create a New Receipt, (or right-click a receipt box and select Manually Create a New Receipt). A set of empty fields will open in Edit mode, allowing you to enter text. 2. In Edit view, you can select or type receipt information in each field to create or reconstruct the receipt. Using Receipt Templates If your receipts share common data such as where the receipts originated, how goods and services were paid for, and who is responsible for them, you can use a template for batch processing. A template consists of a top area (the top part of the receipt), and a bottom area (the lowest part of the receipt). When you scan or import receipts, a dialog box will open to ask if you want to apply an existing template, create a new template, or manually enter the receipt information. You can choose a different command for each receipt. Select Vendor Select a template from the vendor folder in the left pane. Select a template style and click OK to apply it to your receipt. 18
-
 1
1 -
2
-
3
-
4
-
5
-
6
-
7
-
8
-
9
-
10
-
11
-
12
-
13
-
14
-
15
-
16
-
 17
17 -
 18
18 -
 19
19 -
 20
20 -
 21
21 -
 22
22 -
 23
23 -
 24
24 -
 25
25 -
 26
26 -
 27
27 -
28
-
29
-
30
-
31
-
32
 |
 |
