Brother International BM-917B Instruction Manual - English - Page 11
Installing the belt, 3. Installing the button tray, 4. Installing the cotton stand
 |
View all Brother International BM-917B manuals
Add to My Manuals
Save this manual to your list of manuals |
Page 11 highlights
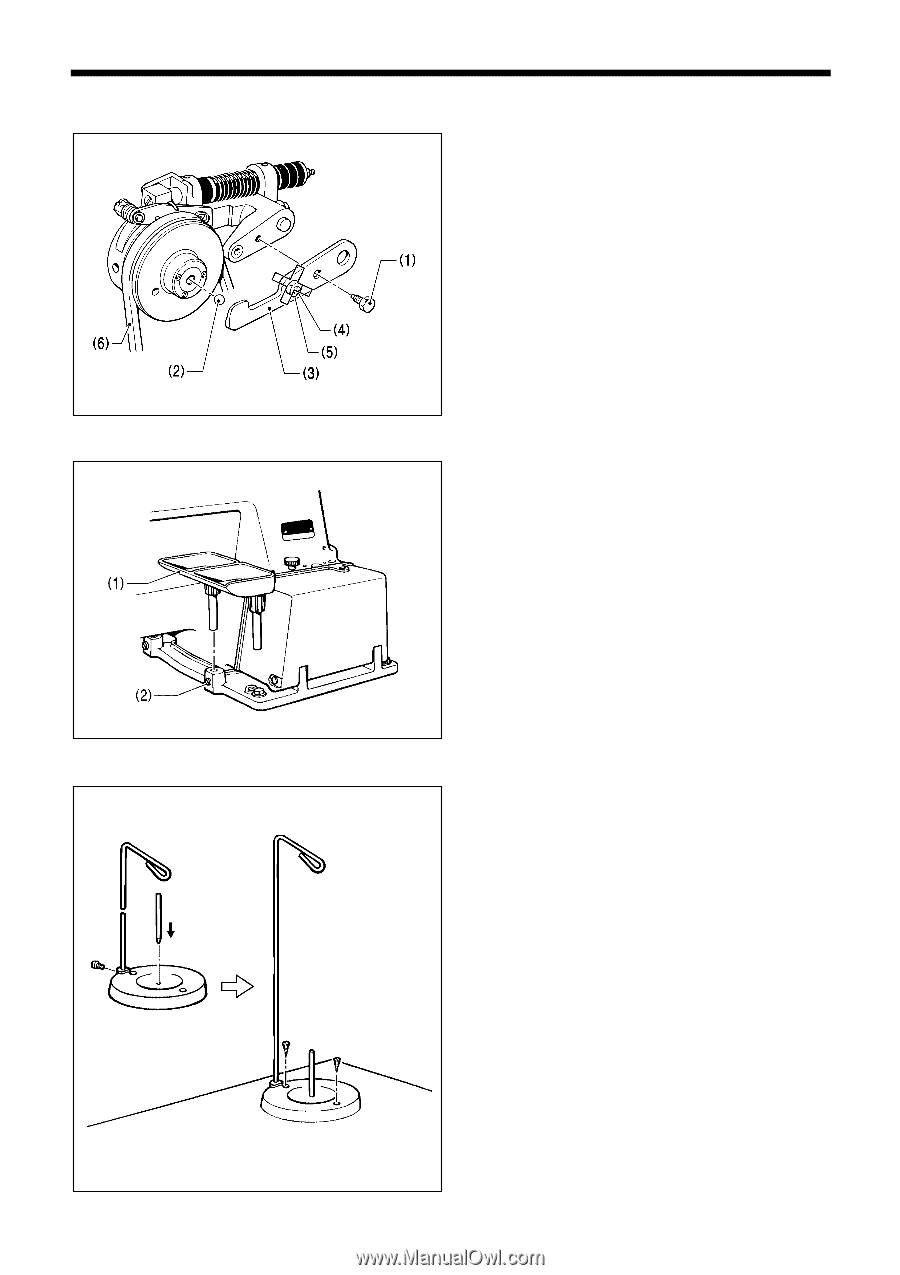
5. INSTALLATION 5-2. Installing the belt 1. Loosen the screw (1), and then remove the ball presser plate (3) while being careful not to drop the bearing ball (2). NOTE: Do not move the screw (4) and the nut (5). 2. Attach the belt (6). 3. Place the bearing ball (2) back into the hole, and then install the ball presser plate (3) with the screw (1). 5-3. Installing the button tray 1971M 1. Install the button tray (1) to either the left or right side of the bed. 2. Secure it by tightening the set screw (2). 5-4. Installing the cotton stand 1972M Assmble the cotton stand as shown in the illustration, and then install it to the far right corner of the table with the two wood screws. Push in 1973M 5 BM-917B, 917C
-
 1
1 -
2
-
3
-
4
-
5
-
 6
6 -
 7
7 -
 8
8 -
 9
9 -
 10
10 -
 11
11 -
 12
12 -
 13
13 -
 14
14 -
 15
15 -
 16
16 -
17
-
18
-
19
-
20
-
21
-
22
-
23
-
24
-
25
-
26
-
27
-
28
-
29
-
30
-
31
-
32
-
33
-
34
-
35
-
36
 |
 |
BM-917B, 917C
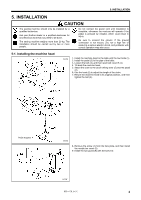
5. INSTALLATION
5
5-2. Installing the belt
1.
Loosen the screw (1), and then remove the ball presser
plate (3) while being careful not to drop the bearing ball (2).
NOTE:
Do not move the screw (4) and the nut (5).
2.
Attach the belt (6).
3.
Place the bearing ball (2) back into the hole, and then
install the ball presser plate (3) with the screw (1).
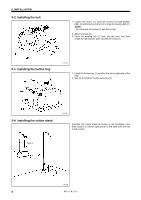
5-3. Installing the button tray
1.
Install the button tray (1) to either the left or right side of the
bed.
2.
Secure it by tightening the set screw (2).
5-4. Installing the cotton stand
Assmble the cotton stand as shown in the illustration, and
then install it to the far right corner of the table with the two
wood screws.
1971M
1972M
1973M
Push in