Brother International BM-917B Instruction Manual - English - Page 31
Troubleshooting, Caution
 |
View all Brother International BM-917B manuals
Add to My Manuals
Save this manual to your list of manuals |
Page 31 highlights
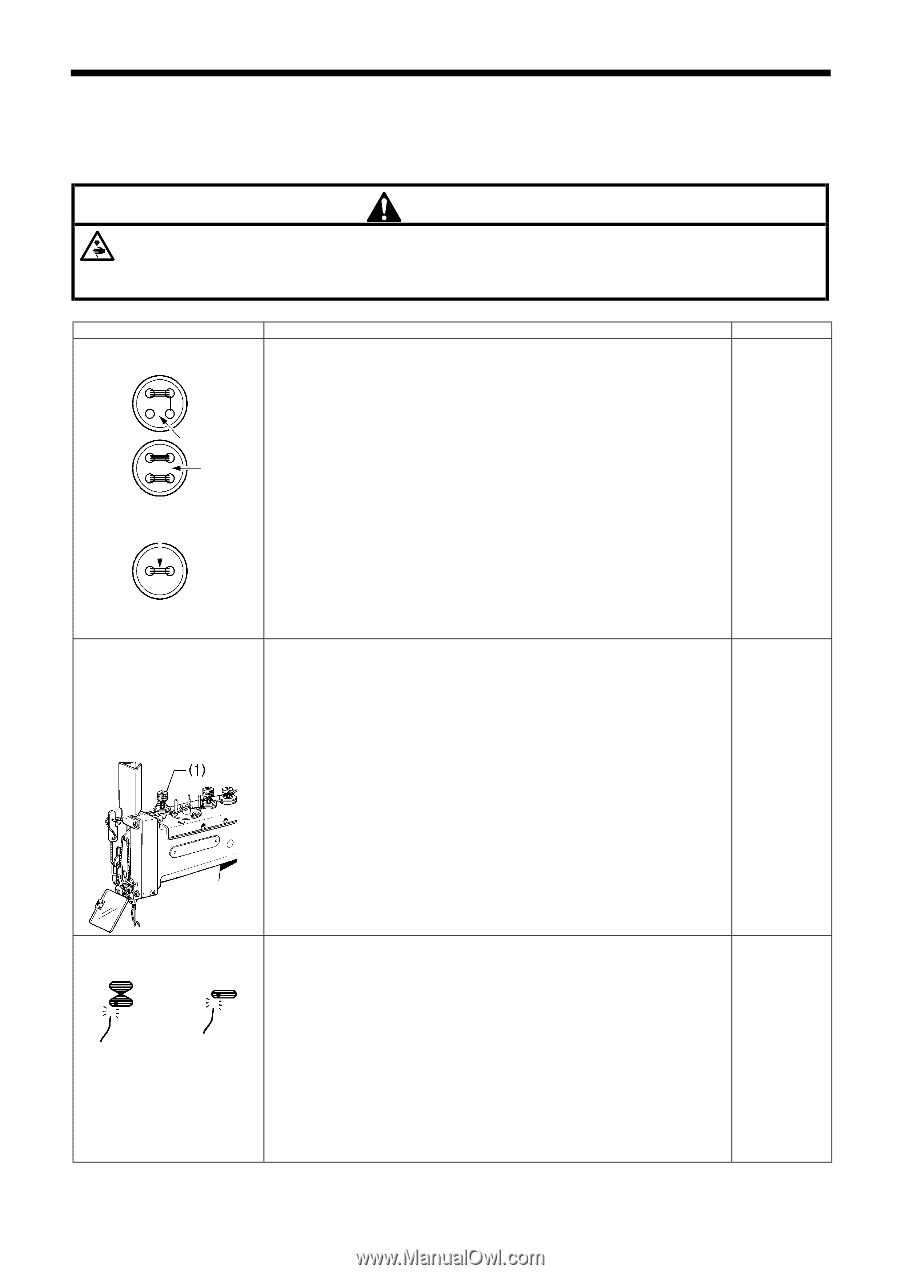
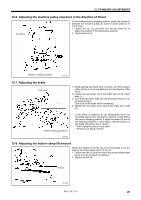
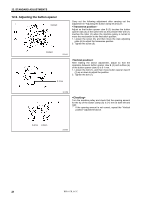
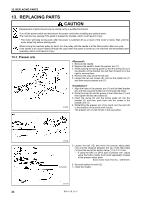
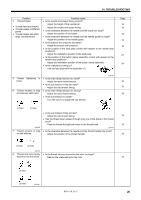
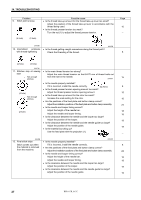
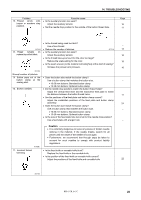
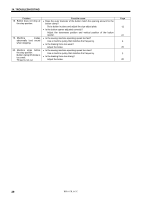
14. TROUBLESHOOTING 14. TROUBLESHOOTING ! Please check the following points before calling for repairs or service. ! If the following suggestions do not solve the problem, turn off the machine power supply and contact your nearest Brother service center. CAUTION Turn off the power switch and disconnect the power cord before carrying out troubleshooting. The machine may operate if the pedal is pressed by mistake, which could result in injury. * The motor will keep turning even after the power is switched off as a result of the motor's inertia. Wait until the motor stops fully before starting work. Problem 1. Broken crossover stitch Not enough stitches 2058M 2. Thread frays at final stitch • Stitch is normal. • Thread frays between thread presser tension(1) and material. Possible cause • Is the main thread tension too strong? Adjust the main thread tension. • Is the sub tension timing too late? Adjust the sub tension timing. • Is an extra fine thread (cotton #80/3S, #70/2S) being used? If using an extra fine thread, pass the thread through only one of the holes in the thread hook. • Is the clearance between the needle and the thread handler too small or too large? Adjust the position of the thread handler. • Is the clearance between the needle and the looper too small? Adjust the position of the looper. • Is the auxiliary tension too weak? Adjust the auxiliary tension. • Is the needle too thin ? Replace the needle with a needle that is one rank thicker. • Is the thread take-up amount for the thread take-up lever too large? Adjust the position of the thread take-up lever in accordance with the thread being used. • Is the button opener adjusted correctly? Adjust the transverse position and vertical position of the button opener. Page ・ 15 ・ 15 ・ ・ 8 ・ 19 ・ 19 ・ 16 ・ - ・ 10 ・ 21 2059M 3. Thread frays at stitch • Is the main thread tension too strong? ・ joints. Adjust the main thread tension. 15 • Is the thread take-up amount for the thread take-up lever too large? ・ Adjust the position of the thread take-up lever in accordance with the thread being used. 10 (4-hole) • Is the button opener adjusted correctly? ・ (2-hole) Adjust the transverse position and vertical position of the button opener. 21 • Insufficient thread remainder. • Stitch is too short. 2060M 25 BM-917B, 917C
-
 1
1 -
2
-
3
-
4
-
5
-
6
-
7
-
8
-
9
-
10
-
11
-
12
-
13
-
14
-
15
-
16
-
17
-
18
-
19
-
20
-
21
-
22
-
23
-
24
-
25
-
 26
26 -
 27
27 -
 28
28 -
 29
29 -
 30
30 -
 31
31 -
 32
32 -
 33
33 -
 34
34 -
 35
35 -
 36
36
 |
 |