Brother International Entrepreneur Pro PR-1000 Kit 1 Installation Guide - Mult - Page 4
Accessories, Contents of CD-ROM, Installation Overview
 |
View all Brother International Entrepreneur Pro PR-1000 manuals
Add to My Manuals
Save this manual to your list of manuals |
Page 4 highlights
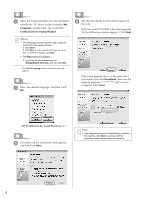
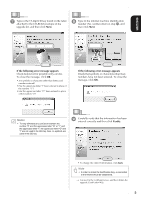
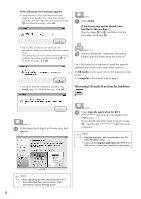
Accessories The following items are included with your purchase. Please verify all contents and if anything is missing or damaged, contact your authorized dealer. • CD-ROM (For details regarding contents, refer to the following.) • Installation Guide (this guide) Installation Overview First, use the Certification Key Issuing Wizard on the enclosed CD-ROM to obtain a Certification Key. Then, use the Certification key within the Settings screen, page 6, to activate the upgrade application for KIT I on the embroidery machine. In the procedures section, indicates operations performed with the embroidery machine and indicates operations performed with the computer. In addition, this kit contains sheets of embroidery positioning stickers. These are necessary for using the pattern connecting function. Refer to the Operation Manual for use. • Embroidery positioning sticker sheets [Step 1] Make a note of the internal machine identification number (No.). [Step 2] Insert the CD-ROM into the computer's CD-ROM drive, and then start the Certification Key Issuing Wizard. Note • For details on proper use of the included accessory see the Operation Manual viewable from the disc by clicking on the "manual" folder and selecting your preferred language. You may also view the Operation Manual by clicking on the "manual_index.pdf" icon contained within the disc and selecting your preferred language. Contents of CD-ROM • Certification Key Issuing Wizard • Upgrade KIT I Operation Manual (PDF) * Adobe Reader is required for viewing and printing the Operation Manual. • Upgrade application for KIT I Note • Upgrade application data is contained in the "PR1000_PR1000e" folder. [Step 3] Follow the wizard instructions for obtaining the Certification Key. [Step 4] Install the upgrade application for KIT I on the embroidery machine. [Step 5] Remove the USB media, and turn the machine off and then on again. [Step 6] After the upgrade has been successfully installed, certify the "KIT I" in the Settings screen of the embroidery machine. 2
-
 1
1 -
 2
2 -
 3
3 -
 4
4 -
 5
5 -
 6
6 -
 7
7 -
 8
8 -
 9
9 -
 10
10 -
11
-
12
-
13
-
14
-
15
-
16
-
17
-
18
-
19
-
20
-
21
-
22
-
23
-
24
-
25
-
26
-
27
-
28
-
29
-
30
-
31
-
32
-
33
-
34
-
35
-
36
-
37
-
38
-
39
-
40
-
41
-
42
-
43
-
44
-
45
-
46
-
47
-
48
-
49
-
50
-
51
-
52
-
53
-
54
-
55
-
56
-
57
-
58
-
59
-
60
-
61
-
62
-
63
-
64
-
65
-
66
-
67
-
68
-
69
-
70
-
71
-
72
-
73
-
74
-
75
-
76
-
77
-
78
-
79
-
80
-
81
-
82
-
83
-
84
 |
 |