Brother International MFC-7360N Network Users Manual - English
Brother International MFC-7360N Manual
 |
UPC - 012502627005
View all Brother International MFC-7360N manuals
Add to My Manuals
Save this manual to your list of manuals |
Brother International MFC-7360N manual content summary:
- Brother International MFC-7360N | Network Users Manual - English - Page 1
, see the Network Glossary. To download the latest manual, please visit the Brother Solutions Center at (http://solutions.brother.com/). You can also download the latest drivers and utilities for your machine, read FAQs and troubleshooting tips or learn about special printing solutions from the - Brother International MFC-7360N | Network Users Manual - English - Page 2
this User's Guide: IMPORTANT Note IMPORTANT Windows® XP in this document represents Windows® XP Professional, Windows® XP Professional x64 Edition and Windows® XP Home Edition. Windows Server® 2003 in this document represents Windows Server® 2003 and Windows Server® 2003 x64 Edition. Windows - Brother International MFC-7360N | Network Users Manual - English - Page 3
-hoc mode 16 Using the Setup Wizard from the control panel 16 Using WPS or AOSS™ from the control panel menu to configure your machine for a wireless network (Push Button Configuration 16 Configuring your machine when the SSID is not broadcast 17 Using the Brother installer application on the CD - Brother International MFC-7360N | Network Users Manual - English - Page 4
to FTP (For MFC-7460DN, MFC-7860DN and MFC-7860DW 32 Fax to Server (For MFC-7460DN, MFC-7860DN and MFC-7860DW: available as a download) .....33 Time Zone ...35 Reset the network settings to the factory default 36 Printing the Network Configuration List 36 Printing the WLAN report (For HL-2280DW - Brother International MFC-7360N | Network Users Manual - English - Page 5
64 Sending an E-mail with user authentication 65 Secure Management using BRAdmin Professional 3 (Windows 66 Using BRAdmin Professional securely 66 9 Troubleshooting 67 Overview...67 Identifying your problem ...67 A Appendix A 74 Supported protocols and security features 74 B Index 75 iv - Brother International MFC-7360N | Network Users Manual - English - Page 6
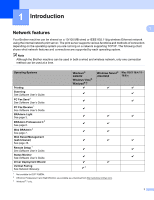
shows what network features and connections are supported by each operating system. Note Although the Brother machine can be used in both a wired and wireless network, only one connection method can be used at a time. Operating Systems Printing Scanning See Software User's Guide. PC Fax Send 1 See - Brother International MFC-7360N | Network Users Manual - English - Page 7
necessary machine settings by using the machine's control panel. For details, please see Internet fax (For MFC-7460DN, MFC-7860DN and MFC-7860DW: available as a download) on page 52. Security 1 Your Brother machine employs some of the latest network security and encryption protocols available. (See - Brother International MFC-7360N | Network Users Manual - English - Page 8
Light utility is designed for initial setup of Brother network connected devices. It also can search for Brother products in a TCP/IP environment, view the status and configure basic network settings, such as IP address. Installing BRAdmin Light 2 Windows® a Please make sure that your machine - Brother International MFC-7360N | Network Users Manual - English - Page 9
current BRAdmin Light window. The default node name of the print server in the machine is "BRNxxxxxxxxxxxx" for a wired network or "BRWxxxxxxxxxxxx" for a wireless network. ("xxxxxxxxxxxx" is your machine's MAC Address / Ethernet Address.) • The default password for Brother print servers is "access - Brother International MFC-7360N | Network Users Manual - English - Page 10
and MAC Address from the control panel. (See Chapter 5: Control panel setup.) d Choose STATIC from Boot Method. Enter the IP Address, Subnet Mask and Gateway (if needed) of your print server. Windows® Macintosh e Click OK. f With the correctly programmed IP address, you will see the Brother print - Brother International MFC-7360N | Network Users Manual - English - Page 11
to update device firmware from a Windows® computer on your LAN. BRAdmin Professional 3 can also log activity of Brother devices on your network and export the log data in an HTML, CSV, TXT or SQL format. For users who want to monitor locally connected machines, install the Print Auditor Client - Brother International MFC-7360N | Network Users Manual - English - Page 12
Professional 3 or Web BRAdmin 1.45 or greater. This allows the administrator to check items such as page counts, toner and drum status and the firmware version. In addition to reporting to Brother network management applications this utility can E-mail the usage and status information directly to - Brother International MFC-7360N | Network Users Manual - English - Page 13
3 Configuring your machine for a wireless network (For HL-2280DW, DCP-7070DW and MFC-7860DW) 3 Overview 3 To connect your machine to your wireless network, we recommend you to follow the steps in the Quick Setup 3 Guide using WPS or AOSS™ (Push Button Configuration). By using this method, you can - Brother International MFC-7360N | Network Users Manual - English - Page 14
™, a USB or network cable c Configure your machine for a wireless network. See page 16. See the Quick Setup See the Quick Setup Guide Guide See page 22 See page 20 Installing drivers and software (See the Quick Setup Guide) Wireless configuration and installing the printer driver have been - Brother International MFC-7360N | Network Users Manual - English - Page 15
Setup Wizard from the control panel (Recommended) Using the Brother installer application c Configure your machine for a wireless network. See page 16. See page 16 See page 22 Installing drivers and software (See the Quick Setup Guide) Wireless configuration and installing the printer driver - Brother International MFC-7360N | Network Users Manual - English - Page 16
the Brother wireless machine (your machine) is part of this network, it receives all print jobs directly from the computer sending the print data. 1 2 1 Wireless network machine (your machine) 2 Wireless capable computer Note We do not guarantee the wireless network connection with Windows Server - Brother International MFC-7360N | Network Users Manual - English - Page 17
-7070DW and MFC-7860DW) Confirm your wireless network setup method 3 There are four methods to configure your wireless network machine. Use Setup Wizard from the control panel (recommended), WPS/AOSS™ (Push Button Configuration) from the control panel menu, the Brother installer application on the - Brother International MFC-7360N | Network Users Manual - English - Page 18
be guided by the on-screen instructions until you are able to use your Brother wireless network machine. You must know your wireless network settings before you proceed with this installation. Configuration using Push Button Configuration 3 3 If your WLAN access point/router (A) supports either - Brother International MFC-7360N | Network Users Manual - English - Page 19
to configure your Brother machine for your wireless network. USB method 3 You can remotely configure the machine from a computer that is also on the network using a USB cable (A) 1. 3 A 1 You can configure the wireless settings of the machine using a USB cable temporarily connected to a wired - Brother International MFC-7360N | Network Users Manual - English - Page 20
-Fi Protected Setup to configure your machine for a wireless network (Infrastructure mode only) 3 If your WLAN access point/router (A) supports Wi-Fi Protected Setup, you can also configure using the PIN Method of Wi-Fi Protected Setup. Connection when the WLAN access point/router (A) doubles as - Brother International MFC-7360N | Network Users Manual - English - Page 21
your WLAN access point/router supports either Wi-Fi Protected Setup (PBC 1) or AOSS™, you can configure the machine easily without knowing your wireless network settings. Your Brother machine has the WPS/AOSS™ menu on the control panel. See the Quick Setup Guide for more information. 1 Push Button - Brother International MFC-7360N | Network Users Manual - English - Page 22
key - - Communication Mode Infrastructure Authentication method WPA2-PSK Encryption mode AES Network key 12345678 Note If your router uses WEP encryption, enter the key used as the first WEP key. Your Brother machine supports the use of the first WEP key only. b Press Menu. c Press a or - Brother International MFC-7360N | Network Users Manual - English - Page 23
SSID> h Enter the SSID name. (For information how to enter text, see the Quick Setup Guide.) Press OK. SSID: i Using a or b, choose Ad-hoc or Infrastructure when instructed. Press OK. Mode Select Infrastructure Do one of the following: If you chose Ad-hoc, go to step k. If you chose Infrastructure - Brother International MFC-7360N | Network Users Manual - English - Page 24
machine will print the WLAN Report. If the connection failed, check the error code on the printed report and refer to Troubleshooting in the Quick Setup Guide. Connected Printing (Windows®) You have completed the wireless network setup. If you would like to continue installing drivers and software - Brother International MFC-7360N | Network Users Manual - English - Page 25
for a wireless network 3 For installation, see Wireless configuration using the Brother installer application (For HL-2280DW, DCP-7070DW and MFC-7860DW) on page 22. Using the PIN Method of Wi-Fi Protected Setup 3 3 If your WLAN access point/router supports Wi-Fi Protected Setup (PIN Method - Brother International MFC-7360N | Network Users Manual - English - Page 26
. The machine will print the WLAN Report. If the connection failed, check the error code on the printed report and refer to Troubleshooting in the Quick Setup Guide. (Windows®) You have completed the wireless network setup. If you would like to continue installing drivers and software necessary for - Brother International MFC-7360N | Network Users Manual - English - Page 27
. • You can also setup your Brother machine using WPS or AOSS™ from the control panel which we recommend. You can find instructions in the supplied Quick Setup Guide. • If you have previously configured the wireless settings of the machine, you must reset the network LAN settings before you can - Brother International MFC-7360N | Network Users Manual - English - Page 28
Initial Installation. Note 4 • If the window does not appear, use Windows® Explorer to run the Start.exe program from the root folder of the Brother CD-ROM. • When the User Account Control screen appears, (Windows Vista®) click Allow. (Windows® 7) click Yes. 3 Click Wireless LAN Setup Wizard - Brother International MFC-7360N | Network Users Manual - English - Page 29
Wireless configuration using the Brother installer application (For HL-2280DW, DCP-7070DW and MFC-7860DW) 3 Click Connect to a network. 4 You can see the SSID of the wireless machine on the list. Choose SETUP and then click Connect. 5 (For Windows Vista® only) Click Connect Anyway and then Close. - Brother International MFC-7360N | Network Users Manual - English - Page 30
5 Control panel setup 5 Network menu 5 The Network menu selections of the control panel allow you to set up the Brother machine for your network configuration. (For more information on how to use the control panel, see the Basic User's Guide.) Press Menu, then press a or b to choose Network. - Brother International MFC-7360N | Network Users Manual - English - Page 31
by the WINS server on your network. Brother recommends the name "BRNxxxxxxxxxxxx" for a wired network or "BRWxxxxxxxxxxxx" for a wireless network. ("xxxxxxxxxxxx" is your machine's MAC Address / Ethernet Address.) WINS Config 5 This selection controls how the machine obtains the IP address - Brother International MFC-7360N | Network Users Manual - English - Page 32
.brother.com/. Note • If you set IPv6 to On, turn off the power switch and then turn it back on to enable this protocol. • After you choose IPv6 On, this setting will be applied to both the wired and wireless LAN interface. Ethernet (wired network only) 5 Ethernet link mode. Auto allows the print - Brother International MFC-7360N | Network Users Manual - English - Page 33
Control panel setup Status (For DCP-7065DN, MFC-7360N, MFC-7460DN and MFC-7860DN)/Wired Status (For HL-2280DW, DCP-7070DW and MFC-7860DW) 5 This field displays the current wired network status. Setup Wizard (wireless network only) 5 The Setup Wizard guides you through the wireless network - Brother International MFC-7360N | Network Users Manual - English - Page 34
Control panel setup MAC Address 5 The MAC address is a unique number assigned for the machine's network interface. You can check your machine's MAC address from the control panel. Set to Default (For HL-2280DW, DCP-7070DW and MFC-7860DW) 5 The Set to Default allows you to reset each wired or - Brother International MFC-7360N | Network Users Manual - English - Page 35
server account where the Internet print jobs are to be retrieved. Note To set for no password, enter a single space. 5 APOP You can enable or disable the APOP (Authenticated Post Office Protocol). Setup Mail RX 5 Auto Polling When set to On, the machine automatically checks the POP3 server for new - Brother International MFC-7360N | Network Users Manual - English - Page 36
Fax machines that support the "MDN" specification. Setup Mail TX 5 Sender Subject This field displays the subject that is attached to the Internet fax data being sent from the Brother machine to a computer (default is Internet Fax be sent and an error report will be printed. The document you are - Brother International MFC-7360N | Network Users Manual - English - Page 37
(For MFC-7460DN, MFC-7860DN and MFC-7860DW: available as a download) on page 52.) Scan to FTP (For MFC-7460DN, MFC-7860DN and MFC-7860DW) 5 You can choose the default color and file type for the Scan to FTP function. (For how to operate Scan to FTP, see Network Scanning in the Software User's Guide - Brother International MFC-7360N | Network Users Manual - English - Page 38
Control panel setup Fax to Server (For MFC-7460DN, MFC-7860DN and MFC-7860DW: available as a download) 5 The Fax to Server feature allows the machine to scan a document and send it over the network to a separate fax server. The document will then be sent from the server as fax data to the - Brother International MFC-7360N | Network Users Manual - English - Page 39
Control panel setup h Press a or b to choose Suffix. Press OK. i Enter the suffix using the dial pad. j Press OK. k Press Stop/Exit. Note You can enter the prefix and suffix address using up to a total of 40 characters. How to operate Fax to Server a Place the document in the ADF or on the scanner - Brother International MFC-7360N | Network Users Manual - English - Page 40
for your country by using the Time Zone setting in Windows®. a For Windows Vista® and Windows® 7: Click the button, Control Panel, Date and Time, and then Change time zone. For Windows® XP and Windows Server® 2003: Click the Start button, Control Panel, Date and Time, and then choose Time Zone - Brother International MFC-7360N | Network Users Manual - English - Page 41
Control panel setup Reset the network settings to the factory default 5 You can reset the print server back to its default factory settings (resetting all information such as the password and IP address information). Note • This function resets all wired and wireless network settings to the - Brother International MFC-7360N | Network Users Manual - English - Page 42
Control panel setup Printing the WLAN report (For HL-2280DW, DCP-7070DW and MFC-7860DW) 5 The WLAN Report prints your machine's wireless status report. If the wireless connection failed, check the error code on the printed report and refer to Troubleshooting in the Quick Setup Guide. a Press Menu - Brother International MFC-7360N | Network Users Manual - English - Page 43
Control panel setup Function table and default factory settings 5 DCP-7065DN, MFC-7360N, MFC-7460DN and MFC-7860DN 5 The factory settings are shown in Bold with an asterisk. Main menu Submenu 3.Network 1.TCP/IP (DCP-7065DN) 5.Network (MFC-7360N and MFC-7460DN) 6.Network (MFC-7860DN) Menu - Brother International MFC-7360N | Network Users Manual - English - Page 44
Control panel setup Main menu Submenu Menu selections Options 3.Network 2.Ethernet - Auto* (DCP-7065DN) 100B-FD 5.Network 100B-HD (MFC-7360N and 10B-FD MFC-7460DN) 10B-HD 6.Network 3.Status - Active 100B-FD (MFC-7860DN) Active 100B-HD (continued) Active 10B-FD Active 10B-HD 5 - Brother International MFC-7360N | Network Users Manual - English - Page 45
Control panel setup HL-2280DW, DCP-7070DW and MFC-7860DW 5 Main menu Submenu Menu selections Options 4.Network 1.Wired LAN 1.TCP/IP 1.Boot Method Auto* (HL-2280DW and DCP-7070DW) 6.Network (MFC-7860DW) Static RARP BOOTP DHCP (If you choose Auto, RARP, BOOTP or DHCP, you will be asked - Brother International MFC-7360N | Network Users Manual - English - Page 46
4.Network 1.Wired LAN 2.Ethernet - Auto* (HL-2280DW and DCP-7070DW) 6.Network (MFC-7860DW) (continued) (continued) 3.Wired Status - 100B-FD 100B-HD 10B-FD 10B-HD Active 100B-FD Active 100B-HD Active 10B-FD Active 10B-HD 5 Inactive 4.MAC Address - 5.Set to Default - Wired OFF - Reset - Brother International MFC-7360N | Network Users Manual - English - Page 47
Control panel setup Main menu 4.Network (HL-2280DW and DCP-7070DW) 6.Network (MFC-7860DW) (continued) Submenu 2.WLAN ( Setup Wizard On - Off 3.WPS/AOSS On - Off 4.WPS w/PIN Code On - Off 5.WLAN Status 1.Status Active(11b) Active(11g) Wired LAN Active WLAN OFF AOSS Active Connection - Brother International MFC-7360N | Network Users Manual - English - Page 48
Control panel setup Main menu Submenu Menu selections Options 4.Network 2.WLAN 6.MAC Address - - (HL-2280DW and DCP-7070DW) 6.Network (MFC-7860DW) (continued) (continued) 7.Set to Default - 8.WLAN Enable - 3.Scan To FTP - (For MFC-7860DW) Color 100 dpi* Color 200 dpi Reset Exit On Off - Brother International MFC-7360N | Network Users Manual - English - Page 49
Control panel setup MFC-7460DN, MFC-7860DN and MFC-7860DW (if you download IFAX ) 5 Main menu Submenu Menu selections Options 5.Network (MFC-7460DN) 6.Network (MFC-7860DN and MFC-7860DW) 3.E-mail/IFAX 1.Mail Address (For MFC-7860DW) 2.Setup Server 5.E-mail/IFAX (For MFC-7460DN and MFC-7860DN) - Brother International MFC-7360N | Network Users Manual - English - Page 50
* Secure PDF JPEG XPS (If you choose Gray option) PDF* B&W 200 dpi Secure PDF B&W 200x100 dpi JPEG XPS (If you choose B&W option) PDF* Secure PDF TIFF 6.Fax to Server - - (For MFC-7860DW) 8.Fax to Server (For MFC-7460DN and MFC-7860DN) On Off* 0.Network Reset - - Reset - - Exit 45 - Brother International MFC-7360N | Network Users Manual - English - Page 51
Setup, Address Book settings and Remote Fax Change network settings such as TCP/IP information Configure Secure Function Lock 2.0 (For MFC-7860DN and MFC-7860DW) Configure Scan to FTP (For MFC-7460DN, MFC-7860DN and MFC-7860DW) Software version information of the machine and print - Brother International MFC-7360N | Network Users Manual - English - Page 52
information 6 Web Based Management offers two levels of password access. Users are able to access to the General Setup, Fax Settings, Copy Settings and Printer Settings. The default user name for User is "user" (case sensitive) and the default password is "access". Administrators are able to access - Brother International MFC-7360N | Network Users Manual - English - Page 53
Professional 3 or Web Based Management. PC Print 1 Copy Page Limit 6 Fax TX Fax RX Scan Page Counter 1 If you register the PC user login names, you can restrict PC print without the user entering a password. For more detail, see Restricting PC print by PC user login name on - Brother International MFC-7360N | Network Users Manual - English - Page 54
have scan selected in the check box will be able to scan. To push scan from the control panel of the machine printer driver is selected. For more information about the printer driver, see the Software User's Guide. • The Secure Function Lock feature does not support the BR-Script driver for printing - Brother International MFC-7360N | Network Users Manual - English - Page 55
users do not need to enter a password to access the features made available through this setting. a Uncheck the check box for the function that you want machine is turned on. All Counter Reset 6 You can reset the page counter by clicking All Counter Reset. Last Counter Record The machine - Brother International MFC-7360N | Network Users Manual - English - Page 56
network or on the Internet. See Network Scanning in the Software User's Guide for more details on Scan to FTP. a Click Administrator Settings on the MFC (FTP server address) Username Password Store Directory File Name and network firewall configuration. By default this setting is On - Brother International MFC-7360N | Network Users Manual - English - Page 57
be able to support the MIME format. 7 4 1 4 2 4 3 3 1 Sender 2 Internet 3 Receiver 4 E-mail server Note • In order to use this function, please download the necessary software from the Brother Solutions Center. (http://solutions.brother.com/) • You can send/receive I-Fax documents in Letter - Brother International MFC-7360N | Network Users Manual - English - Page 58
Internet fax (For MFC-7460DN, MFC-7860DN and MFC-7860DW: available as a download) Forwarding received E-mail and fax messages You can forward received E-mail or standard fax messages to another E-mail address or fax machine. For more information see Forwarding received E-mail and fax messages on - Brother International MFC-7360N | Network Users Manual - English - Page 59
and MFC-7860DW: available as a download) How to Internet fax 7 Before using Internet fax you must configure your Brother machine to communicate with your network and mail server. You must ensure the following items are configured on your machine. You can configure these items from the control panel - Brother International MFC-7360N | Network Users Manual - English - Page 60
is approximately 1 Mbyte in size.) Receiving E-mail or Internet fax 7 Before receiving an Internet fax To receive an Internet fax, you should configure the following items from the control panel, Web Based Management or Remote Setup: Auto Polling (if needed) Poll Frequency (if needed) Header - Brother International MFC-7360N | Network Users Manual - English - Page 61
fax. This is notified in the subject field of the received mail message. Note If the computer to which you wish to send a document is not running Windows® 2000/XP, Windows Server® 2003/2008, Windows Vista® or Windows® 7 operating system, please inform the computer's owner that they must install - Brother International MFC-7360N | Network Users Manual - English - Page 62
control panel of the machine. The steps for configuring fax forward can be found in the Advanced User's Guide supplied with your machine. Please see the Advanced User's Guide supplied with the machine to check that this feature is supported. Relay broadcasting 7 This function allows the Brother - Brother International MFC-7360N | Network Users Manual - English - Page 63
Internet fax (For MFC-7460DN, MFC-7860DN and MFC-7860DW: available as a download) Relay broadcast from a machine 7 [email protected] [email protected] 123456789 1 [email protected](fax#123456789) 1 Internet In this example, your machine has an E-mail address of [email protected], you wish to - Brother International MFC-7360N | Network Users Manual - English - Page 64
MFC-7460DN, MFC-7860DN and MFC-7860DW: available as a download) Sending to multiple phone numbers: 7 If you want to have the document relayed to more than one standard fax machine the address can be entered using the following method: a Enter the phone number of the first Fax machine UKFAX@brother - Brother International MFC-7360N | Network Users Manual - English - Page 65
to transmit a default report back to the sending station after successfully receiving and processing an Internet Fax or E-mail. To use this feature you must set the Notification option within the Setup Mail RX and Setup Mail TX options. You can configure these settings from the control panel of the - Brother International MFC-7360N | Network Users Manual - English - Page 66
Internet fax (For MFC-7460DN, MFC-7860DN and MFC-7860DW: available as a download) Error mail 7 If there is a mail delivery error while sending an Internet fax, the mail server will send an error message back to the machine and the error message will be printed. If there is an error while receiving - Brother International MFC-7360N | Network Users Manual - English - Page 67
fax (For MFC-7460DN, MFC-7860DN and MFC-7860DW: available as a download SMTP/POP3 mail server support. (See Sending an to enter a 4 digit password using numbers 0-9 before choosing One Touch key or Speed Dial number. Press Start. The machine starts the scanning process. Note You can only choose a One - Brother International MFC-7360N | Network Users Manual - English - Page 68
Internet fax (For MFC-7460DN, MFC-7860DN and MFC-7860DW: available as a download) Using One Touch or Speed Dial number 7 You can also scan a document directly to an address you registered in a One Touch or Speed Dial number. When you scan the document, the settings you registered with the One - Brother International MFC-7360N | Network Users Manual - English - Page 69
3 (Windows®) (See Secure Management using BRAdmin Professional 3 (Windows®) on page printer's IP address" is the printer's IP address). For example: http://192.168.1.2/ c Click Network Configuration. d Enter a user name and a password. The default User Name is "admin" and the default Password - Brother International MFC-7360N | Network Users Manual - English - Page 70
Internet fax sending. E-mail server settings You need to match the settings of SMTP authentication method with the method used by your E-mail server. 8 Contact your network administrator or your ISP (Internet Service Provider) about the E-mail server configuration. You will also need to check SMTP - Brother International MFC-7360N | Network Users Manual - English - Page 71
Secure Management using BRAdmin Professional 3 (Windows®) 8 Using BRAdmin Professional securely 8 We strongly recommend to use the latest version of the BRAdmin Professional 3 utility or Web BRAdmin that are available as a download from http://solutions.brother.com/. If you use an older - Brother International MFC-7360N | Network Users Manual - English - Page 72
has been removed from the machine. The toner cartridges and drum unit are installed properly. The front and back covers are fully closed. Paper is inserted properly in the paper tray. (For wired networks) A network cable is securely connected to the Brother machine and the router or hub. 9 Go - Brother International MFC-7360N | Network Users Manual - English - Page 73
see SSID, Network Key and channels in the Safety and Legal. Are you using MAC address wireless filtering? Confirm the MAC address of the Brother machine is allowed in the filter. You can find the MAC address from Brother machine's control panel. (See Function table and default factory settings on - Brother International MFC-7360N | Network Users Manual - English - Page 74
Mask, ask the network administrator or visit the Brother Solutions Center at http://solutions.brother.com/. (Windows®) Confirm the IP address and the Subnet Mask using the Network Connection Repair Tool. Use the Network Connection Repair Tool to fix the Brother machine's network settings. It - Brother International MFC-7360N | Network Users Manual - English - Page 75
, Brother, BrotherNetTool.exe to run the program. Note If the User Account Control screen appears, (Windows Vista®) click Continue. (Windows® 7) click Yes. 3 Follow the on screen instructions. 4 Check the diagnosis by printing the Network Configuration List. Note 9 The Network Connection - Brother International MFC-7360N | Network Users Manual - English - Page 76
HL-2280DW, 9 DCP-7070DW and MFC-7860DW) on page 37.) If there is an error code on the printed WLAN report, see Troubleshooting in the Quick Setup Guide. See The Brother machine is not found on the network during the MFL-Pro Suite installation. on page 68. I have checked and tried all of above - Brother International MFC-7360N | Network Users Manual - English - Page 77
network? wireless Print the WLAN report to confirm the state of the wireless connection. (For how to print, see Printing the WLAN report (For HL-2280DW, DCP-7070DW and MFC-7860DW) on page 37.) If there is an error code on the printed WLAN report see Troubleshooting in the Quick Setup Guide - Brother International MFC-7360N | Network Users Manual - English - Page 78
Troubleshooting I want to check my network devices are working properly. (continued) Question I have checked and tried all of the above, however, I'm still having problems. Is there anything else I can do? Interface wired/ wireless Solution See the instructions supplied with your WLAN access - Brother International MFC-7360N | Network Users Manual - English - Page 79
Supported protocols and security features A Interface Network (common) Ethernet Wireless 1 Protocol (IPv4) Protocol (IPv6) Network Security Wireless Network ICMP, LLTD responder, Web Services (Print), NDP, RA, DNS v2c, ICMPv6, LLTD responder, Web Services (Print), APOP, POP before SMTP, SMTP - Brother International MFC-7360N | Network Users Manual - English - Page 80
66 Brother installer application 12, 13 Brother Solutions Center 4, 6 BRPrint Auditor 7 C Control Panel 3 D DNS server 27 Driver Deployment Wizard 1 E Ethernet 27 F Factory default 36 G Gateway 26 H Hyper Text Transfer Protocol 6 I Infrastructure mode 9, 11 IP address 26 IPv6 27 M MAC
-
 1
1 -
 2
2 -
 3
3 -
 4
4 -
 5
5 -
 6
6 -
 7
7 -
8
-
9
-
10
-
11
-
12
-
13
-
14
-
15
-
16
-
17
-
18
-
19
-
20
-
21
-
22
-
23
-
24
-
25
-
26
-
27
-
28
-
29
-
30
-
31
-
32
-
33
-
34
-
35
-
36
-
37
-
38
-
39
-
40
-
41
-
42
-
43
-
44
-
45
-
46
-
47
-
48
-
49
-
50
-
51
-
52
-
53
-
54
-
55
-
56
-
57
-
58
-
59
-
60
-
61
-
62
-
63
-
64
-
65
-
66
-
67
-
68
-
69
-
70
-
71
-
72
-
73
-
74
-
75
-
76
-
77
-
78
-
79
-
80
 |
 |
NETWORK
USER’S GUIDE
Multi-Protocol On-board Ethernet Multi-function Print Server and
Wireless Ethernet Multi-function Print Server
This Network User’s Guide provides useful information of wired
and wireless network settings, security settings and Internet fax
settings using your Brother machine. You can also find supported
protocol information and detailed troubleshooting tips.
To find basic information about network and advanced network
features of your Brother machine, see the
Network Glossary
.
To download the latest manual, please visit the Brother Solutions
Center at (http://solutions.brother.com/)
. You can also download
the latest drivers and utilities for your machine, read FAQs and
troubleshooting tips or learn about special printing solutions from
the Brother Solutions Center.
Version A
ENG